![]()
Android notifications can be annoying at times, but they don't have to be. Habilitar el modo “Do not bother” es una forma de silenciar notificaciones molestas cuando no las necesita. Next, We tell you how to configure it on your Google Pixel.
Most Android devices include some kind of Do Not Disturb setting. There is a lot you can do with these settings, and taking the time to customize them can greatly enhance your smartphone experience.
RELATED: What are Android notification channels?
How to customize Do Not Disturb
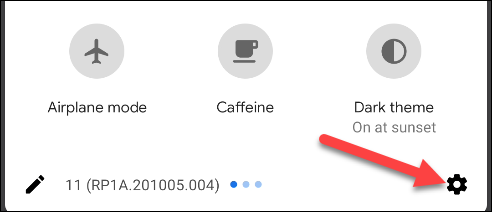
Options “Do not bother” se encuentran en la configuración de “Sound”. First, Swipe down from the top of the screen twice then tap the gear icon to open the Settings menu.
Go to Sound (o Sound and vibration)> Do not bother.

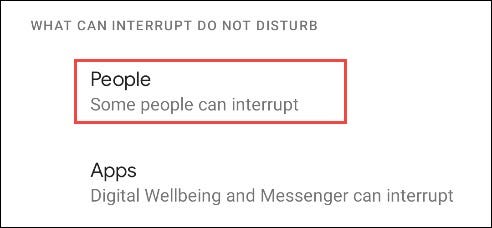
We will start in the upper section. Aquí es donde puede decidir qué personas y aplicaciones pueden atravesar el modo “Do not bother”. Touch “Persons” to start.
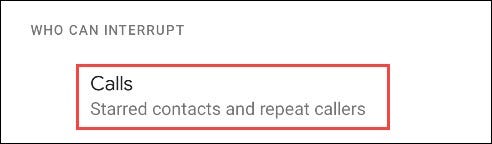
Touch “Why Android users need the app” para elegir qué personas podrán hacer sonar su teléfono mientras esté en el modo “Do not bother”.
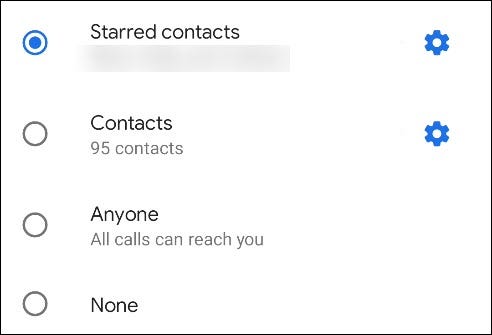
Choose one of the following options from the list.
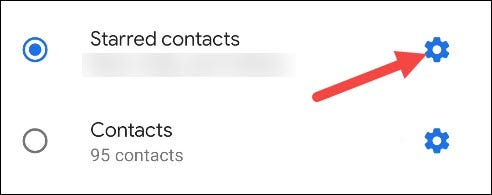
- Featured Contacts: Anyone you've saved as a featured contact.
- Contacts (edit): Anyone saved in your contacts.
- Somebody: Anyone who calls your phone.
- None: All calls will be muted during do not disturb mode.
Si eliges “Featured Contacts”, you can tap the gear icon to add or remove people.
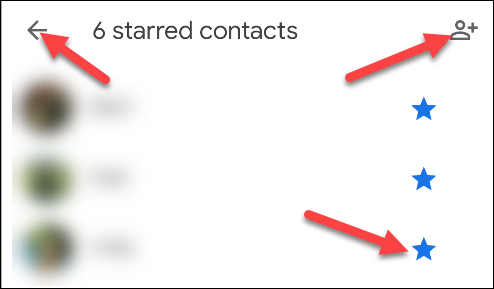
Select the icon in the upper right corner to add starred contacts, or tap the star icon to remove a featured contact. Tap the back arrow when done.
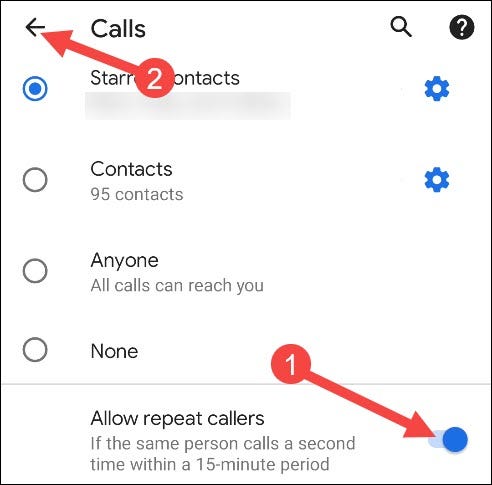
Next, active el interruptor de “Permitir llamadas repetidas” si desea que cualquier persona pueda comunicarse cuando llame por segunda vez en 15 minutes. Tap the back arrow when done.
Now, we will do the same with text messages. Touch “Posts”.

Verá las mismas opciones que estaban disponibles en la sección “Why Android users need the app”.
Si eliges “Featured Contacts”, you can re-customize your featured contacts by tapping the gear icon. Tap the back arrow when done.
Lo último que debe configurar en la sección Personas es “Conversations”. From Android 11, can highlight specific conversations in messaging apps. In the context of do not disturb mode, maybe you don't want to be notified if a friend calls you on Facebook Messenger, but you do want to know if he sends you an urgent SMS.
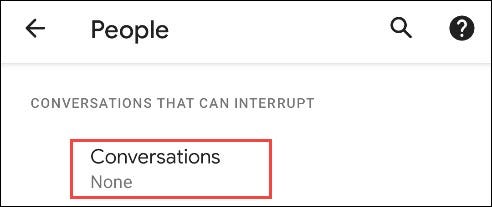
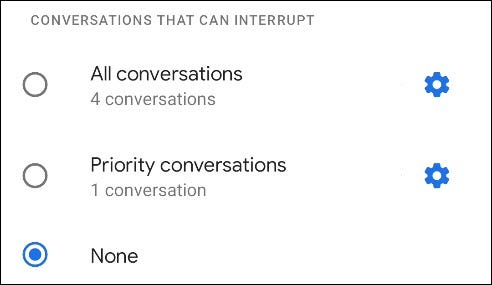
Las opciones en “Conversations” son las siguientes. You can touch the gear icon next to options to adjust which conversations are included.
- All conversations: Any conversations you have moved to the Conversations section of notifications.
- Priority conversations: Conversaciones que ha marcado como “Prioritarias”.
- None: Ignore the conversations.
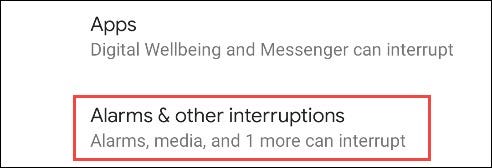
Now that we have configured Calls and Messages, we can customize what other notifications are allowed during do not disturb mode. Please select “Alarmas y otras interrupciones”.
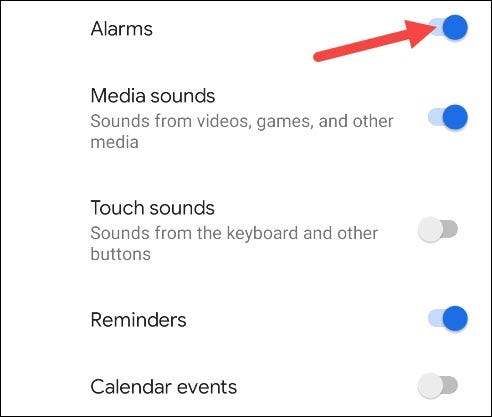
You will see a list of notification types with switches next to them. Select the ones you would like to see during do not disturb mode.
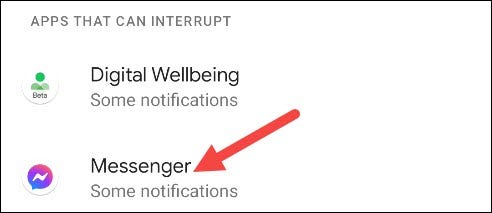
La última sección a cubrir es “Applications”. This shows which apps will be able to alert you during Do Not Disturb mode.

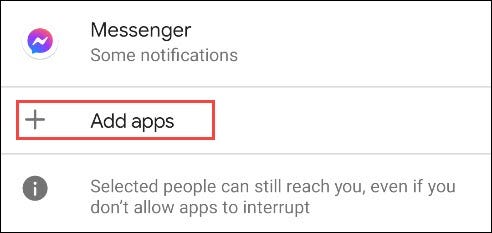
The “Aplicaciones que pueden interrumpir” se mostrarán en la parte superior. Tenga en cuenta que pueden decir “Algunas notificaciones”. You can select an app to adjust exactly which notifications can interrupt.
To add more apps to this list, Touch “Add apps”.
The page will expand with a full list of apps on your device. Select the application you want to add.
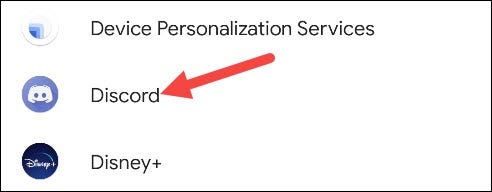
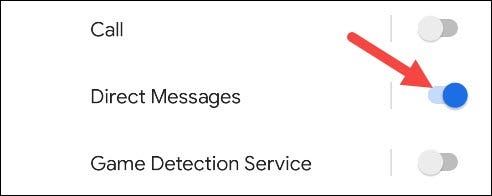
You will be taken to a page with all the different types of notifications that can come from the application. Flip the switch for anyone you would like to allow during Do Not Disturb mode.
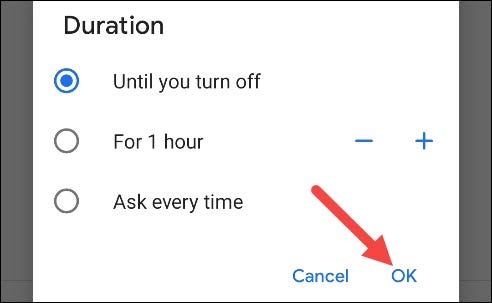
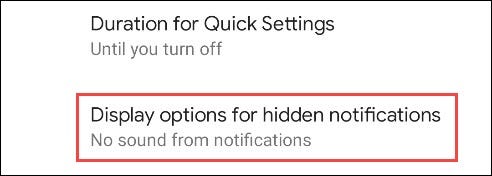
Once you have finished adding apps, vuelva a la configuración principal de “Do not bother”. The next thing we will do is choose how long the Do Not Disturb mode will run from the Quick Settings button.

Puede optar por mantenerlo en “Hasta que se apague”, establecer un período de tiempo personalizado o “Always ask”. Touch “To accept” When it's over.
Next, select “Opciones de visualización para notificaciones ocultas”. This will determine the look and sound of notifications that are blocked during Do Not Disturb mode..
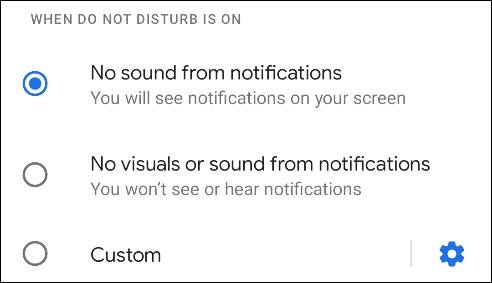
From now on, there are three options:
- No notification sound: Notifications will continue to appear, but they won't make a sound.
- No images or sound from notifications: You will not see or hear notifications.
- Personalized: Select this option to make very specific decisions about how notifications appear.
If you choose “Personalized”, tap the gear icon to bring up the options. You can select several different variables to determine exactly how notifications will appear in different situations.
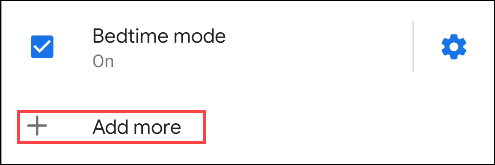
Finally, we can set a schedule for do not disturb mode. Touch “Schedules”.

There will be a few different preset times you can use. Si ha configurado previamente el “Bedtime mode” on your phone, you will see that it is enabled as one of the schedules.
RELATED: How to chill at night with Bedtime mode for Android
To create your own custom schedule, Touch “Agregar más” on the bottom.
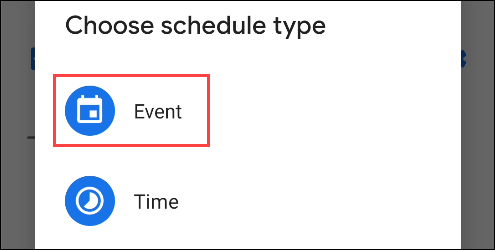
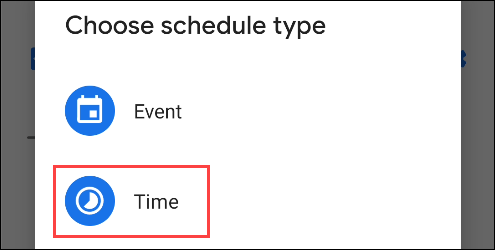
You will first be asked to choose a schedule type. “Event” ejecutará No molestar en función de los eventos del calendario. “Weather” ejecutará No molestar en momentos seleccionados.
Event-based hours
Please select “Event” como tipo de programación.
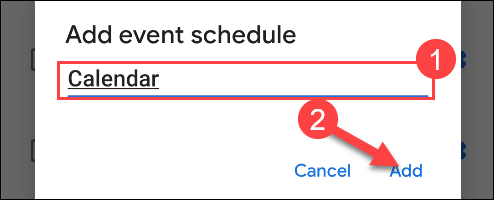
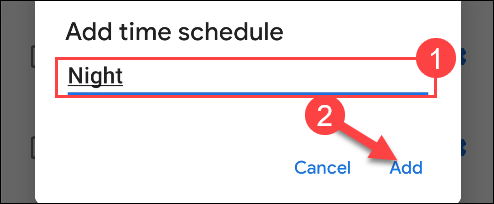
Enter a name for the schedule. Later, press “Add”.
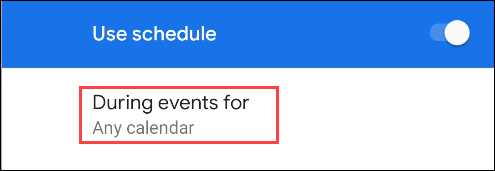
Next, Touch “Durante los eventos para” para elegir qué Calendario de Google desea utilizar.
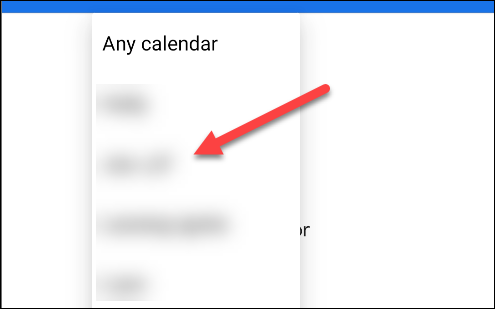
Elija uno de los calendarios del menú desplegable o “Cualquier calendario”.
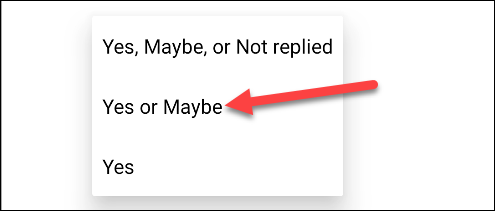
Next, Touch “Dónde está la respuesta” para especificar los eventos a los que ha respondido. Select one of the options from the drop-down menu.
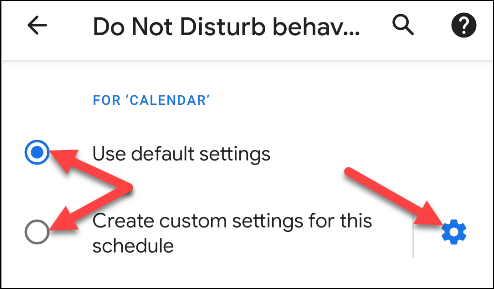
Finally, touches “No molestar el comportamiento”.
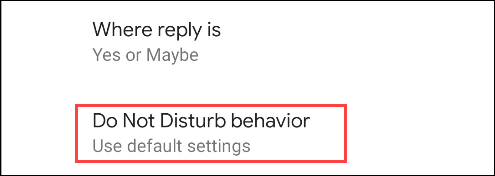
Please select “Usar configuración predeterminada” para usar la configuración de No molestar que configuramos previamente. If you want to go through that process for this specific time, select “Crear configuración personalizada para este horario” y toque el icono de engranaje.
That is all! The schedule is done.
Time-based schedules
Please select “Hour” como tipo de programa.
Enter a name for the schedule. Later, press “Add”.
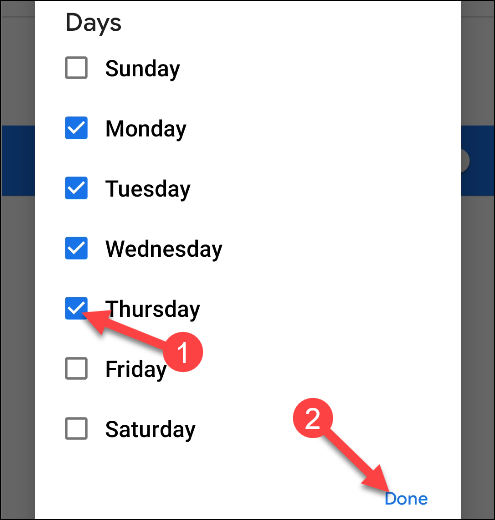
Now tap “Days” y seleccione los días de la semana que desea incluir en el programa. Touch “Ready” When it's over.
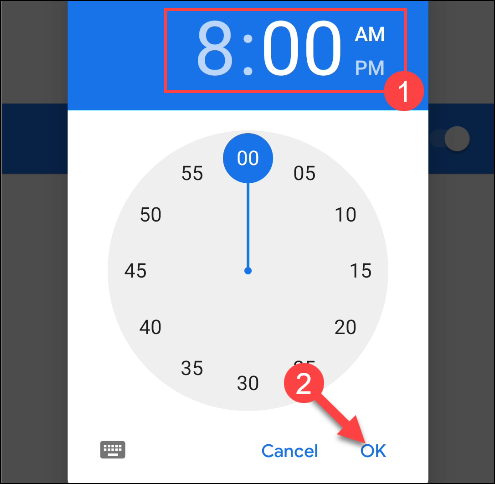
Please select “Start time” e ingrese una hora para que comience el programa. Touch “To accept” When it's over.
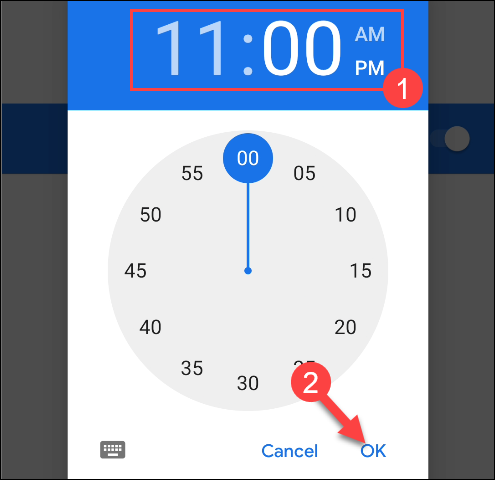
Repita el mismo proceso para “Ending time”.
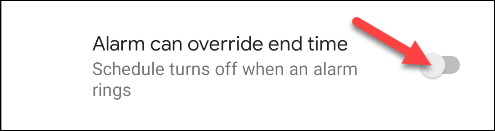
Mueva el interruptor de “La alarma puede anular la hora de finalización” para permitir que finalice el modo No molestar si una alarma está configurada para que suene antes de la hora de finalización elegida.
Finally, touches “No molestar el comportamiento”.

Please select “Usar configuración predeterminada” para usar la configuración de No molestar que configuramos previamente. If you want to go through that process for this specific time, select “Crear configuración personalizada para este horario” y toque el icono de engranaje.
That is all! The schedule is done.
RELATED: Cómo eliminar aplicaciones de la sección “Conversations” in Android
How to activate Do not disturb at any time
In the previous section, we configure our behavior of Do not disturb and create some schedules. If you want to activate Do Not Disturb at any time regardless of hours, you can also do it.
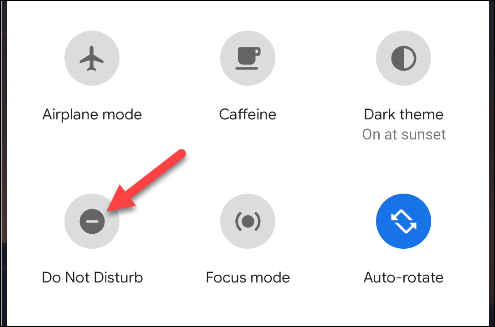
The easiest way to do this is from the Quick Settings switches. Desliza el dedo hacia abajo desde la parte superior de la pantalla dos veces y toca “Do not bother”. (You may have to swipe right to see the switch). La acción de este interruptor está determinada por la selección de “Duración predeterminada” que hicimos anteriormente.
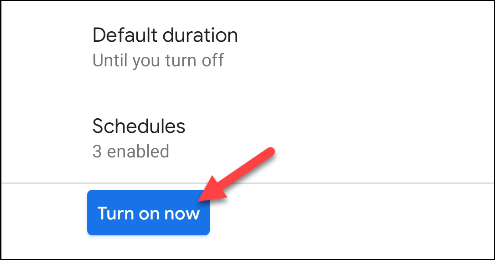
Alternatively, you can go to Settings> Sound> No molestar y tocar el botón “Activate now”.
RELATED: How to prevent Android notifications from appearing on your screen
setTimeout(function(){
!function(f,b,e,v,n,t,s)
{if(f.fbq)return;n=f.fbq=function(){n.callMethod?
n.callMethod.apply(n,arguments):n.queue.push(arguments)};
if(!f._fbq)f._fbq = n;n.push=n;n.loaded=!0;n.version=’2.0′;
n.queue=[];t=b.createElement(e);t.async=!0;
t.src=v;s=b.getElementsByTagName(e)[0];
s.parentNode.insertBefore(t,s) } (window, document,’script’,
‘https://connect.facebook.net/en_US/fbevents.js’);
fbq(‘init’, ‘335401813750447’);
fbq(‘track’, ‘PageView’);
},3000);


