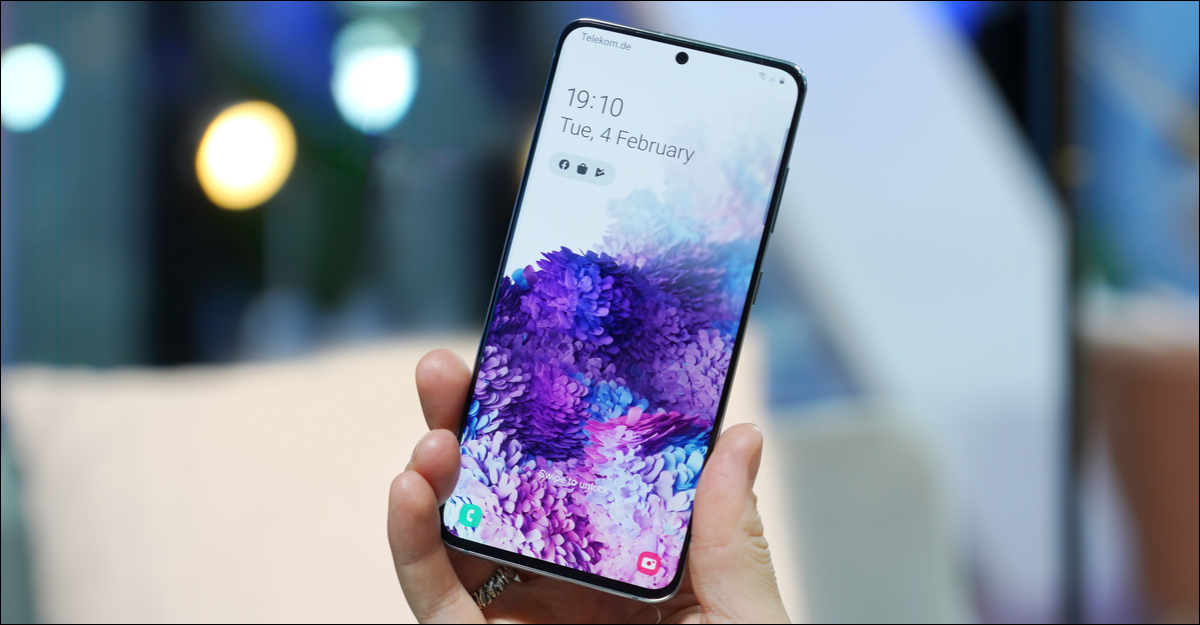
There's no reason to let annoying Android notifications put you in harm's way. set mode “Do not bother” y silencie automáticamente las notificaciones molestas cuando no las necesite. Next, We tell you how to do it on your Samsung Galaxy.
El modo “Do not bother” es algo que disponen todos los dispositivos Android, but it can be overwhelming to set it up. The good news is that you only need to set it up once. Thereafter, it will simply do all the work for you. Let's get started.
RELATED: How to set up Do Not Disturb on Google Pixel phones
How to customize Do Not Disturb
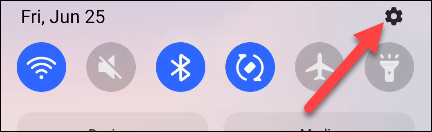
First, deslícese hacia abajo desde la parte de arriba de la pantalla y toque el ícono de ajustes para abrir el menú Configuración.
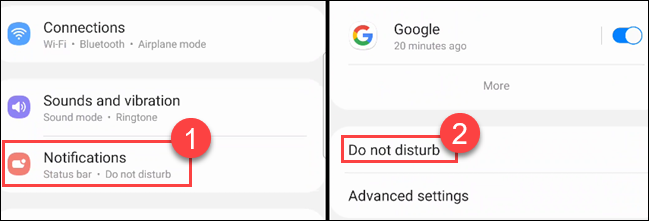
Vaya a Notificaciones> No molestar.
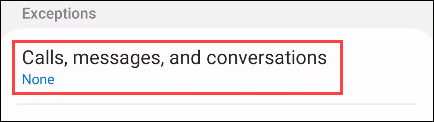
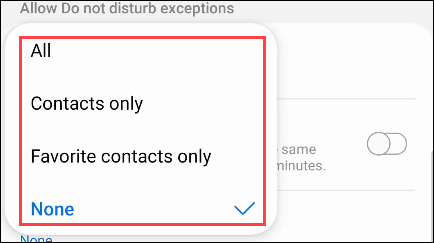
Touch “Why Android users need the app” y posteriormente elija una de las siguientes opciones de la lista. This is the person who will be able to ring your phone during DND.
- Only favorite contacts: Anyone you have saved as a favorite contact.
- Only contacts: Anyone saved in your contacts.
- Everybody: Anyone who calls your phone.
- None: All calls will be muted throughout Do Not Disturb mode.
Note: Favorite contacts can be set in the Contacts app of your Galaxy phone.
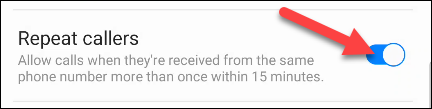
Next, active el interruptor de “Llamadas repetidas” si desea que cualquier persona pueda comunicarse cuando llame por segunda vez en 15 minutes. Tap the back arrow when done.
Now, we will do the same with text messages. Touch “Posts” y obtendrá las mismas opciones que estaban disponibles en la sección “Why Android users need the app”.
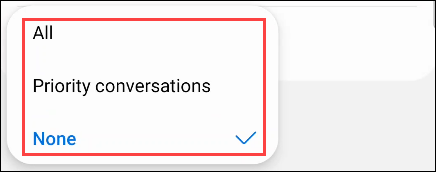
Lo último que debe configurar en la sección Personas es “Conversations”. From Android 11, can highlight specific conversations in messaging apps. In the context of do not disturb mode, maybe you don't want to be notified if a friend calls you on Facebook Messenger, but you are interested in knowing if he sends you an urgent SMS.
Las alternativas en “Conversations” son las siguientes. You can tap the gear icon next to the alternatives to adjust which conversations are included.
- All conversations: Any conversations you have moved to the Conversations section of notifications.
- Priority conversations: Conversaciones que ha marcado como “Prioritarias”.
- None: Ignore the conversations.
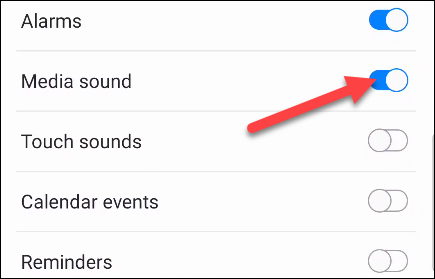
Now that we have configured Calls and Messages, we can customize what other notifications are allowed throughout do not disturb mode. Vuelve a la pantalla anterior y selecciona “Alarmas y sonidos”.

You will see a list of notification types with switches next to them. Select the ones you would like to see throughout Do Not Disturb mode.
Back on the previous screen, the last section to cover is “Applications”. This shows which apps will be able to alert you throughout Do Not Disturb mode.

Touch “Add apps” y seleccione las aplicaciones de la lista que le gustaría tener permiso para notificarle a lo largo del modo No molestar.
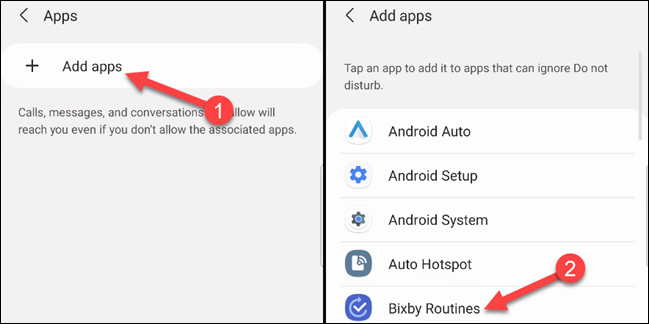
When you select an application, you will be taken to a page with all the different types of notifications that can come from it. Flip the switch for anyone you would like to allow throughout Do Not Disturb mode.
Next, select “Esconder notificaciones”. This will determine the look and sound of notifications that are blocked throughout Do Not Disturb mode..
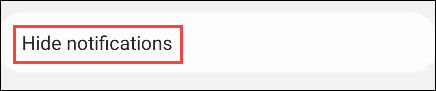
From here, you will have a number of alternatives to control the behavior of notifications during Do not disturb. Activate everything you want.

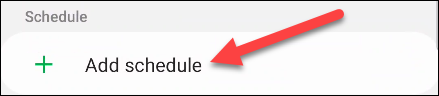
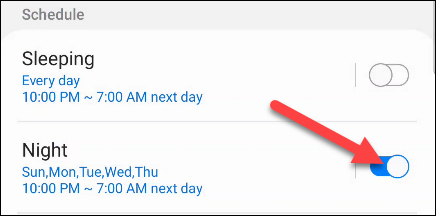
Finally, we can set a schedule for do not disturb mode. In the section “Programming”, select “Add schedule”.
First, Give the Program a name at the top and choose the days you want it to run.
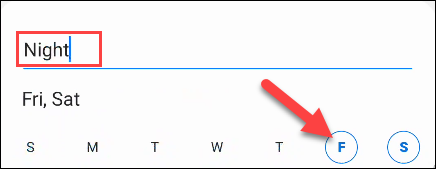
Next, elija una “Start time” and “Ending time”.
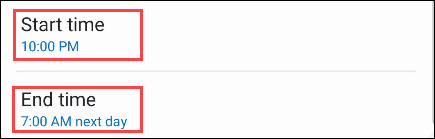
Ahora puede tocar “Keep” to end.

Your schedules will appear on the Do Not Disturb settings screen and you can turn them on or off as needed.
RELATED: How to delete apps from the section “Conversations” in Android
How to activate Do not disturb at any time
In the previous section, we configure our behavior of Do not disturb and create some schedules. If you want to activate Do Not Disturb at any time regardless of schedules, you can also do it.
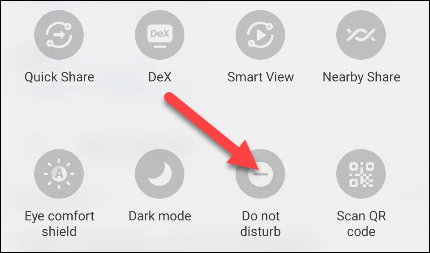
The easiest way to do this is from the Quick Settings switches. Desliza el dedo hacia abajo desde la parte de arriba de la pantalla dos veces y busca el botón “Do not bother”. You may need to swipe right to see the switch.
Alternatively, puede ir a Configuración> Notificaciones> No molestar y activar “Do not bother”. You also have the option to select the duration.
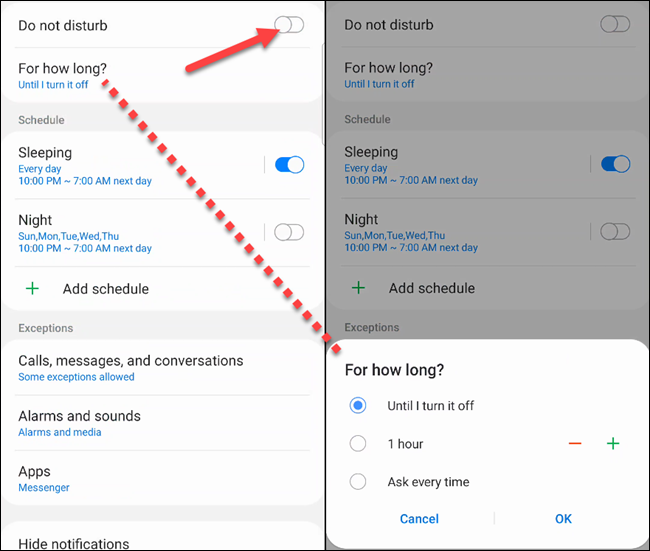 Notificaciones> No molestar y activa “Do not bother”.’ width=”650″ height=”551″ onload=”pagespeed.lazyLoadImages.loadIfVisibleAndMaybeBeacon(this);” onerror=”this.onerror=null;pagespeed.lazyLoadImages.loadIfVisibleAndMaybeBeacon(this);”>
That's all about it. With Do Not Disturb, you don't have to do as much notification management on your own. Set everything up once and let automatic schedules take care of everything. Esta es solo una forma de limpiar las notificaciones de Android.
RELATED: How to prevent Android notifications from appearing on your screen


