
If you have been considering giving your phone a new life with a custom ROM, LineageOS is one of the most popular currently available. Here is everything you need to know about how to update this ROM on your phone.
Zero step: make sure your device (and computer) be ready to go
Before you get too jealous and start throwing things on a command line, you will first need to make sure you have everything you need to get started, included if your phone is ready to accept a ROM.
Then, the first is the first: Is your phone compatible? You will need to make sure there is a Lineage build specifically designed for your phone. Just go to Lineage Downloads Page, select the manufacturer of your phone and then search for your model. If there, you're lucky: Lineage is compatible with your phone.
Importantly, it may take a bit of research if there are multiple variants of your phone., as there are with most Samsung Galaxy models. Then, you'll want to make sure the phone codename and processor information matches your phone. You can find this information on the Lineage download page for your phone..
Once you have confirmed that Lineage does indeed have a build for your phone, you'll need to make sure your computer has everything you need to get you where you need to go: ADB y Fastboot. We have a great guide to get started with ADB, so it is definitely recommended to read before you start.
RELATED: How to install and use ADB, the android debug bridge utility
With all that out of the way, there is one last thing you will need to do before you can flash Lineage on your phone: an unlocked bootloader or a compatible workaround. This is probably the most difficult part of the whole procedure. (In other words, depending on the particular phone model), since it is very difficult to circumvent the security measures implemented in many phones.
If your phone supports bootloader unlocking, that will be the easiest way to do it, and this guide works under the assumption that your phone supports this function. If that is not the case, like most Samsung devices, a little more research will be needed on your particular model.
With the preparations made, you are ready to start flashing.
Step one: collect your downloads and enable developer mode
You will need some tools, and you better go ahead and collect them all now. Here is the list:
- TWRP: Custom recovery. This is the most popular option out there right now and it's enabled for a ton of different phones.. You will need this to show everything.
- Lineage operating system: The actual operating system.
- GApps (Optional): If you want all the Googleyness that comes with Android, must have a GApps package (Google Apps) ready to launch. We will talk more about that below..
- SU file (Optional): If you want root access, you will need to update this.
It is useful to download all these files in the same location, preferably the one with your ADB and Fastboot files if you didn't take the time to configure them in your system's PATH.
Here's a brief look at what each thing does, why you need it and how to select the right one for your phone.
Download Team Win Recovery Project (TWRP)
TWRP is a custom recovery that is simply needed before you can update Lineage (or any other custom package).
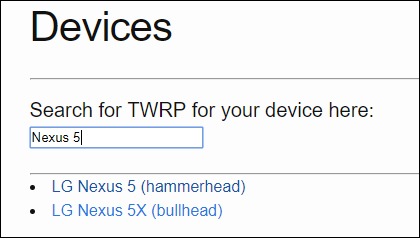
To grab it, go to TWRP Home Pageand then click on the link “Devices”.

Write the model name of your phone. Make sure to pay attention here: there could be devices with similar names and you want to make sure you get the correct one. Case in question: Nexus y Nexus 5x. Two different phones, two different recoveries.
Once you have selected your phone, desplácese hacia abajo en la página hasta la sección “Links de descarga” y después haga clic en el link respectivo a su región.
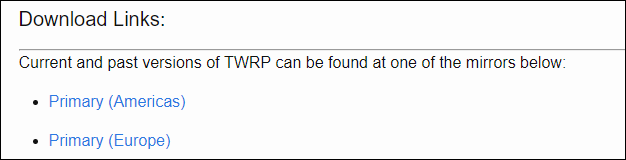
From there, click the link for the latest version.
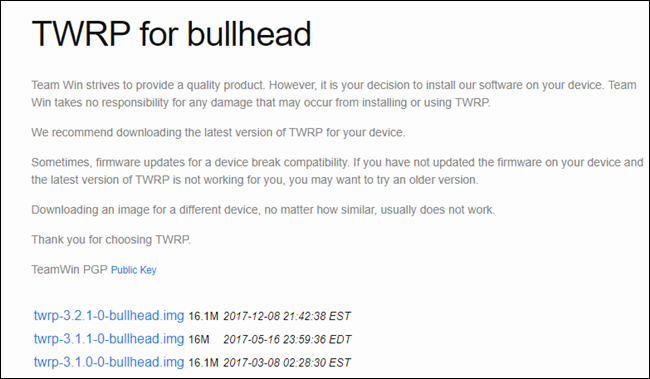
This opens a new page, donde debe hacer un clic en el botón “Descargar twrp-xxximg” para comenzar a descargar el archivo.
Download your Lineage build
Since you already looked for your phone in the Lineage web portal, you already did half the work here; just take the latest download and you're good to go.

Please note which version of Lineage it is, because you will need that information if you plan to update Google Apps
Download Google Apps (optional)
If you want to set up your phone with your Google account, have access to the Play Store and use all the other features that make Android what it is and what you're used to, you will need Google Apps.
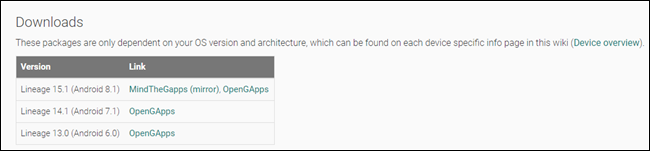
Head to the GApps download page and choose the version of Lineage in which you will install it; it's probably 15.1 O 14.1. Click on the OpenGApps link for the respective version.
From there, you will find a wide variety of alternatives: platform, Android and variant. The most important thing to get here is the Platform. The GApps version you flash has to match your phone's processor!! If you are not sure which version your phone is running, you will have to check your specifications. GSMArena it's a good place to start.
Once you have confirmed the platform version, the other two are simple. Android version must be preselected appropriately, therefore confirm it. And for the variant, this is just the number of things that are included in the package. Nano is selected by default, but we suggest to use Micro or bigger; choose Full if you want the most stock-equivalent experience.
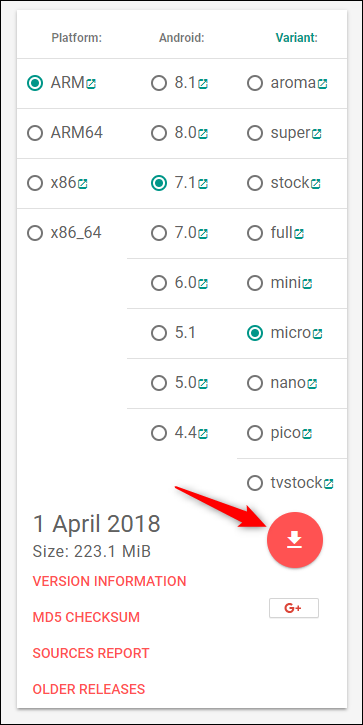
Once everything is selected, tap the download button and save the file.
Download SU (optional)
Finally, if you want root access after flashing Lineage, you will need to grab the appropriate SU file from here. Choose the version that matches the architecture of your phone (which you probably discovered when downloading GApps) and the Lineage version.
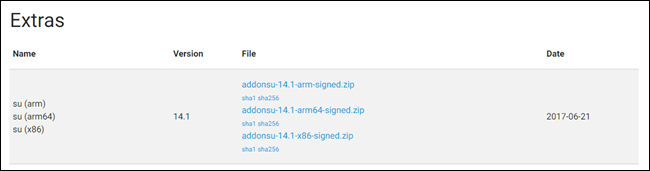
Note: There is no SU file for Lineage yet 15.1.
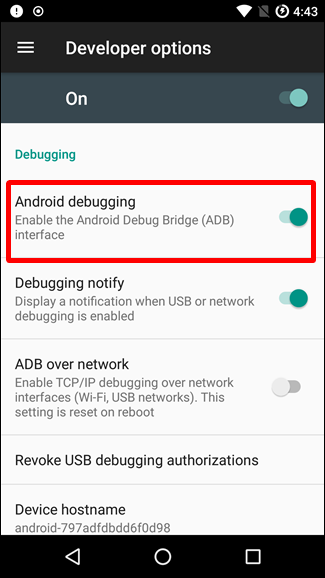
Enable developer mode and USB debugging
With all your downloads saved and ready to use, you will need to enable developer mode and USB debugging on your phone.
We have a complete guide on how to do this, but here's the quick and dirty: go to the Regarding section of your phone, find the Build number and then tap the number seven times. This enables the developer mode menu.
RELATED: How to enter developer alternatives and enable USB debugging on Android
Vaya a este nuevo menú y después habilite la opción “Depuración de Android”. Please note that if you are using a newer Android device, además tendrá que habilitar la función “Desbloqueo OEM”.
Step two: unlock bootloader
Now that you have everything downloaded, enabled and, otherwise, ready to go, it's time to get down let's get to it.
The first thing you will need to do is unlock your phone's bootloader. We strongly suggest to backup your phone before doing this.
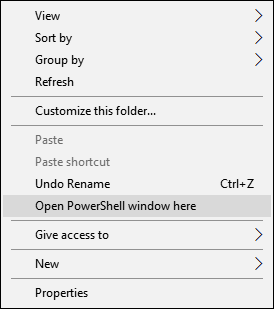
When you are ready, connect your phone to your computer via USB and then navigate to the folder where your ADB and Fastboot files are stored. You will need to open a command prompt or PowerShell window in this folder. La forma más sencilla de hacerlo es presionar la tecla Mayús y hacer un clic con el botón derecho en la carpeta y seleccionar el comando “Open PowerShell window here”.
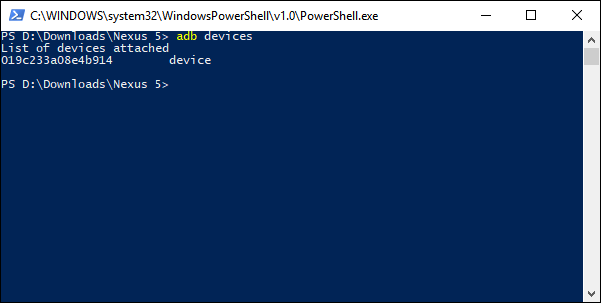
Once it opens, you need to make sure your device is connected properly. Writes adb devices at the prompt and then press Enter. You should return your device in the list of connected devices.
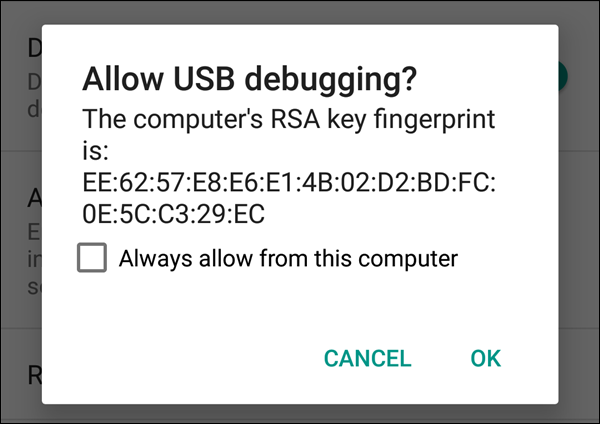
If you've never used ADB before, take a look at your phone. You should have a dialog asking for permission to grant access to ADB. Check the box “Always allow from this computer” has access to a new action “To accept”.
Si adb retrocedió como “no autorizado” la primera vez, please try again now that you have authorized access on your phone. Debería mostrar “device”, this means it is connected.
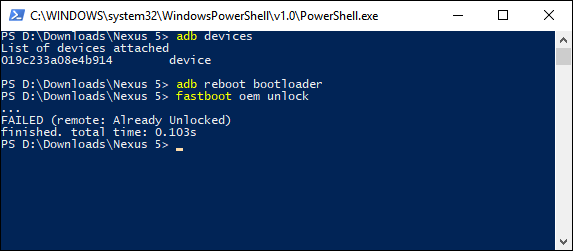
Now, type the following command and hit Enter:
adb reboot bootloaderThe phone should reboot into the bootloader. Once you have finished rebooting, type the following command and hit Enter to unlock the bootloader:
fastboot oem unlockNote: This will factory reset your phone, So make sure you have made a backup first!!
You will have to confirm on your phone using the volume and power buttons. Use el botón para subir el volumen para elegir la opción “Yes” y después presione el botón de encendido para confirmar.
With the bootloader unlocked, you are now ready to update a custom recovery.
Step three: Flash TWRP
The device should take a few minutes to format. When it's over, you will be ready to update TWRP. With a command prompt or PowerShell window open in the folder where you saved the TWRP, type the following command and hit Enter:
fastboot flash recovery <nameofrecovery.img>In any case, switch to fastboot flash recovery twrp-3.2.1-1-hammerhead.img .
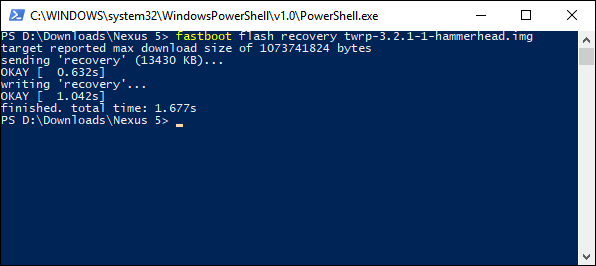
This step should only take a few seconds.
Step four: restore / delete partitions
Next, you will need to start the recovery you just showed. Using the phone's volume control to navigate the menu, look for the option “Recovery mode”. Press the power button to enter recovery.
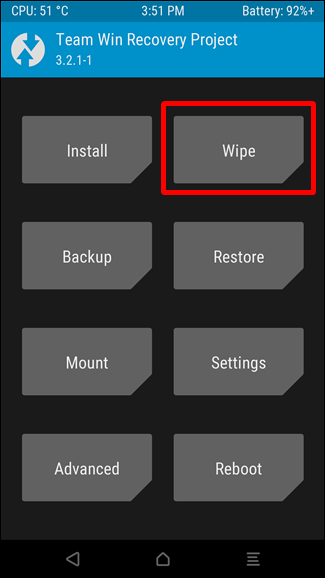
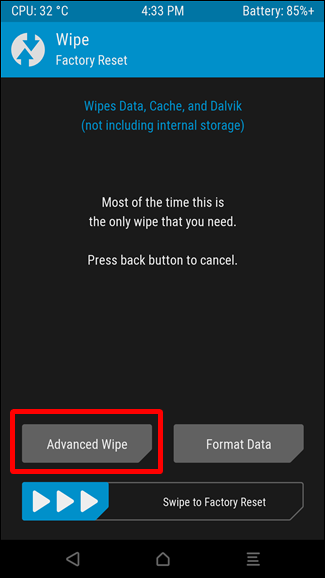
TWRP shouldn't take long to launch for the first time. Once it starts, you will need to swipe to enter recovery screen. On that screen, touch the button “Clean up” has access to a new action “Limpiar Avanzado”.
Check the alternatives System, Data and Cache, and then slide the slider at the bottom to start the erase.
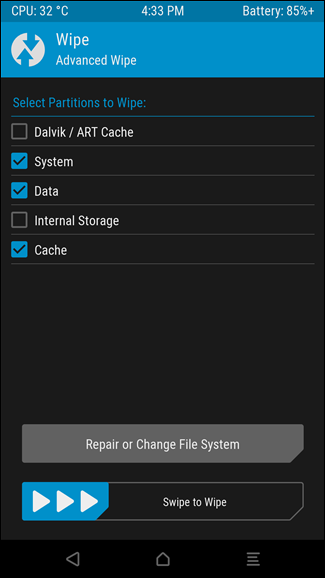
Give it some time to do its thing and then restart the system using the button at the bottom.
Step five: Flash Lineage, GApps y SU
After reboot, and when your phone is back in recovery, you will need to return to the Command Prompt or PowerShell window on your computer. Type the following command and hit Enter:
adb push <nameoflineagebuild.zip> /sdcardNote that “sdcard” es lo que Android llama almacenamiento local. You don't need a real SD card in your phone for this.

This copies your Lineage download to the phone's local storage for flashing. If you have GApps and SU, you must move them now also, using the same command, but replace those files.
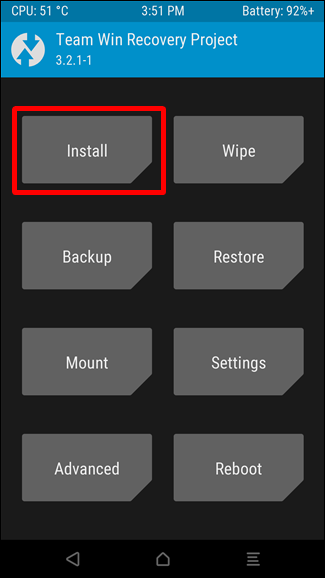
adb push <gapps.zip> /sdcardadb push <su.zip> /sdcardTotal, you should have moved three files to your phone storage (assuming you are installing GApps and SU). When you finish, pick up your phone again. First, touch the button “Install” y después elija su descarga de Lineage. This has to Be the first in line!
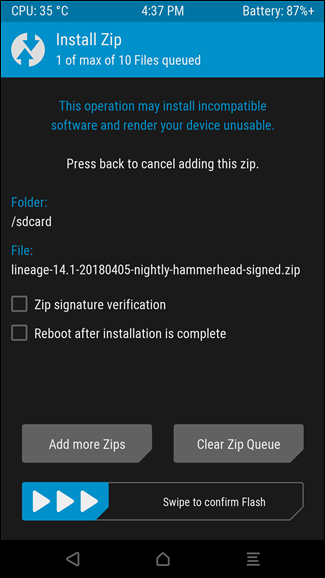
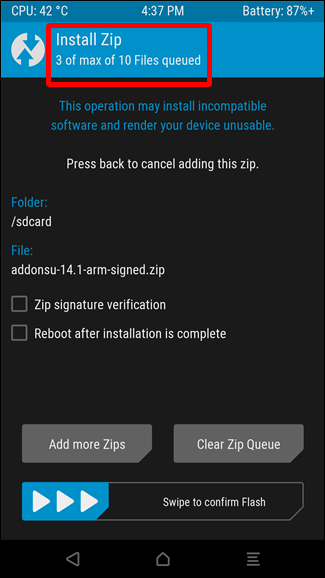
Once selected, touch the button “Agregar más cremalleras” y después elija GApps. Repeat the procedure for SU. When you've selected them all, asegúrese de que en la parte de arriba se lea “3 de un máximo de 10 archivos en cola”.

Note: GApps must be installed before the first boot, so if you don't update it now, will have to start over.
With the three files selected, swipe to show them all. This will take a little, so just check it to make sure there are no errors.
Step six: startup and configuration
Once the flash ends, you will need to restart your phone one more time.
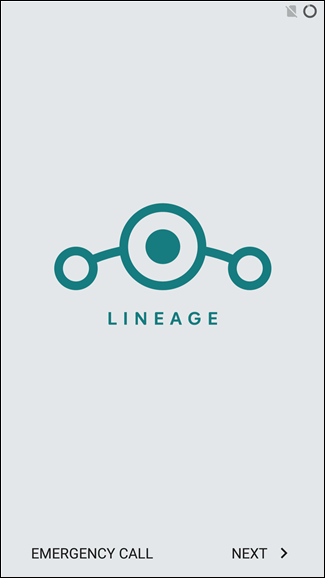
The first boot may take a while, but when it's running, will configure it like any other android mobile. Congratulations, you are now running Lineage OS!


