Taking a screenshot on an iPad is as simple as pressing two buttons at the same time on your device, or you can use an alternative method on screen. Here's how to do it.
What is a screenshot?
A screenshot is a direct capture of exactly what is on your device's screen. With a screenshot, you can capture what you are watching and later save it for later or share it with others without having to take a photo of your device with a camera.
In an iPad, when you take a screenshot, se guarda como una imagen en tu biblioteca de Fotos en el álbum “Screenshots” (unless you choose to save it to Files after editing, about which you will see below). Once the screenshot is in Photos, can share it, like any other image or photo stored on your device.
How to take a screenshot with buttons

Most people capture a screenshot on their iPad using a combination of hardware buttons. The buttons you press are different depending on the type of iPad you have. Here are the combinations:
- iPads without a home button: Briefly press and hold the top button and the volume up button at the same time.
- iPads with a home button: Briefly press and hold the top button and the home button at the same time.
How to take a screenshot without buttons
You can also capture screenshots on your iPad without using the hardware buttons using a feature called AssistiveTouch.. This is useful if you cannot physically perform the button combination or if one of the buttons is broken or damaged.
To enable AssistiveTouch, open Settings and navigate to Accessibility> Touch> AssistiveTouch. you may see a list of applications “AssistiveTouch” a la posición de encendido.
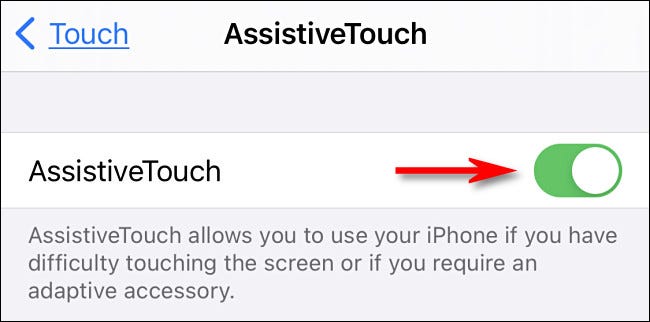
Once AssistiveTouch is enabled, you will see a button that looks like a circle within a rounded rectangle near the edge of your screen. This is the AssistiveTouch button. You can drag it with your finger to reposition it, but it always stays on your screen as long as AssistiveTouch is enabled.
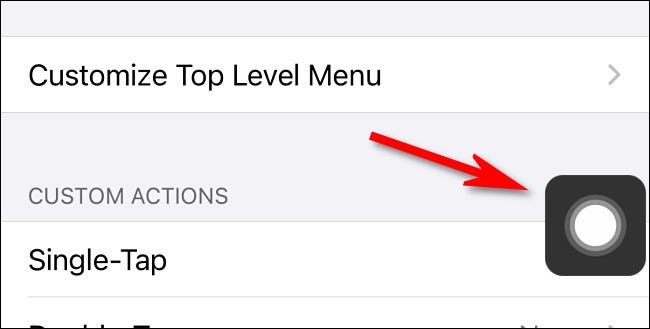
Now that AssistiveTouch is enabled, there are two main ways to trigger a screenshot with it. La primera es a través de el uso de “Custom actions” que ocurren cuando toca el botón AssistiveTouch.
On the Settings screen> Touch> AssistiveTouch, look for the section “Custom actions”. Touch “One touch”, “Double touch” O “Pulsación larga” according to your preference, and then select “Screenshot” de la lista de acciones que aparecen.
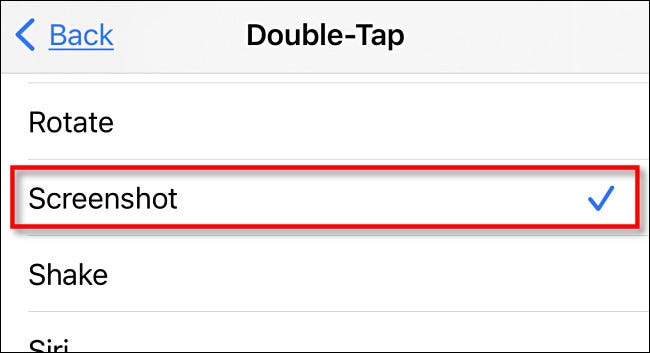
After, touches “Behind”. To take a screenshot, just touch one touch, one tap twice or press and hold the AssistiveTouch button (according to the one you choose).
The second method of taking buttonless screenshots is through the AssistiveTouch menu. By default, la acción personalizada “One touch” in Settings> Touch> AssistiveTouch está asignada a “Open Menu”. If that's still the case, you can touch the AssistiveTouch button at any time to see a pop-up menu.
When you see the pop-up menu, select Device> Plus, and then touch “Screenshot” para tomar una captura de pantalla.
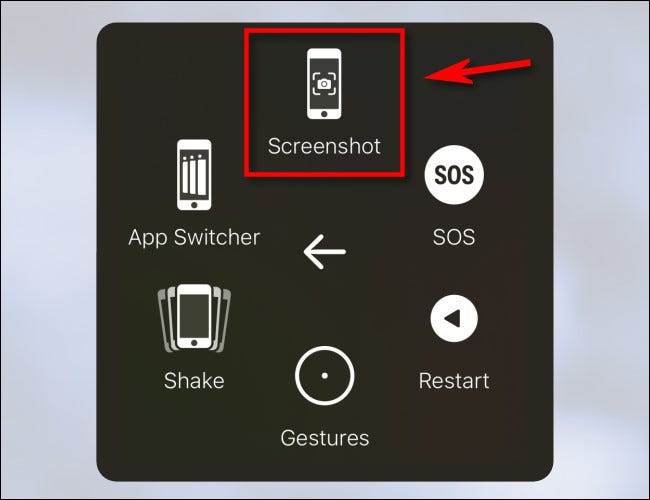
Thereafter, will capture a screenshot exactly as if you had pressed the screenshot button combination on your iPad.
What happens after?
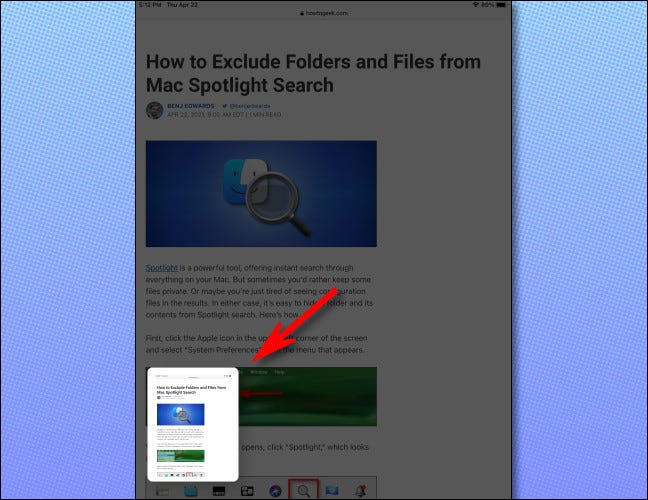
When you capture a screenshot on your iPad, A thumbnail image of the screenshot will appear in the lower left corner of the screen. If you do nothing, la miniatura desaparecerá automáticamente y la captura de pantalla se guardará en su álbum “Screenshots” in the Photos app.
If you touch the thumbnail, you will enter an edit mode where you can add notes to your screenshot, trim it and more.
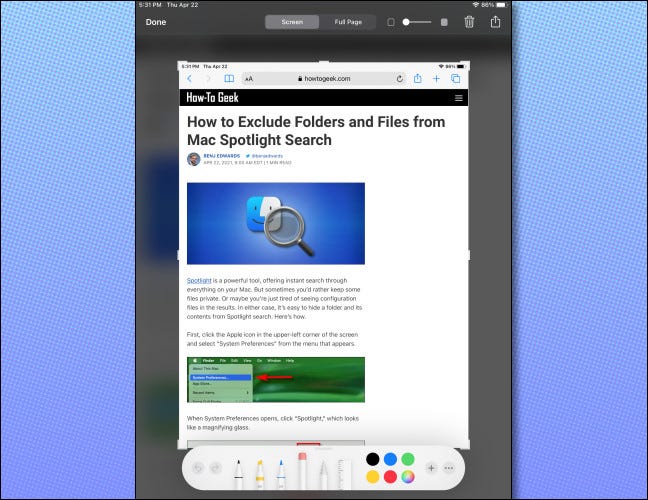
When you're done editing, Touch “Ready” y su iPad le preguntará si desea guardar la captura de pantalla en Fotos o Archivos, or if you prefer to delete it. Then repeat as many times as you want. The only limit to the amount of screenshots you can take is the size of your iPad storage. Have fun!
RELATED: What to do when your iPhone or iPad runs out of space
setTimeout(function(){
!function(f,b,e,v,n,t,s)
{if(f.fbq)return;n=f.fbq=function(){n.callMethod?
n.callMethod.apply(n,arguments):n.queue.push(arguments)};
if(!f._fbq)f._fbq = n;n.push=n;n.loaded=!0;n.version=’2.0′;
n.queue=[];t=b.createElement(e);t.async=!0;
t.src=v;s=b.getElementsByTagName(e)[0];
s.parentNode.insertBefore(t,s) } (window, document,’script’,
‘https://connect.facebook.net/en_US/fbevents.js’);
fbq(‘init’, ‘335401813750447’);
fbq(‘track’, ‘PageView’);
},3000);


