Do you often need to authenticate logins? From iOS 15 and iPadOS 15, has a built-in two-factor authenticator for your saved logins. You can generate verification codes and autocomplete them for more secure logins. Here's how to set it up.
Thanks to iCloud Keychain, you can see all the accounts and passwords saved in the section “Passwords” (previously, Passwords and accounts) of the application “Setting”. From iOS 15 and iPadOS 15, It also has a two-factor authentication function incorporated in the Passwords section to generate verification codes. The codes will also be filled in automatically, in the same way as saved passwords, when you log into your accounts.
Please note that using this feature involves a bit of tedious work on the front-end, as you will need to configure it for the login of each web portal and application that you want to protect with two-factor authentication. Of course, it will only work if the respective sites and apps support two factor authentication for logins.
Next, explains how to use the authenticator built into your iPhone or iPad.
RELATED: What is two-factor authentication and why do I need it??
How to configure the two-factor authentication function
You can use the built-in two-factor authenticator with every site and application that supports two-factor authentication for secure login. While setting it up, you will need to add a setup key or a QR code in the two-factor authenticator built into your iPhone and iPad.
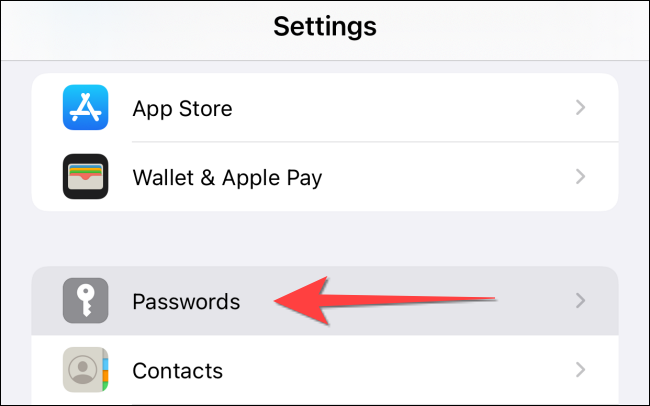
To start, open the app “Setting” and select “Passwords” on your iPhone or iPad.
You must use Face ID or Touch ID (or password) to enter passwords.

The next window shows the list of all the passwords stored in the iCloud keychain. You can touch an existing entry. Alternatively, select the “+” (plus sign) in the upper right corner of the screen to add a new one.

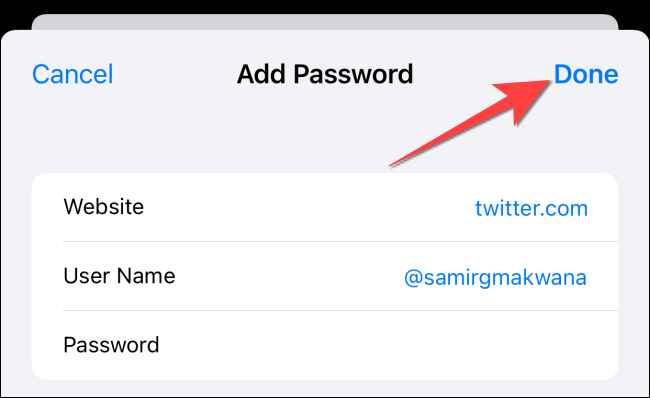
Enter the web portal address, existing username and password. You will also find a more secure password suggested at the top of the keyboard if you want to update the login with a more secure password.. To end, Touch “Ready” to continue.
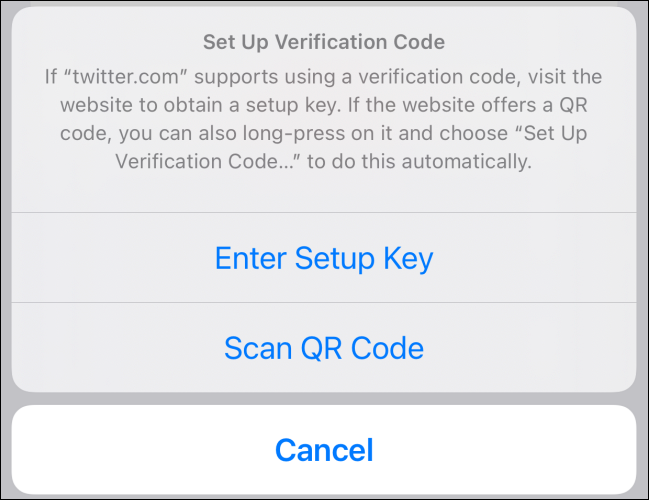
In the section “Account options”, select option “Set verification code”.
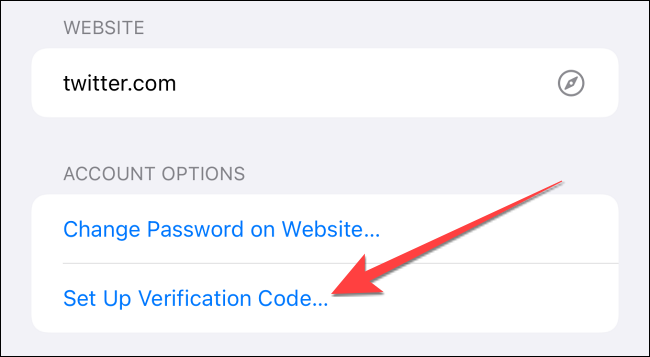
In the menu that appears, select “Enter configuration key” O “Scan QR code” to add the verification code for your login. You will get the key or code from the web portal, as we will explain below.
Two-factor authenticator only works with sites and apps that support two-factor authentication code setup via QR code or security key. Because, you can use it with services like Github, Gmail, Outlook and even social media applications like Facebook, Instagram y Twitter.
RELATED: How secure are Face ID and Touch ID?
How to set up an account for two-factor authentication
Let's say you want to protect your Twitter account. For that, you can use the authenticator after setting it up on your iPhone or iPad using the Twitter QR code.
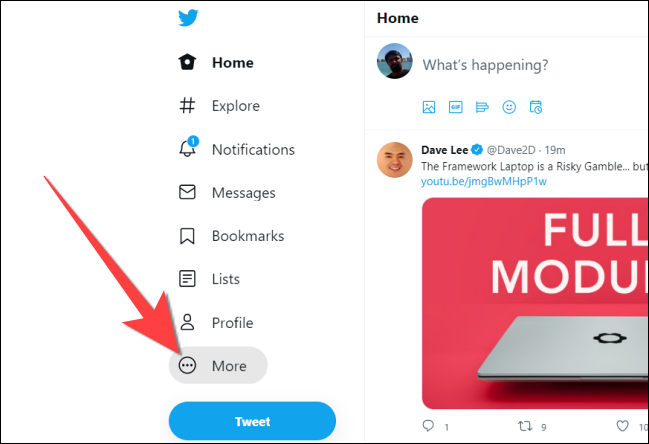
To get into that, first open the Twitter website in a browser on your computer and tap the “Plus” On the left side.
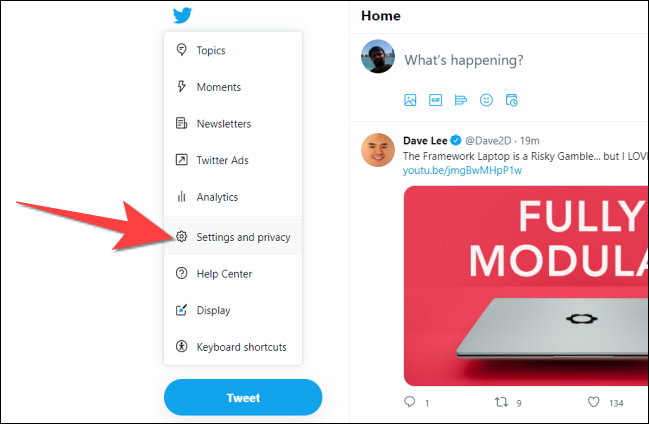
In the menu that appears, select “Settings and privacy”.
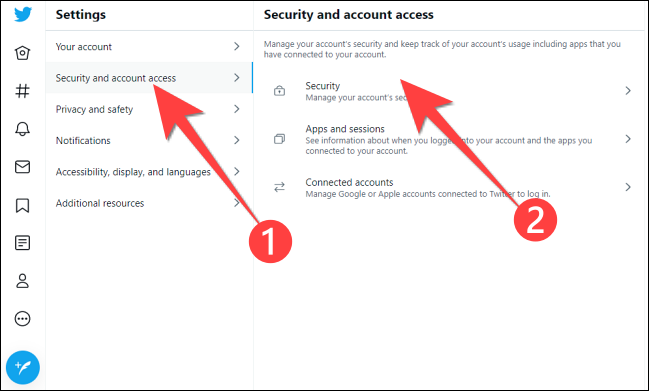
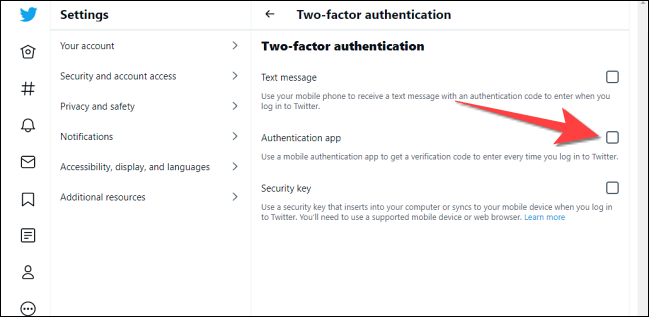
In Settings, click on “Account access and security”, then click on “Security”.
In the section “Security”, click on “Two factor authentication”.

In the section “Two factor authentication”, uncheck the box “Authentication app”. Subsequently, enter the password of the Twitter account to verify the changes you are about to make.
A pop-up window will appear for the authenticator application and click the “Beginning”.
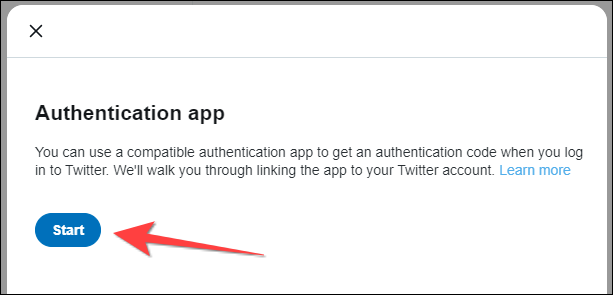
The next screen will show you a QR code. Use your iPhone's camera app to scan that QR code from the Twitter site. Next, touch notification “Add verification code in passwords” that appears at the top of the screen.

Verify your identity with Face ID or Touch ID and select the account to add the verification code. Once you add that for the Twitter site on “Passwords”, navigate to the folder where your PDF file is located “Verification code” which provides a six-digit code that changes each 30 seconds.

How to enable auto-complete for passwords and verification codes
If you've been using a third-party password manager, you will need to enable AutoComplete after configuring built-in two-factor authentication. At the same time as prompts to fill in passwords, you will also receive similar prompts for verification codes, so you will not have to change applications.
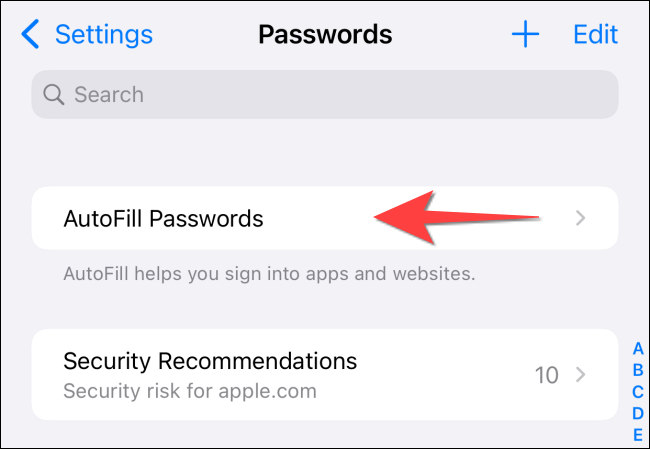
Open the app “Setting” and touch “Passwords” on your iPhone or iPad and use Face ID or Touch ID to enter the “Passwords”. Next, Touch “Autocomplete passwords”.
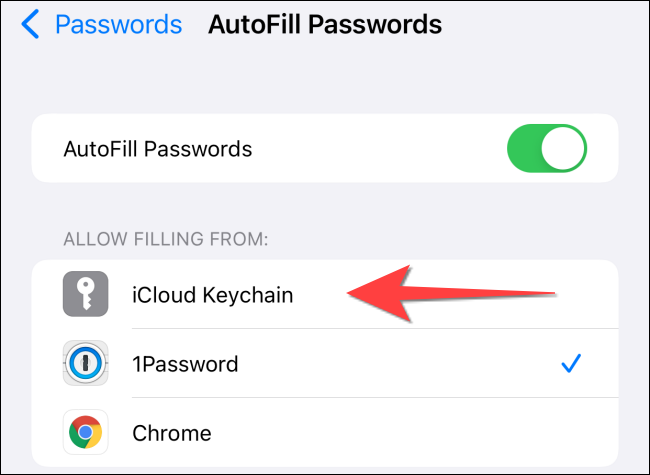
In the section “Allow fill in from”, tap the option “ICloud Keychain” to select it.
on your iPhone or iPad and select the photo you want to remove location details from “Setting”.
That is all! After setting this, you can log in to your favorite apps and sites more securely on your iPhone and iPad.
RELATED: How to find your accounts and passwords on an iPhone or iPad


