
Before disconnecting a removable drive on a Mac, should always expel her. Here are five alternatives to do it with ease and, to start, why you need to eject.
Why do you need to eject?
Ejecting a disc on a Mac is a necessary step to avoid data loss. Here is why: to speed up the perceived operation of writing data to an external drive, macOS sometimes writes data to a temporary location in memory instead of writing it to disk. If you disconnect a drive before the data has been written, Could get lost.
When you click “Expel” on a removable disk, temporary write procedure ends, writing the 100% of the data on the actual device. Once you officially eject the drive, no data will be lost when you physically disconnect the removable drive from your Mac.
Method 1: drag the drive icon to the trash
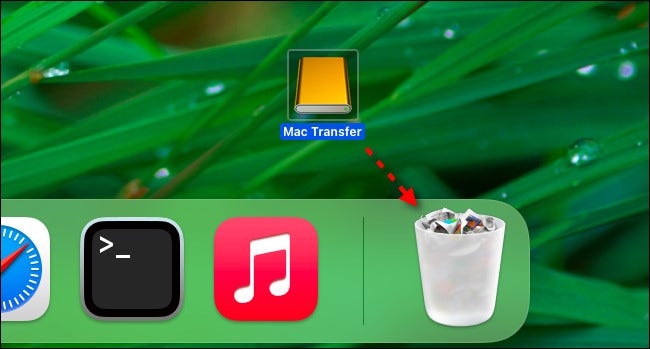
One of the oldest ways ejecting a removable drive on a Mac is dragging it to the Trash. To do it, the drive should be visible on your desktop. To kick it out, just click and drag the drive icon to the trash. While dragging, the Trash icon will change to an eject symbol. Once you release the pointer button, the unit will eject.
Tip: If you don't see a removable disk on your desktop, you can enable that feature easily. Bring the Finder to the fore, then select Finder> Preferences from the menu bar (or press Command + Eat on your keyboard). When Finder Preferences opens, select the tab “General”, then place check marks next to the items you would like to see on your desktop.
Method 2: Eject from menu bar
You can also eject a removable disk through an option in the menu bar at the top of the screen. To do it, select the removable disk you want to eject on your desktop or in the Finder, then select File> Eject from the menu.
Method 3: Eject from Finder sidebar
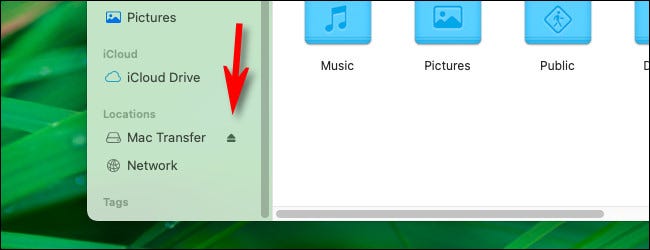
Plus it's easy to eject a removable disk from the Finder sidebar. Just open any Finder window and expand the section “Locations” in the sidebar. After, click the little eject icon next to the drive name in the list.
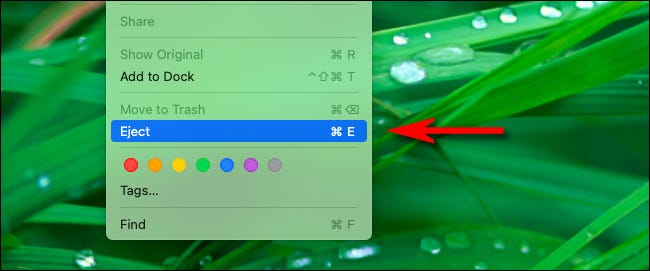
Method 4: right-click on the drive's desktop icon
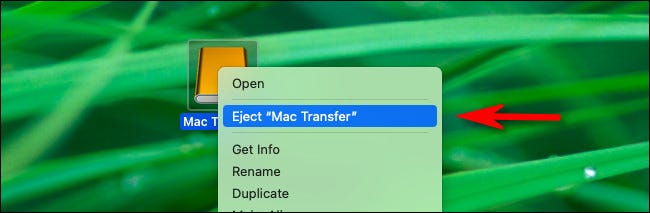
Power users love the right-click menu, and it should come as no surprise that you can use that menu to eject discs. Just select the removable drive icon in Finder or on the desktop, and right click on the mouse or trackpad. In the menu that appears, select “Expel”.
Method 5: press Command + E
And finally, you can also eject a disc using just your keyboard. To do it, highlight disk (in his desk, in a Finder window or Finder sidebar) and press Command + E. The disc will eject smoothly. Very easy!
RELATED: Why, exactly, you need to safely eject USB media?


