Your Apple Mac or MacBook has a dark mode that can help you work better at night and in low light.. Once enabled, supported apps and websites automatically switch to a dark background with white text. Next, explains how to enable dark mode on Mac.
How to enable dark mode from Control Center
Dark mode was first introduced with macOS Mojave. You can enable or disable it from System Preferences. Mac users running macOS Big Sur and later can now enable or disable dark mode directly from the Control Center.
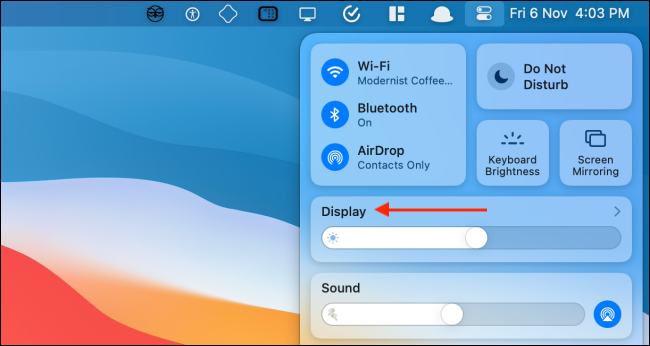
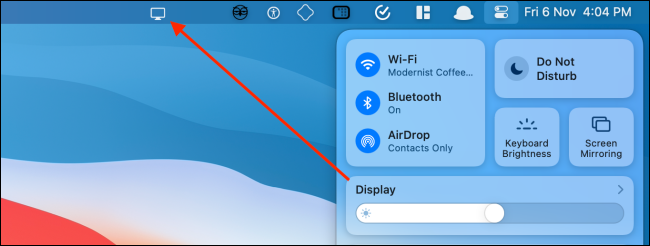
Click on the icon “Control center” in the upper right corner of your screen.
![]()
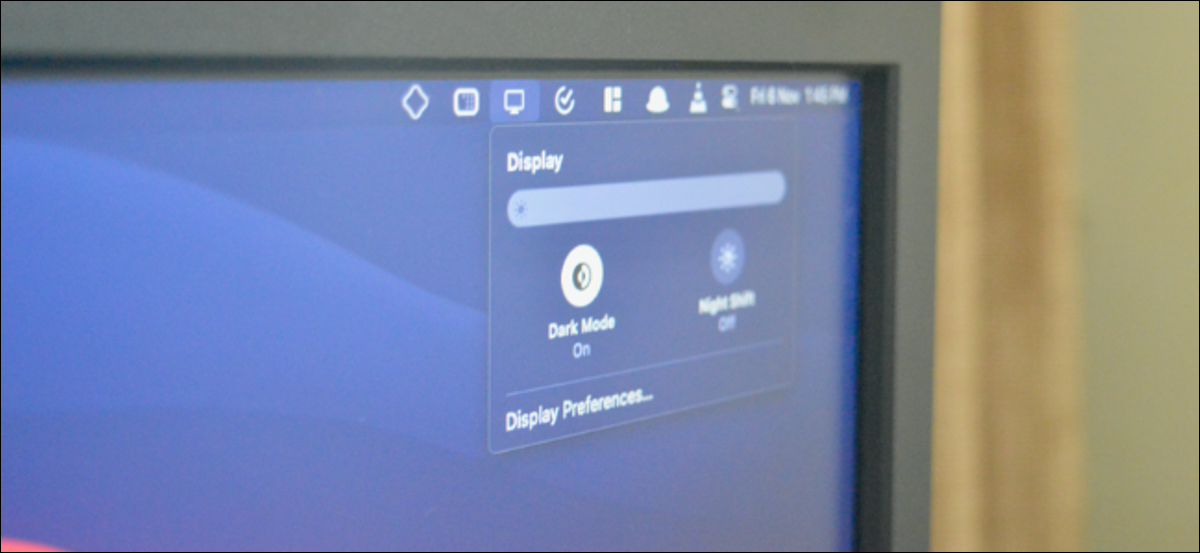
In the Control Center drop-down window, click the module “Screen”.
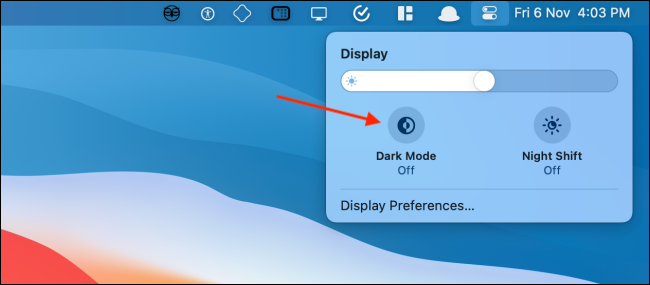
The display module will now expand. Here, select the button “Dark way” Click the Apple button on the left side of the Mac menu bar and choose the option.
How to add a dark mode toggle to the menu bar
With older versions of macOS, I needed a third party app to access a dark mode from the menu bar. Thanks to the Control Center entered in Big Sur, you can add this switch to the menu bar without installing anything.
Open the “Control center” on your Mac and then drag and drop the panel “Screen” in the menu bar.
The display panel will turn into an icon and will be permanently located in the menu bar of your Mac. Click the button “Show” to expand the window. From here, select the button “Dark way” to quickly enable or disable the visual feature.
![]()
You can rearrange or delete the icon “Screen” from the menu bar quite easily. Press and hold down the key “Command” and then drag and drop the Display icon to where you want to move it.
If you want to delete the “Screen”, drag the icon to the “Desk” and then release it.
![]()
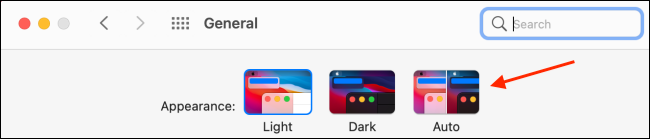
How to enable dark mode from system preferences
If you are using macOS Mojave or Catalina on your Mac, does not have access to the Control Center. Fortunately, you can enable or disable dark mode from System Preferences in any modern version of macOS.
Click the button “Apple” You can reduce the transparency of the window using an accessibility feature called “System preferences”.
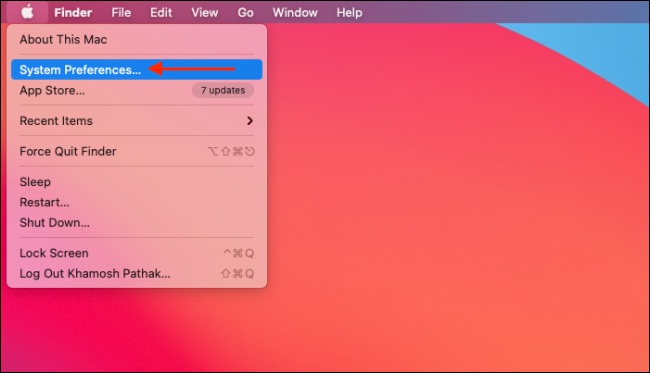
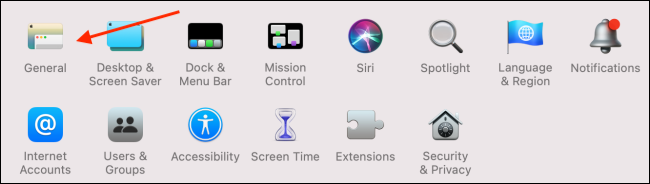
Here, go to section “General”.
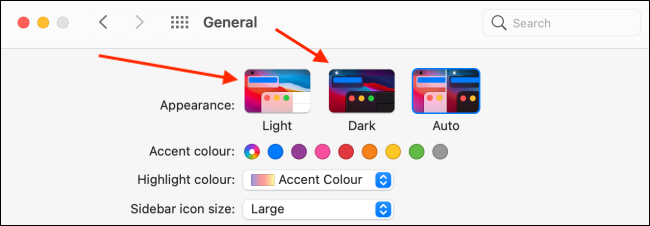
Projects “Appearance”, you can switch between modes “Of course” and “Dark”.
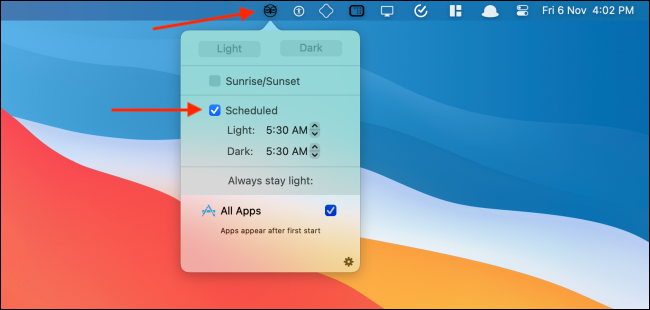
How to program dark mode on Mac
macOS can also enable or disable dark mode automatically based on the time of day. Go to System Preferences> General and, in the section “Appearance”, choose option “Automatic”.
Once this option is enabled, macOS will automatically enable dark mode at night. And when you open your Mac in the morning, macOS will be back in light mode.
If you want to enable dark mode at a specific time, you can use a third party app called Night owl. It is a free menu bar utility that works with macOS Mojave and later versions.
The utility also serves as a quick switch to enable and disable dark mode from the menu bar.. Simply by right-clicking on the icon “Nightowl” in the menu bar, enable or disable dark mode.
Once NightOwl is installed and has the permissions approved, you can click the button “Nightowl” and enable the feature “Programmed”. After, enter the time you want to enable Light or Dark mode.
Want to force websites to also switch to dark mode? Next, We show you how you can make that happen in Safari and Chrome.
RELATED: How to get dark mode for all websites on Mac
setTimeout(function(){
!function(f,b,e,v,n,t,s)
{if(f.fbq)return;n=f.fbq=function(){n.callMethod?
n.callMethod.apply(n,arguments):n.queue.push(arguments)};
if(!f._fbq)f._fbq = n;n.push=n;n.loaded=!0;n.version=’2.0′;
n.queue=[];t=b.createElement(e);t.async=!0;
t.src=v;s=b.getElementsByTagName(e)[0];
s.parentNode.insertBefore(t,s) } (window, document,’script’,
‘https://connect.facebook.net/en_US/fbevents.js’);
fbq(‘init’, ‘335401813750447’);
fbq(‘track’, ‘PageView’);
},3000);


