The time has come to replace your Mac. Once you have decided on a new model, you have disbursed the cash and taken your expensive new toy out of the box, it's time to get on with it and transfer your data.
All the tools you need are included with macOS (plus or minus one or two cables, or an external drive). AND, if you buy a new Mac, Apple will transfer your data for free.
Apple will migrate your data for free
If you do not want to transfer your data yourself, an Apple employee can do it for you. You just have to bring your old Mac when you buy your replacement. Apple used to charge 99 dollars for this service, but now it's free to anyone who buys a new Mac.
For MacBook and Mac mini models, This makes perfect sense. Despite this, if you have an old iMac or Mac Pro, you better transfer your data at home.
Your choices
Apple has a tool called Migration Assistant in macOS to help you with both sides of a data transfer.. In Migration Assistant, you can transfer data in one of three ways:
- Mac a Mac, through the local network (or a local wireless connection between machines).
- Mac to Mac using target disk mode and a cable.
- Restore from a Time Machine backup stored on an external drive.
There are a few things you need to pay attention to if you want to use the first option. If both machines are running macOS Sierra or later, can transfer wirelessly via local Wi-Fi connection. This connection is made directly between the machines and, because, you don't need both machines to be connected to the same network.
If your Mac is older and only supports OS X El Capitan, you need to make sure both machines are connected to the same network. You can do this over Wi-Fi or, for best results, use un cable Ethernet. Migration Assistant enables you to transfer data from older Macs running OS X Snow Leopard 10.6.8 the later.
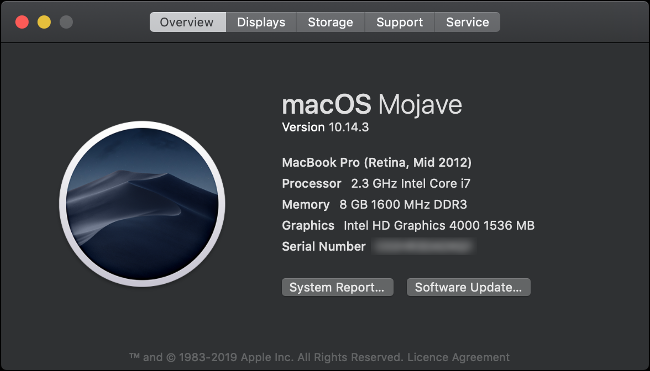
Not sure which version of macOS or OS X your Mac is running? Click on the Apple logo in the upper left corner of the screen and then select Related to this Mac. You should see the name and version number of the current operating system in the Overview tab.
Option 1: Mac to Mac over the network
One of the easiest methods (no cables or external drives required) to transfer content from your Mac is via a network connection.
Despite its simplicity, this is the slowest way to migrate your data to a new Mac. If you have a large amount of data (more of 200 GB) to transfer, you should plan to take several hours to complete. You might even have to wait overnight.
One thing that gives you an advantage is if you use a wired network connection. A wire transfer is not only more reliable, but it is also faster. A connection “wired” means you have your new and old computers connected to your router via ethernet cable. You don't need an internet connection to transfer this way, so you could even relocate your network equipment temporarily to speed up the transfer.
Follow these steps to transfer your data from Mac to Mac over the network:
- On your old Mac, start the Migration Wizard and click “Continue”.
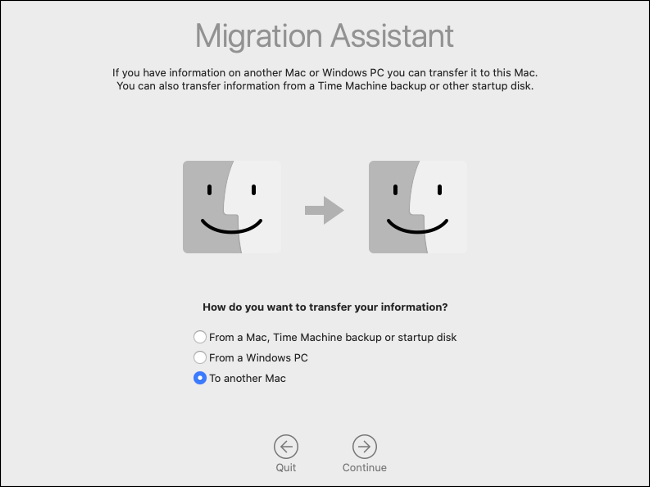
- Choose “To another Mac” when prompted and then click “Continue”.
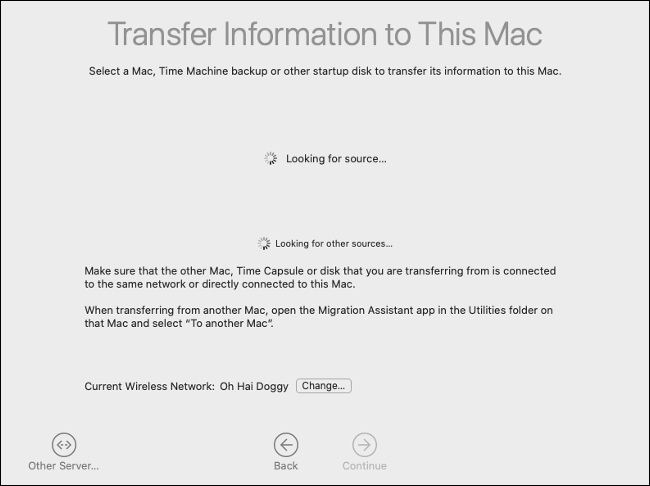
- On your new Mac, start the Migration Wizard and click “Continue”.
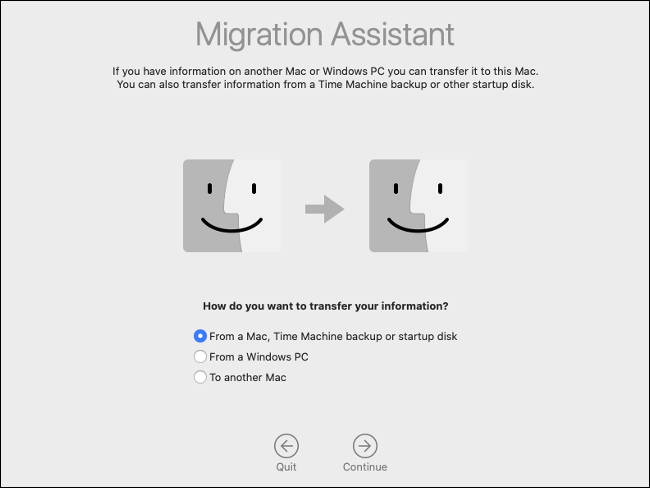
- Choose “From a Mac, Time Machine Backup or Startup Disk” when prompted, and then click “Continue”.
- Choose the Mac icon when prompted and then click “Continue”.
- Make a note of the security code and verify that it matches that of your old Mac (if provided).
- Select what information you want to transfer from your old Mac and then click “Continue”.
Now, just wait for the transfer to complete. If you transfer to a Mac that shares the same user account, you will be prompted to rename or replace the user account on your new Mac. If you choose to replace the account, all data will be deleted, but since the Mac is new, this shouldn't matter.
Option 2: Mac to Mac by cable
Destination disk mode is a faster method than transferring the contents of your drive over the network. If you connect your old Mac directly to your new one with a high-speed cable, can significantly reduce the total transfer time.
Target disk mode works through Thunderbolt 3, USB 3.0 the later, Thunderbolt 2 y FireWire. Despite USB support 3.0, must use a Mac 2012 or later if you want to connect via USB Type-A. Your new Mac will need to use a USB Type-C connector.
Next, Some things to pay attention are included:
- Can make Thunderbolt connection 3 a Thunderbolt 3, or Thunderbolt 3 a USB 3.0 Type-C with a Cable Apple Thunderbolt 3 (USB-C).
- If copying from a Thunderbolt interface 2, you can use a Thunderbolt cable 2 standard with Thunderbolt adapter 2 a Thunderbolt 3 (USB-C).
- Para copiar de un USB Type-A a USB Type-C, be sure to use a cable that supports USB 3.0 the later (USB 2.0 it will not work).
- You cannot use the USB Type-C cable that you use to charge your MacBook.
You must restart your old Mac in target disk mode for this to work. When you do this, mount your old Mac's drive on your new Mac, so it appears as an external volume. If you have protected your disk with FileVault encryption, you need to type the password to decrypt it when you mount it.
Follow these steps to transfer data from Mac to Mac by cable:
- Connect the transfer cable from your old Mac to the new one.
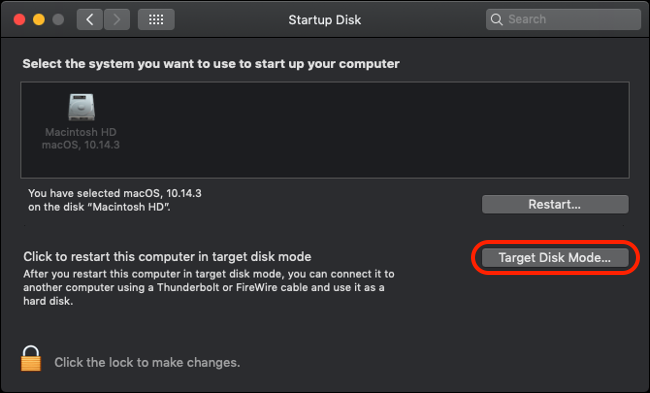
- Turn on your old Mac and hold the key “T” while starting. If it is already activated, go to System Preferences> Startup Disk and then click “Target disk mode”. Wait for it to restart.
- On your new Mac, wait for your old Mac drive to appear. Enter your FileVault password, if requested. If you don't see your old Mac, launch Disk Utility and check the sidebar. Select the volume when it appears, click File> Mount and then type your FileVault password.
- With unit mounted, start the Migration Wizard and then click “Continue”.
- Choose “From a Mac, Time Machine Backup or Startup Disk” when prompted, and then click “Continue”.
- Click on the respective startup disk icon.
- Select the data you want to transfer to your new Mac and then click “Continue”.
Can't get your old Mac to appear? Make sure you are using the correct cable or adapter to connect the two machines. For Best Results with Thunderbolt Connections 2 O 3, use only Apple brand cables.
Transfer time ultimately depends on the cable you use. Thunderbolt cables 3 active copper are expensive but offer speeds of up to 40 Gbps (maximum speed of 5 GB per second). Thunderbolt cables 2 provide about half (20 Gbps), while USB 3.1 and 3.0 they manage 10 Gbps y 5 Gbps, respectively.
When the transfer is complete, eject the drive from your old Mac like you would any other.
Method 3: from a Time Machine backup
This latter method of data transfer is ideal if you use Time Machine to back up your Mac to an external drive. All you have to do is connect your backup drive to your new Mac and then import your data with Migration Assistant.. Make sure to create an updated Time Machine backup on your old Mac before continuing.
This method is also usually faster than using a network connection, especially if you have a USB compatible drive 3.0 the later.
Follow these steps to transfer your data from a Time Machine backup:
- On your new Mac, start the Migration Wizard and then click “Continue”.
- Choose “From a Mac, Time Machine Backup or Startup Disk” when prompted, and then click “Continue”.
- Choose the Time Machine icon when prompted and then click “Continue”.
- When you see a list of available backups, select one (you will probably want the most recent).
- Select the data you want to transfer from your old Mac and then click “Continue”.
Don't forget to safely eject your Time Machine drive. You will need to configure Time Machine again if you intend to use this drive to back up your new Mac.
The great data migration
You do not I have use migration wizard, but it makes life so much easier. Alternatively, despite this, you can plug your old Mac into target disk mode and manually copy whatever files you want to keep. Or you can make your entire Mac drive available over the network via System Preferences> Sharing.
Now is the time to choose what to do with your old Mac. You can use it as a network Time Machine drive, clean your drive and install macOS from scratch, or sell it and get back some of the money you spent on the upgrade.


