Macs ship with a robust built-in compression tool that can help you compress and decompress files and folders.. What's more, It is very easy to use! For additional functionality, you can always try a third party app too.
First, Let's talk about the built-in archive utility tool. Not an app, but a function deeply integrated into the Finder app.
How to compress files and folders on Mac
To start, open the app “Finder” and locate the files or folders that you want to compress. If you are selecting multiple files, hold down the Command key while selecting files.
Once you have made your selection, right click on it to see the context menu. Here, click the option “Compress”.
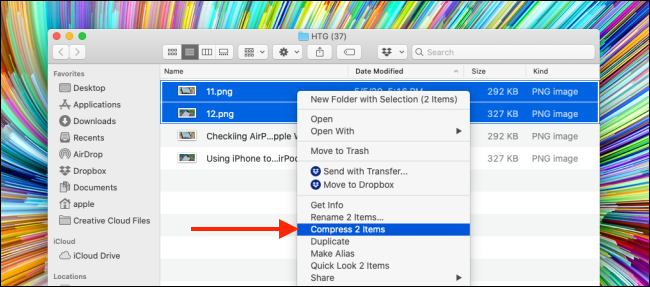
If you are using multiple files, Compress option will also show you how many files you have selected.
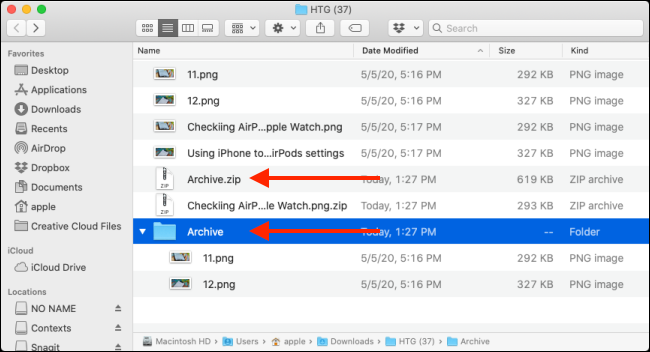
After the compression process is finished, you will see a new compressed file in the same folder. If you compressed a single file or folder, the file will have the same name, with an extension “.zip”.
If you compressed multiple files, you will see a new file with the name “Archive.zip”. You should rename the file to make it easier to find.
RELATED: The fastest ways to rename files in macOS
Now you can move the compressed Zip file to another folder or send it as an email attachment.
How to Unzip Files and Folders on Mac
Unzipping a file is even easier. It does not matter if it is a Zip file that you downloaded from the Internet or something that you compressed yourself.
Navigate to the file in the Finder application and double-click the Zip file. After several seconds, the file or folder will be unzipped to the same folder.
If it was a single file, you will see that the file will revert to its original state, with the name intact. If you are unzipping a folder or Zip file that contained multiple files, will appear as a folder with the same name as the file.
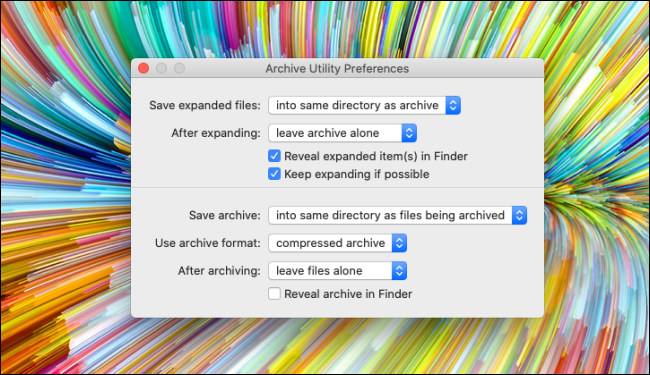
How to change the archive utility settings
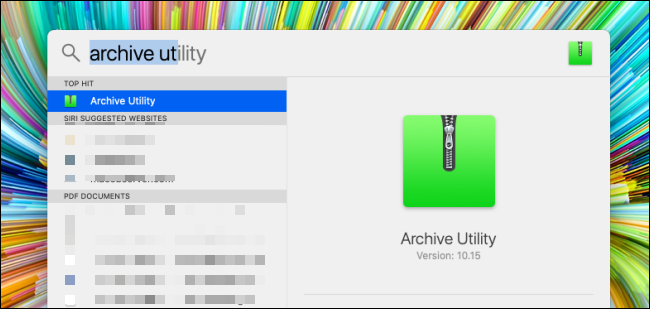
Although Archive Utility does not have a visible user interface, you can change some of your settings. To do this, open Spotlight on your Mac (Command + Space) and look for “File Utility”.
Once it opens, click the item “File Utility” on the menu bar and click the “preferences”.

Here, you will be able to change the behavior of the Archive Utility in the Finder application. You can create a new default destination for all compressed and unzipped files, as well as choosing to move archived files to Trash.
Third party alternative: The Unarchiver
If you are looking for more functions, or if you want to unzip different formats like RAR, 7With, Tar, etc., try The Unfile. It is a completely free utility that supports more than a dozen popular and unknown file formats.
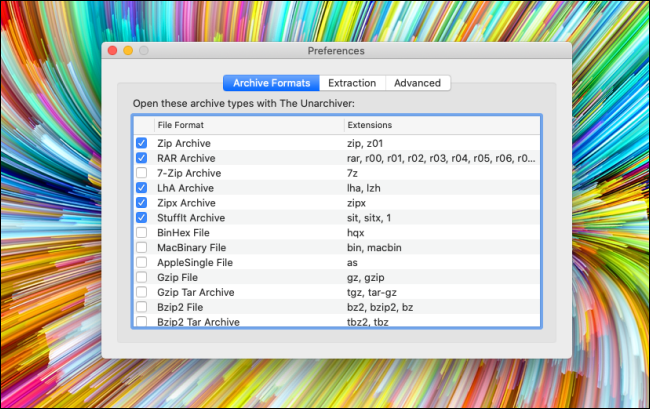
The application allows you to change the default extraction destination. What's more, allows you to choose to create a new folder to extract files, automatically open folders once extraction is complete and enable an option to move the file to Trash once extraction is done.
RELATED: How to open 7z and other archive files in OS X
setTimeout(function(){
!function(f,b,e,v,n,t,s)
{if(f.fbq)return;n=f.fbq=function(){n.callMethod?
n.callMethod.apply(n,arguments):n.queue.push(arguments)};
if(!f._fbq)f._fbq = n;n.push=n;n.loaded=!0;n.version=’2.0′;
n.queue=[];t=b.createElement(e);t.async=!0;
t.src=v;s=b.getElementsByTagName(e)[0];
s.parentNode.insertBefore(t,s) } (window, document,’script’,
‘https://connect.facebook.net/en_US/fbevents.js’);
fbq(‘init’, ‘335401813750447’);
fbq(‘track’, ‘PageView’);
},3000);


