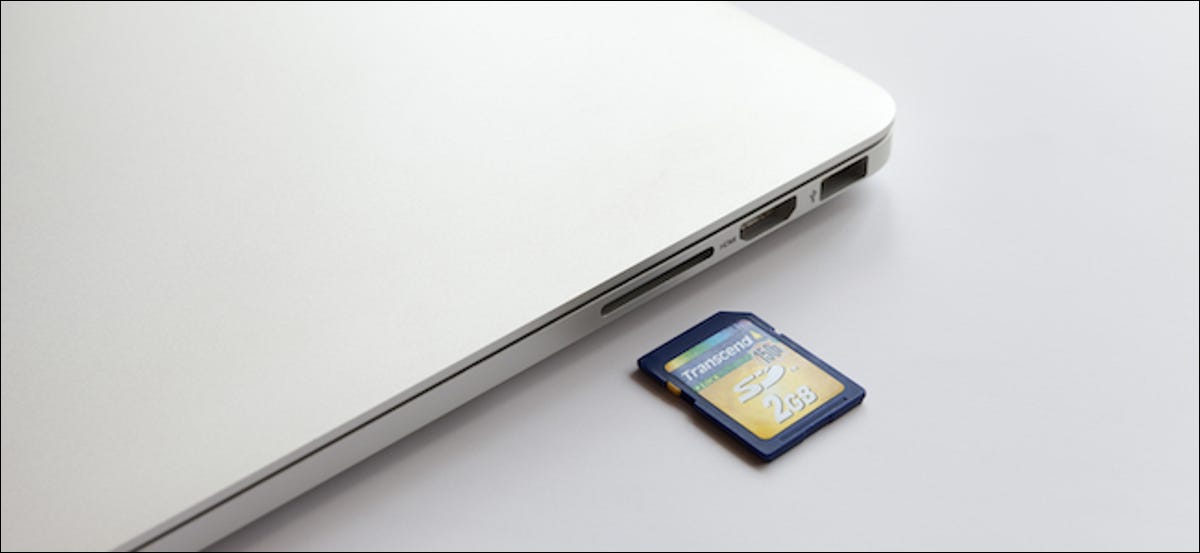
There are times when an SD card starts to act strange. Once you have backed up your data, the only safe way to reset the SD card is to format it. Next, explains how to quickly format an SD card on Mac.
If you are a long time Mac user, you may be familiar with Disk Utility. It is the application that allows you to manage and format the internal and external storage. Although it works great for SSD and hard drives, it's a bit strange when it comes to formatting SD cards.
RELATED: How to use your Mac's disk utility to partition, remove, repair, restore and copy drives
Fortunately, there is a faster and easier way to format an SD card. The SD Association's own SD Card Formatter app enables you to format an SD card in just a couple of clicks. The application supports SD cards / SDHC / SDXC.
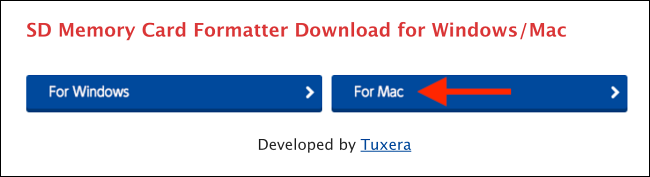
To start, visit SD Association’s SD card formatter download page. From here, Click the button “For Mac”.
Scroll down and click “To accept” to accept the terms and conditions. Now, the application will be downloaded in the Downloads folder.

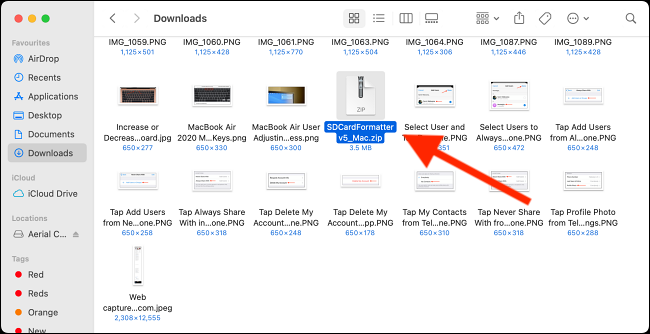
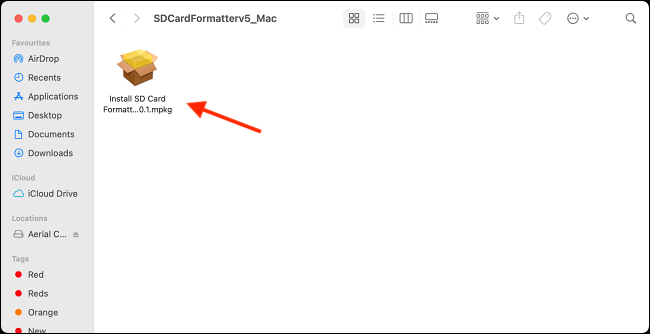
Go to the Downloads folder and double-click the zip file “SDCardFormatterv5_Mac”.
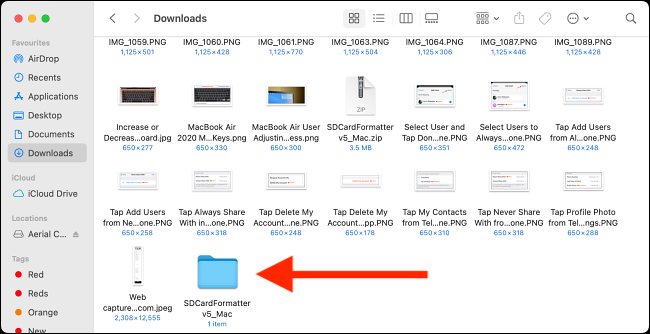
This will expand to a folder with the same name. Double click on the folder to open it.
Now, double click the installation package.
Here, follow the procedure to install the SD Card Formatter application.
Once the application is installed, open it with the Applications folder or using Spotlight search.
RELATED: How to use macOS Spotlight like a champ
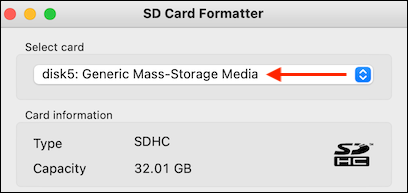
Now you can connect the SD card to your Mac (using an external card reader or the SD slot, if your Mac supports the port) and go to Finder to make sure you have connected the correct SD card.

Back in the SD Card Formatter app, the SD card will appear in the “Selected card”. You will also see the details of the SD card, such as the type and capacity of the SD card.
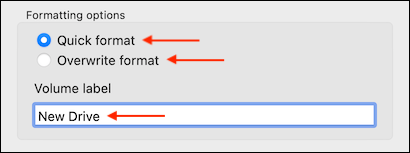
Now, if you want to reformat your SD card quickly, choose option “Quick format” from the section “Formatting options”. If you want a complete overwrite, choose option “Overwrite format”. This option will take much longer (minutes instead of seconds).
After, from the menu bar and choose the option “Volume label”, you can select to rename the SD card if you want.
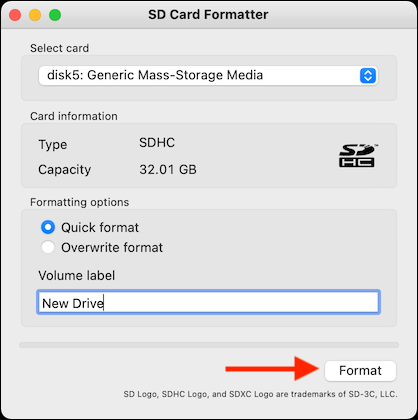
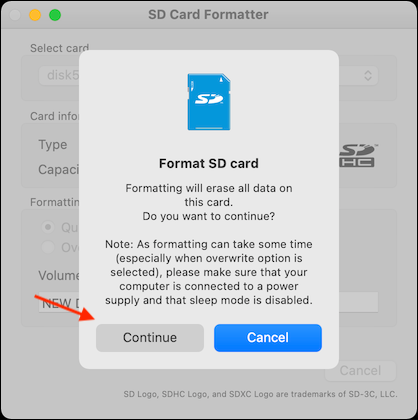
Once i'm done, Click the button “Format”.
In the pop-up message, click the option “Continue”.
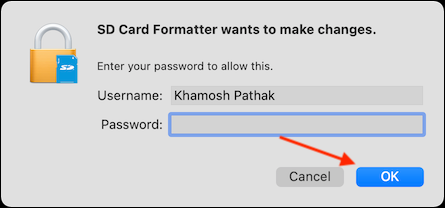
Enter the password of your user account and click the “To accept” to allow the application to reformat the SD card.
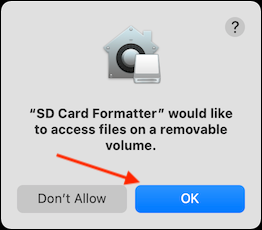
The application will now require permission to access the removable volume (the sd card). Here, Click the button “To accept”.
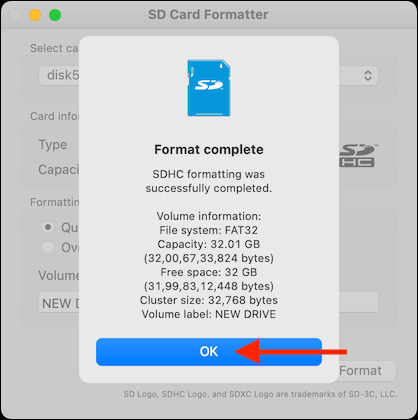
All you have to do now is wait. If you selected the “Quick format”, the procedure will be completed in a couple of seconds and you will see a pop-up message from “Full format”.
This pop-up window will show the details of the newly formatted drive. Click the button “To accept” to go out.
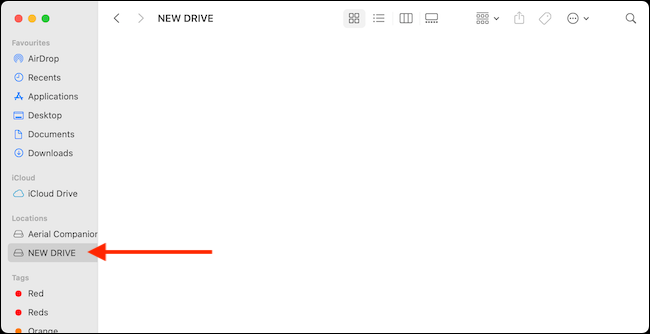
And that is. Now you have formatted the SD card.
When I return to the Finder, find the newly formatted drive, with the new name, in the sidebar. When selecting the unit, will be empty.
Now you can copy files and folders to the SD card.
If you want to format a USB drive, we suggest you use Disk Utility application.
RELATED: How to delete and format a USB drive on your Mac


