
Almost everyone has accidentally deleted a file before. Whether it's family photos or important documents, all files are just data on your hard drive, and that data doesn't exactly disappear after you delete it. There are many alternatives to recover them after sending them to the trash.
Today we will show you a couple of alternatives to recover those files, because even when things are removed, do not always disappear completely. AND, hopefully, if one of the methods doesn't work, the other one will.
Keep regular backups to avoid deletion in the first place
MacOS Time Machine is a great, built-in way to manage backups automatically. If you have an old external hard drive lying around (or some extra money for a new one), plug it in and then navigate to System Preferences> Time Machine> Choose Backup Disk. You can choose your external hard drive and activate automatic backups.
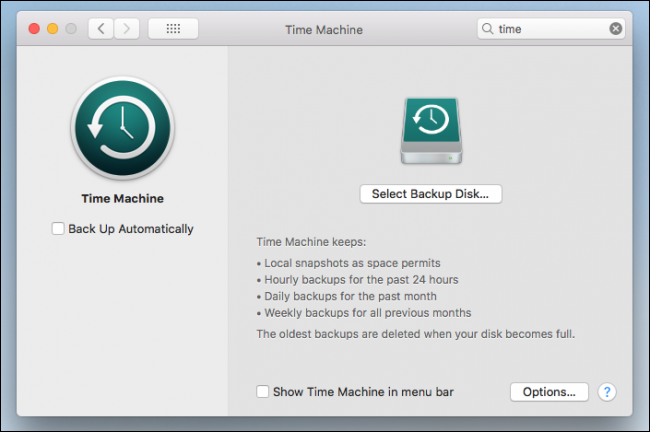
Time Machine maintains a safe backup of your computer data on your external hard drive, and you can navigate back in time through old versions of your files.
If you don't trust your old hard drive (or if you want an additional external backup), you can always use something like Arq, enabling you to back up to the cloud using your own AWS S3 instance, Google Drive o Dropbox.
Check the trash
Click on “Remove” doesn't actually delete files. Sends them to the trash, that you need to flush manually to get rid of them permanently.
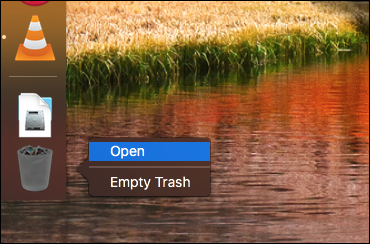
The Trash in general is at the end of its dock. Right-click and click the command “To open”. It should give you a list of the files that you have recently deleted, at least since the last time you emptied it. And if you haven't emptied it in a while, doing so could restore you quite a bit of disk space.
Check the other trash cans
If your file was stored on a USB flash drive or external hard drive, These have their own Trash that you can check for deleted files. Despite this, are hidden by default, so you need to do some research.
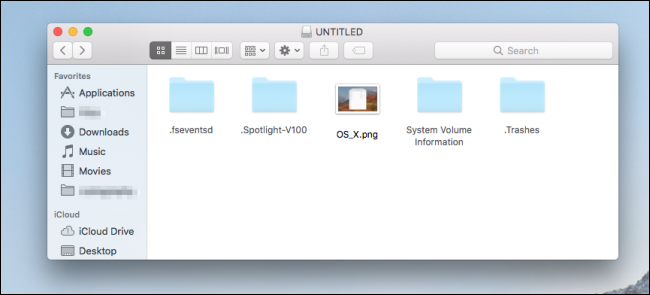
Whenever you use an external drive, your Mac creates a bunch of hidden folders that start with a period to help the drive work better with macOS. One of these hidden folders is “.Trashes” and contains the trash can for that unit.
Enable hidden files in Sierra or later
If you are using macOS Sierra or later, you can see hidden files in Finder just using SHIFT + CMD +. hotkey (that's the period key).
If you are using an older version of OS X
You can enable hidden files in Finder by running the following commands in Terminal. Press Command + Space and type “Terminal” in order to show up. When prompted, paste these two lines one at the same time, pressing Enter after each line:
defaults write com.apple.finder AppleShowAllFiles TRUE

killall Finder
After you run these commands, you should be able to see the folder “.Trashes”. You can even empty it from Finder to free up some space on a USB stick.
If you want to stop showing hidden files (are hidden for some reason and there are many), you can run the same commands in the terminal again, but replace “TRUE” by “FALSE” on the front line:
defaults write com.apple.finder AppleShowAllFiles FALSE

killall Finder
That should fix things for you.
If all else fails, use Disk Drill
Even when you empty the trash, deleted files are not removed from your hard drive immediately. Instead, macOS marks them as available space. Your data is still there until something else overwrites it. This means that if you have an application that can read the files directly from your hard drive, you could get them back completely if you do it quickly enough after deletion.
One tool that does this very well is Disc drill. Scans your hard drive for files that are still waiting to be overwritten and recovers them for you, retrieving your documents from the computer grave.
Please note that any additional data you put on your hard drive could overwrite the files, so if you are more cautious, download Disk Drill on another computer and save it to a flash drive. The last thing you want is for the download to overwrite the data you want to recover.
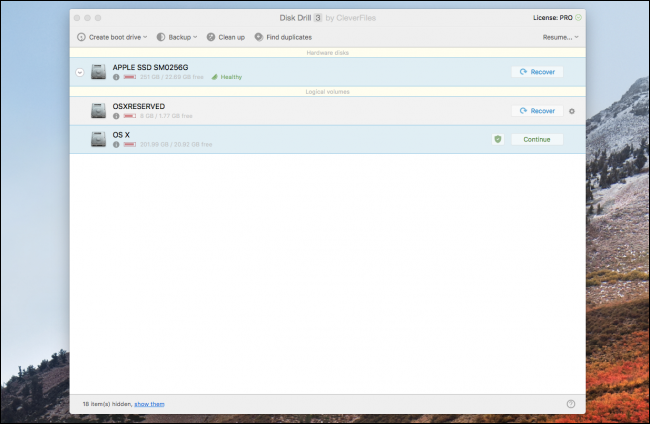
When I open it for the first time, Disk Drill will ask you to select your disk and perform a scan. Select OS X if you want to scan your main disk. The scan may take a few minutes, but when i finish, you will be presented with a list of recently deleted files. Many of these are garbage, but if you know what you are looking for (images, as an example) you can sort them and open the folders you want. Most of the files should be in your home directory with your name.
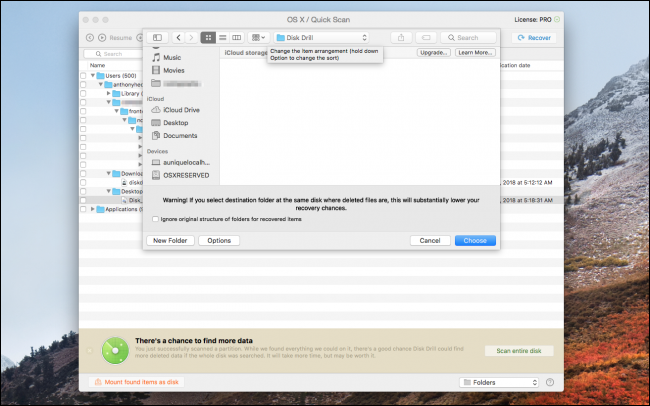
Once you have found the files, right click on them, choose option “you can remove single or multiple recordings at the same time in Voice Memos” and then select the directory where you want to save the recovered files. Ideally, you should use an external drive to prevent other files from being overwritten. For this demo, i used my hard drive and it worked fine.
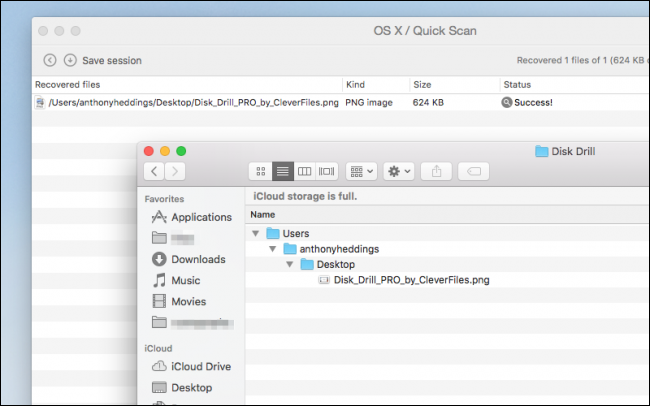
If everything goes fine, you should see the recovered files appear in the directory you chose. I deleted a screenshot on my desktop, I emptied the Trash and then I was able to recover it with Disk Drill, 100% intact.
Your chances of recovery will decrease for older files, since your computer had more time to overwrite them, so it is best to act quickly after discovering that you have accidentally deleted a file.
Please note that you will need to purchase the full version of Disk Drill to recover files. The free version just searches for files and shows you that they exist. Despite this, this is not so bad, because you can at least verify that your files are there before you buy the app.
The exception to this is that if you already have Disk Drill installed, you can use your “Recovery Vault” to keep track of deleted files and save a copy when you delete them. This ensures that whenever you accidentally delete something, I can always get it back, and it's a totally free feature. Despite this, uses additional hard drive space, so it is not for everyone.
Disk Drill is not the only data recovery tool out there. PhotoRec is a free application that can recover photos and other files, even though it's a bit clumsier to use. There are other business options, What Data rescue and EaseUS, but they all share the same price as Disk Drill. Usually, many of these tools will have low success rates and Disk Drill is good for being able to see which files are intact before purchasing.
Image credits: Shutterstock


