![]()
If an image is too large, you can reduce its size in two ways. You can change the size and reduce the resolution, or you can export it in a lower quality. Here's how to resize or reduce the size of a photo on Mac.
You don't need to use a third-party application to do this on your Mac. Can be done using the versatile built-in preview image editing application.
How to reduce photo size by reducing resolution
The quickest way to reduce the size of the photo is by reducing the resolution of the photo. If a web portal or application has an upper limit for the size of a photo file, first try reducing the resolution.
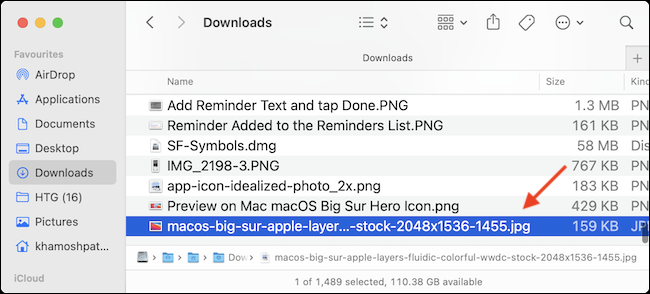
With the Preview app, you can do this for one image at the same time or for multiple images at the same time. First, open the Finder app and locate the image (or images) whose size you want to change. After, just double click the file to open it in Preview.
If Preview is not set as the default image viewer, right-click and choose Open With> Preview (We suggest that you take some time to determine Preview as the default image viewer, since it will make your life easier).
RELATED: How to change the default application for a file type in Mac OS X
Now that the photo is open in Preview, it's time to resize. Click the Edit button on the top toolbar (looks like a pencil icon). After, from the editing alternatives, click the Resize button (is the icon with quite a few pictures).

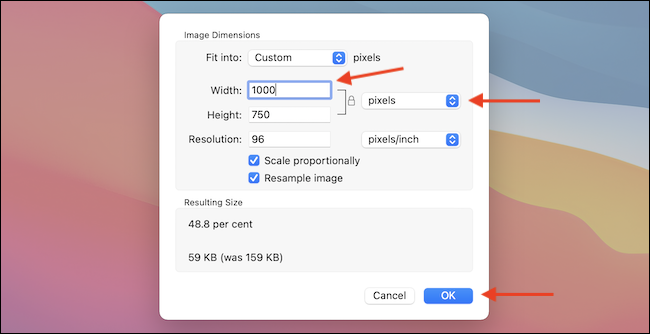
From the pop-up window, first, switch to option “Pixels”. After, change the width to around the 50% original size (can try different resolutions). Instantly, Preview will tell you the new file size of the image. Once you are satisfied with the result, Click the button “To accept”.
The preview will automatically save your changes to the image, but you can use Command option + s to manually update the image. Now, you can close the Preview window by clicking the red Close button in the upper right corner, or you can use the Command keyboard shortcut + instead.
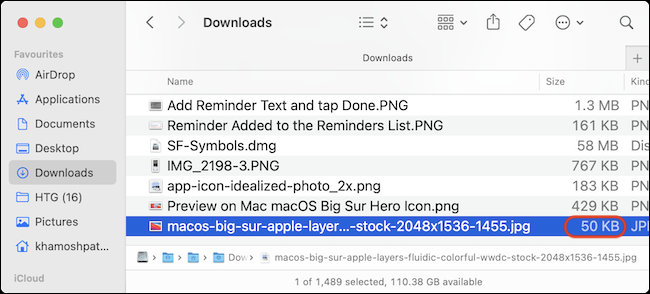
When you return to the Finder window, you will see the updated file size for the photo.
How to reduce photo size by reducing quality
What if you can't resize the image, but you still want to reduce the file size? The Preview app can also help you. You can export an image in JPEG format with lower quality (this function does not support PNG format, but we offer a solution for that in the next section).
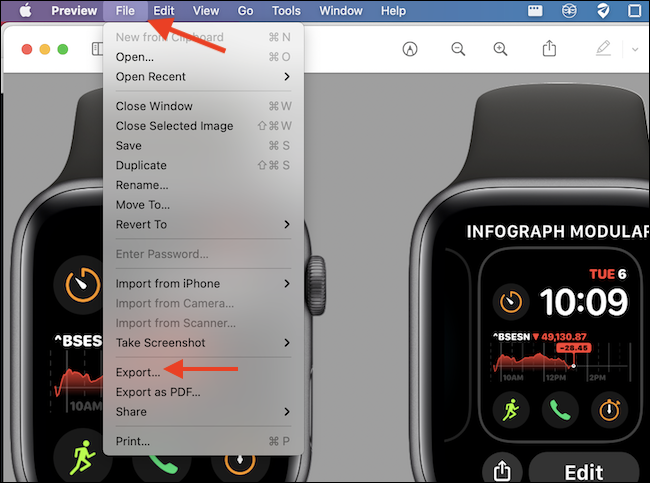
To start, open the image file in Preview. After, from the menu bar at the top, click the option “File” and select “To export”.
Once you switch to “JPEG” as a file format, you will see a slider “Quality”. Here, slide to the side of “Less” quality and you will see the file size update in real time.
How Preview is exporting a new image, you can edit photo name and destination from above. Once you are satisfied with the size, Click the button “Keep”.
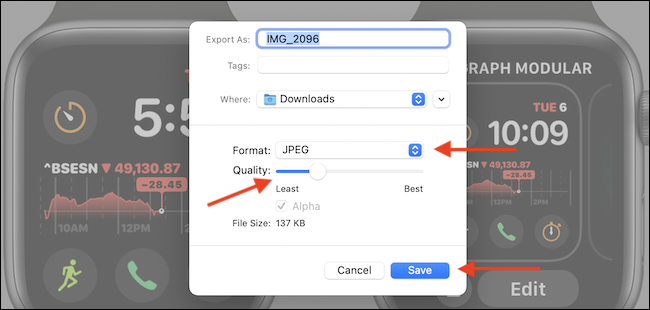
Go to the designated folder in Finder and you will find the exported image ready to use. In our tests, we were able to reduce a PNG photo of 371 KB to a JPEG image of 52 KB without having to resize or experience significant quality loss.

How to compress photos using TinyPNG
Don't want to resize a photo, but you still want to use PNG format? Try TinyPNG.
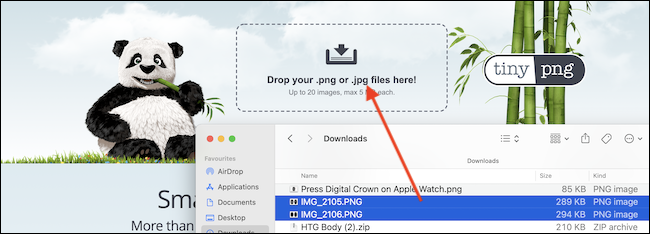
This web portal uses intelligent compression to compress the PNG or JPEG file by up to a 90% without any noticeable loss in visual quality. Just open the TinyPNG website and drag and drop the image files into the upload area.
Once compression is done, you can download the photos individually or as a ZIP file.
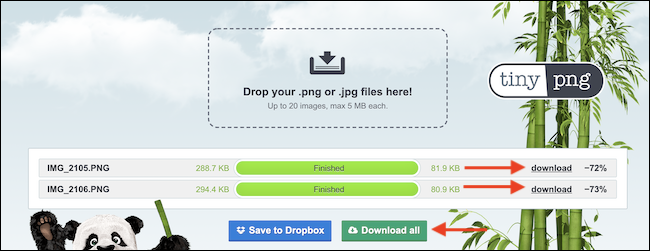
As you can see in the screenshot above, TinyPNG managed to compress the file from 299,7 KB a solo 81,9 KB. That's a decrease in 72% in file size!
Speaking of compressing files, the Preview app isn't just limited to photos. You can also use the Preview application to compress PDF files!!
RELATED: How to compress PDF files and make them smaller


