
Photos, previously iPhoto, is the default macOS app for organizing photos. Photos integrates with iCloud and keeps everything in sync on your devices. It does much of the work on its own and keeps your library reasonably tidy without you having to do much, but it also has support for user-created albums and other organizational features.
Set up and import your photos
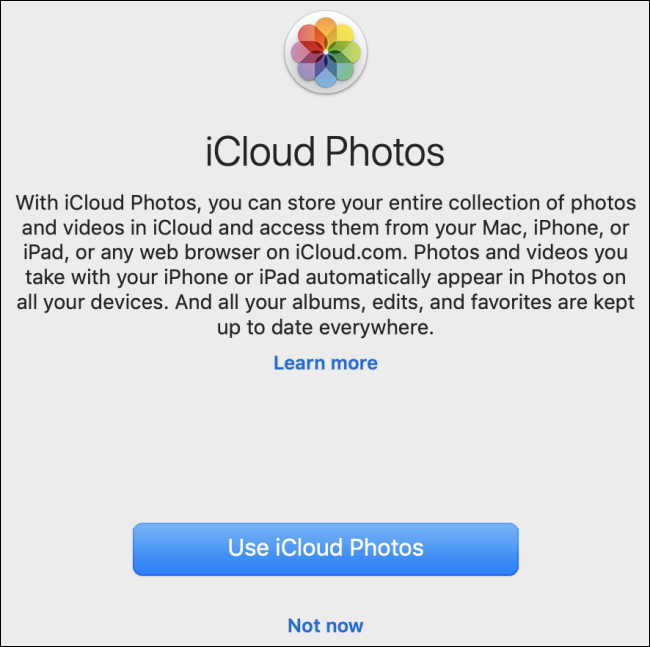
When you open the app for the first time, you are asked if you want to link your iCloud. If it does, go ahead and click on the “Utilizar fotos de iCloud”. If it is now, click on the link “Not now”. You can always set it up later if you don't want to do it right away.
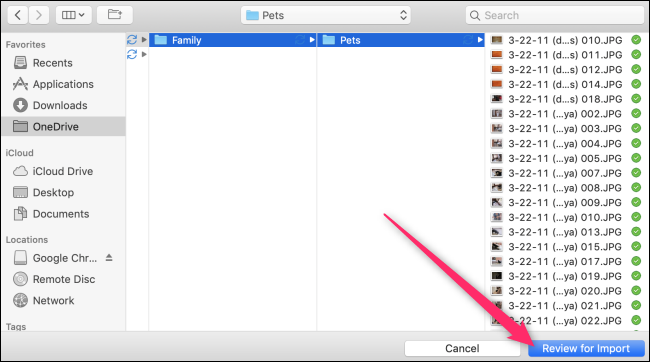
Thereafter, you will find yourself in the main Photos window. If you have other images that you want to import into Photos, select File> Import or press Shift + Command + I to open the import window. You can import photos by dragging them from Finder, taking them out of a camera or selecting a folder and later choosing the images to import.
Here, we have selected a folder from which to import. Once you select your folder, Press the button “Revisar para importar”.
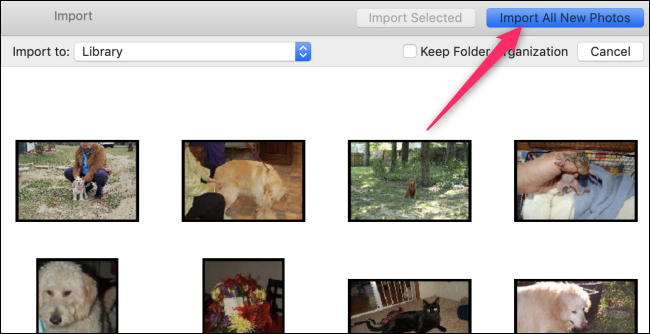
Next, you can review the images you want to import. If you want to import all the images in the folder, go ahead and click on the “Importar todas las fotos nuevas”. Opposite case, puede elegir solo las imágenes que desea importar y posteriormente hacer un clic en el botón “Import selected”. By default, images are only imported into your library, but you can also import them into a new album if you want to stay a little more organized. Will still add all photos to your main photo library.
If you have your photos in iCloud or on your iPhone, Photos will sync them all together. Choose Photos> Preferences or hit Command-Comma to open settings:
Using photos
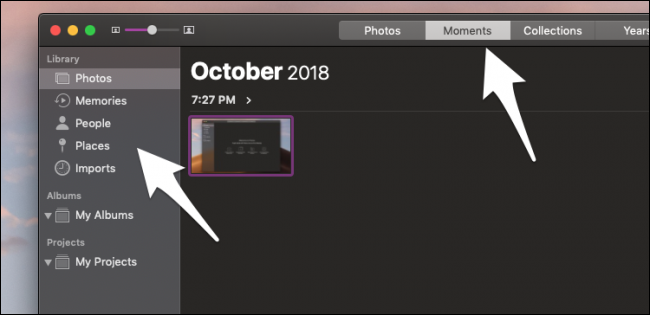
Photos is great for keeping your photos organized. You can use the sidebar to control the view you see, what includes:
- Photos: All your photos, uncategorized.
- Regards: Scan your library, searches for groups of images and groups them. If you are looking for photos of a particular event, Look here.
- People: Scans faces in your images and groups them, useful for searching for pictures of friends and family.
- Places: Sort by location. If you are looking for photos you took while on vacation, it will be easy to find them here.
The top bar changes the sort method: Photos shows everything, Moments is probably the most useful, Collections shows a more extensive view and Years is only useful for large libraries.
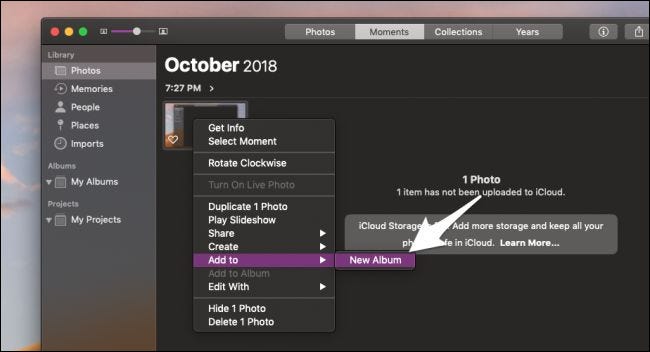
All this organization is automatic, which is great for most people. Despite this, you can also manually sort your photos by creating new albums for them. Right click on any photo and choose Add To> New Album:
By default, Photos names the album with the date, pero puede cambiarle el nombre haciendo clic con el botón derecho y seleccionando “Cambiar nombre del álbum” o presionando la barra espaciadora mientras el álbum está seleccionado en la barra lateral.
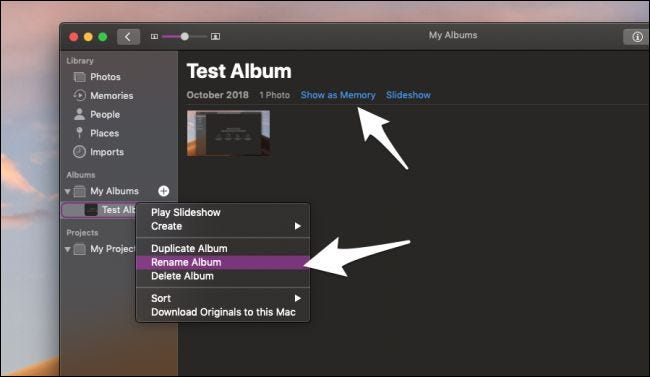
Puede agregar manualmente el álbum a sus recuerdos seleccionando “Mostrar como memoria” and subsequently “Agregar a recuerdos” on the bottom. Please note that you can add the same album multiple times to memories, but you can delete them if you do it by accident.
Projects is another interesting section, that allows you to do many creative things with your photos, how to make calendars and cards:
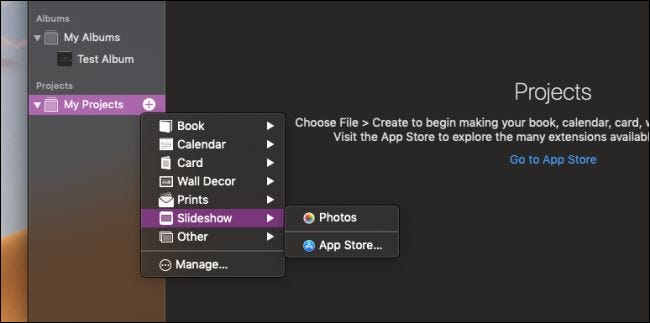
All of them, except slide show, use external plugins, that you will need to download from the App Store. Despite this, most of them are free.
Edit pictures
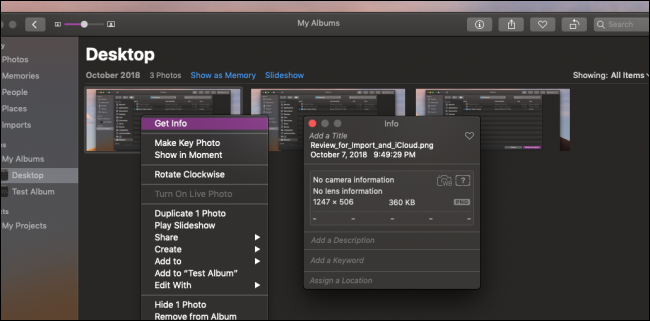
If you want to edit the details of a photo, right-click and select “Get information”. Here, you can edit metadata like description and location the photo was taken.
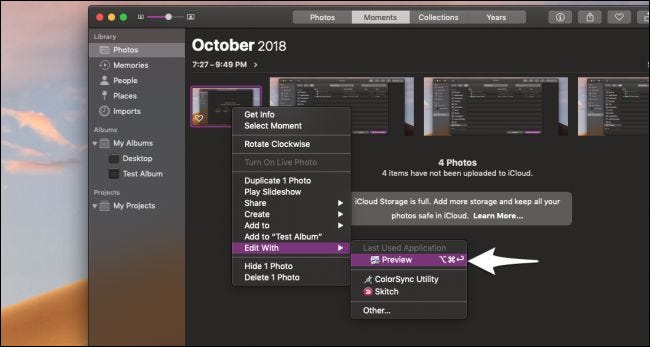
For real photo manipulation, you will need an external program. Puede hacer un clic con el botón derecho en una foto y señalar el menú “Editar con” para ver una lista de las aplicaciones de edición que puede utilizar. If you don't have any installed, the built-in preview app has some basic tools. You can send a photo to Preview by selecting Edit With> Preview.
From there, you will need to press this button to perform any actual editing.
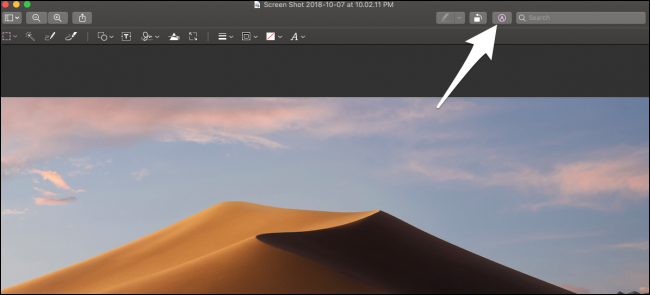
Once i'm done, press save and it will automatically update the photo in Photos, no need to import more.


