You can easily monitor and manage multiple Linux computers with Cockpit, a browser-based dashboard and administration tool. It is autonomous, easy to set up and easy to use. We'll show you how to get started.
Manage multiple Linux servers
If you have multiple Linux computers or servers to monitor, has a challenge. This is especially true if some of them run as headless systems with no monitor attached.. As an example, You may have remote or rack-mounted servers located in different buildings or a collection of Raspberry Pi scattered around your house.
How can you monitor the health and performance of all of these?
Si utiliza Secure Shell (SSH) to connect to them, can execute top or other terminal-based monitoring tool. You will get useful information, but each tool has its own specific area of interest. It is inconvenient to have to switch from one tool to another to see the different metrics of your remote Linux computer.
Unfortunately, there is no convenient way to jump between the different tools that give you some of that information. At the same time, if you have administrative or repair tasks to do, you must make a new connection to the remote computer or close the monitoring application. After, you must use your existing SSH session to run your admin commands.
Cabin links many common monitoring and management requirements in a browser-based console, making it easy to monitor and maintain multiple Linux computers.
Cockpit gets its information from application programming interfaces (API) that already exist within Linux. Because the information comes directly from the source, there is no personalized collection or generation of information, so it can be considered unadulterated.
Cockpit and user accounts
Cockpit uses your Linux login credentials, so it is not necessary to configure users within it. To log in to Cockpit, just use your current username and password. If you have accounts on different Linux computers that use the same username and password, Cockpit will use those credentials to connect to remote machines.
Of course, using the same password on different computers is a security risk and is considered bad practice. Despite this, if you are only working with local computers that are not exposed to the internet, you can conclude that the risk is small enough.
Despite this, a far superior solution is to configure SSH keys on each computer and subsequently allow Cockpit to use them to connect to remote computers.
RELATED: How to create and install SSH keys from the Linux Shell
Cabin installation
Cockpit is located in the central repositories of the main Linux families. To install Cockpit on Ubuntu, write the following:
sudo apt-get install cockpit

In Fedora, the command is:
sudo dnf install cockpit

In Manjaro, you must install Cockpit and a package called packagekit. This platform independent package sits on top of the native package management system of a Linux distribution. Provides a consistent API for application software.
Developers can write software that works with packagekit, and your software can communicate with the package manager of any Linux distribution. This means that they do not have to write a version that works with dnf, another for pacman, and so on.
Fortunately, packagekit is already installed on Ubuntu and Fedora, therefore simply type the following two commands:
sudo pacman -Sy cockpit

sudo pacman -Sy packagekit

Launch booth
To get started with Cockpit, open your browser, type the following in the address bar and then press enter:
localhost:9090
Next, you should see the cockpit login screen. If you see an error telling you that the site cannot be entered or that the connection was rejected, you might need to type the following commands to enable and start the Cockpit daemon:
sudo systemctl enable cockpit

sudo systemctl start cockpit

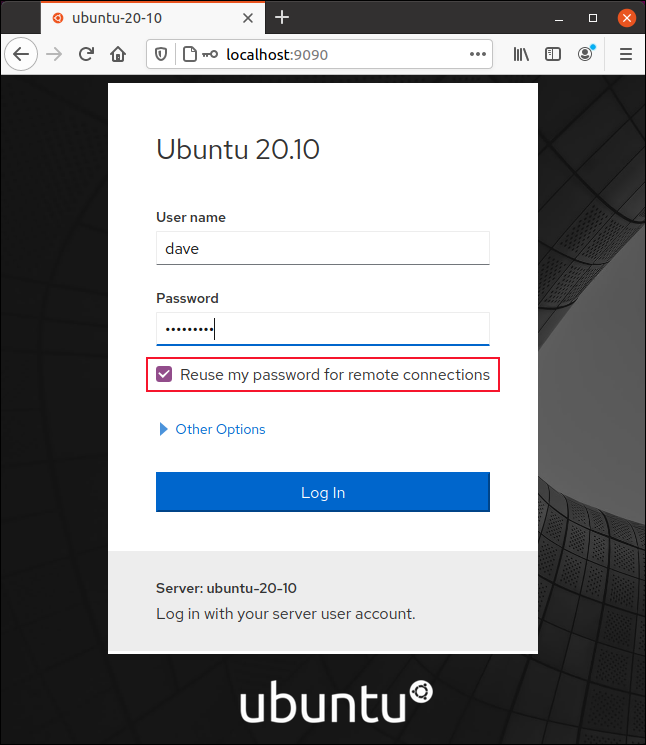
When Cockpit starts, the login screen appears; just log in with your existing Linux credentials.
To connect to other computers with these same credentials, select the check box next to “Reuse my password for remote connections”. If you are using SSH keys to connect to remote computers or you are not going to monitor other machines remotely, you can leave this box unchecked.
The summary
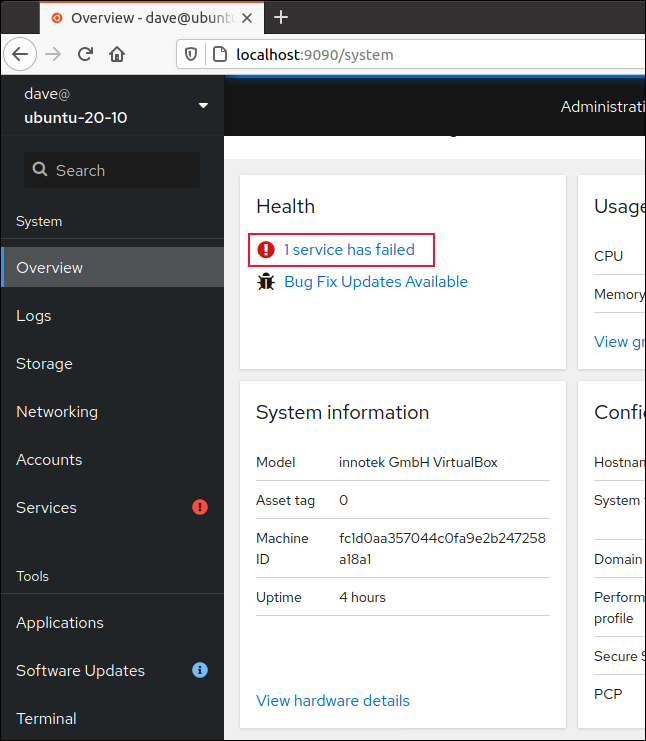
The cockpit web page is fully responsive and will adjust sensibly if you resize your browser window.
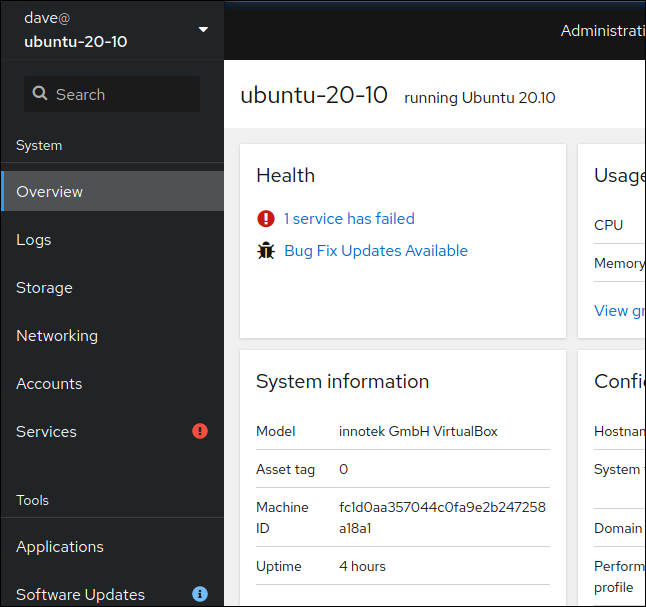
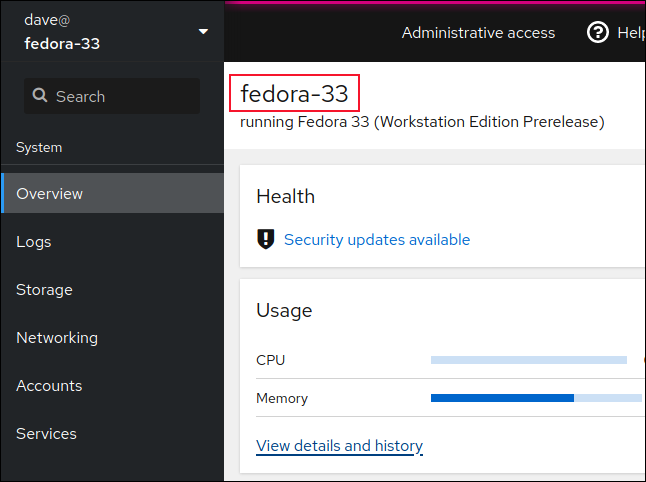
The main screen presents a list of task categories in a sidebar on the left, while the rest of the window contains information related to the selected category. The default view is “General description”.
Cockpit also adapts when you use it on a phone.
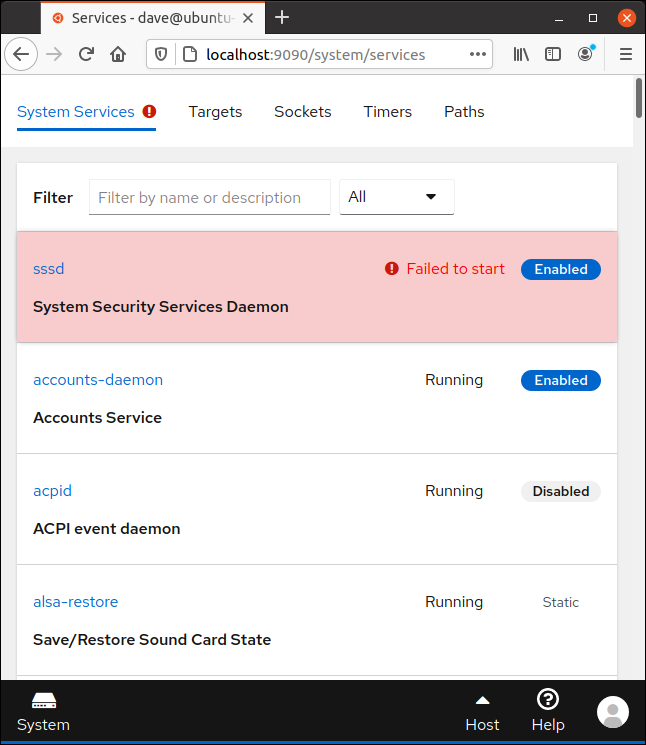
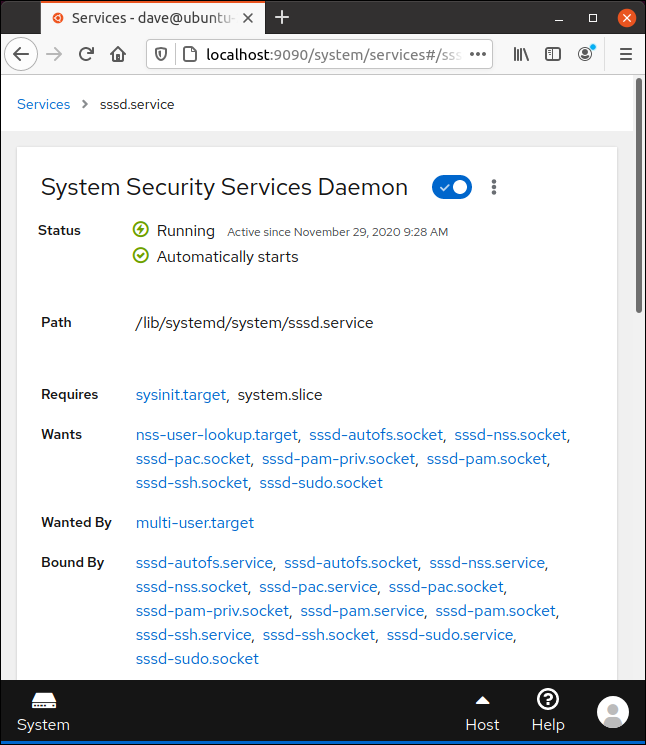
On our test computer, we see that an error has been flagged because a service failed.
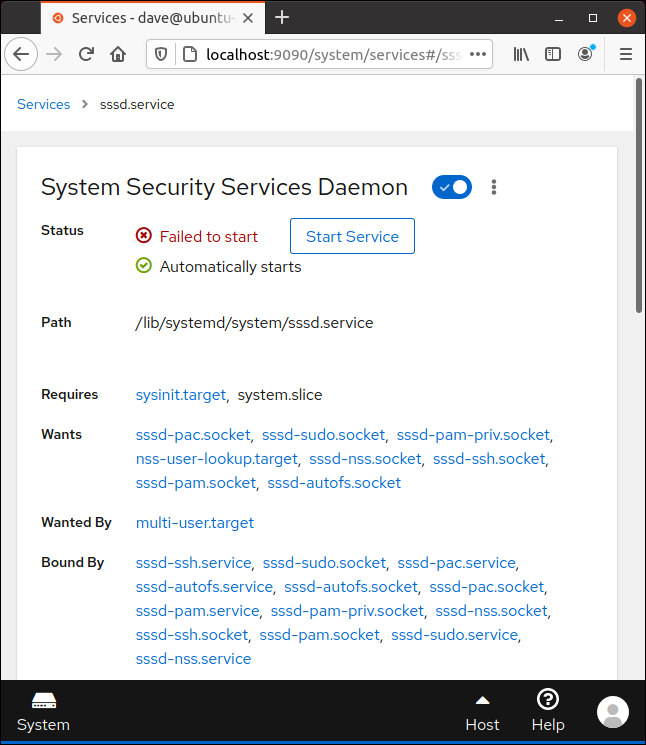
that appears and “1 service failed” to move to the System Services view. the System Security Services Daemon (SSSD) has not started, so we click on the link “sssd” to move to the sssd control page.
that appears and “Start Service”.
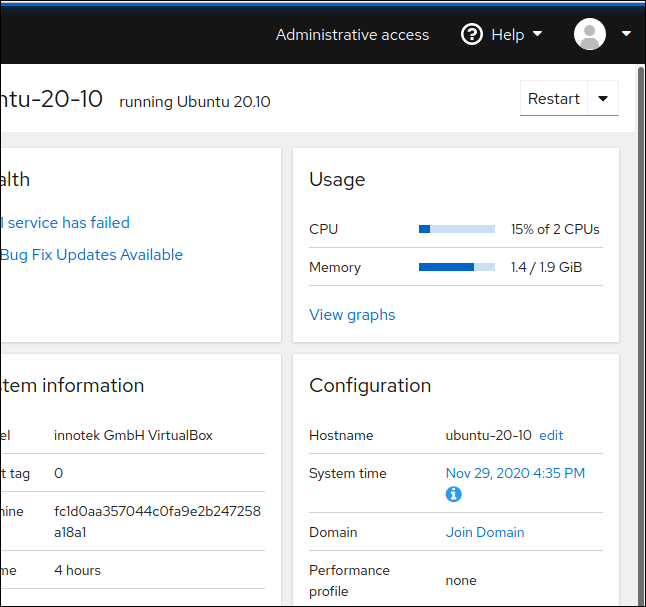
With the service running, we can explore more of our monitored system.
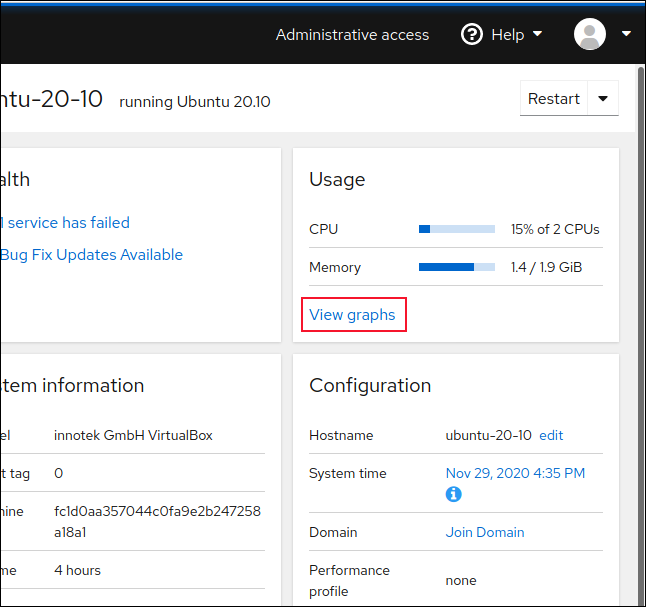
You can click on “General description” if visible in the sidebar; If that is not the case, just click the System icon and then click “General description”.
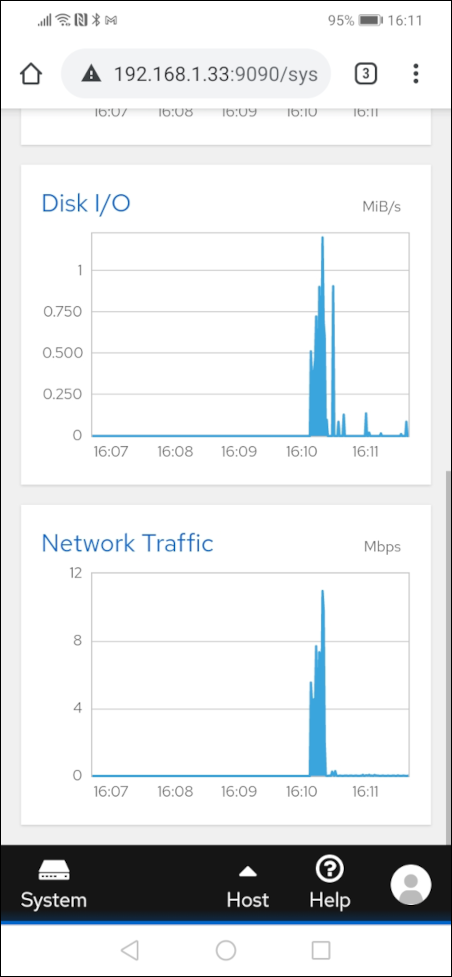
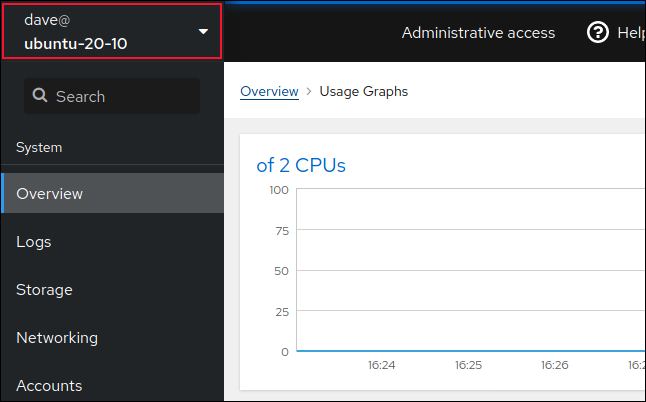
CPU and memory graphics
On the CPU and memory usage panel, click on “just click the System icon and then click”.
The following graphics are shown:
- “Uso de CPU”: The combined CPU usage for the total number of CPUs.
- “just click the System icon and then click”: RAM and swap usage.
- “E / S disk”: The hard drive reads and writes.
- “just click the System icon and then click”: All traffic to and from the computer.
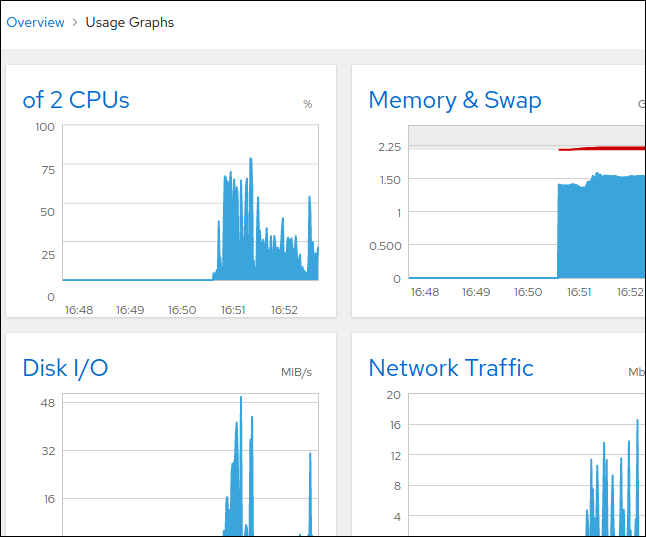
Despite this, if you click on the name of each chart, you can see more detailed information:
- If you click “E / S disk”, just click the System icon and then click “Storage” in the sidebar.
- If you click “just click the System icon and then click”, just click the System icon and then click “Networking” in the sidebar.
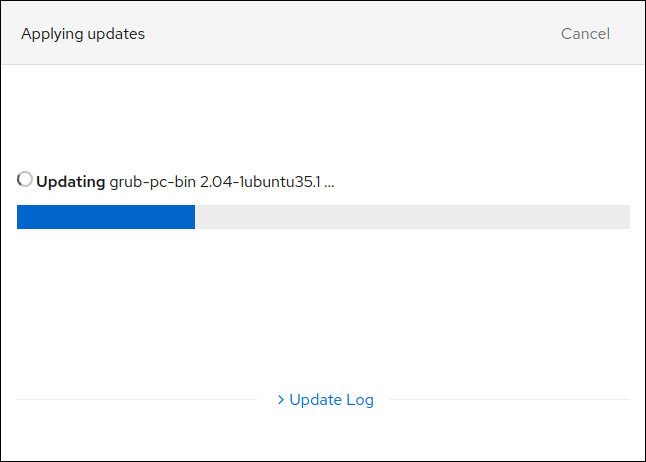
Software updates
You can click on “Software updates” just click the System icon and then click.
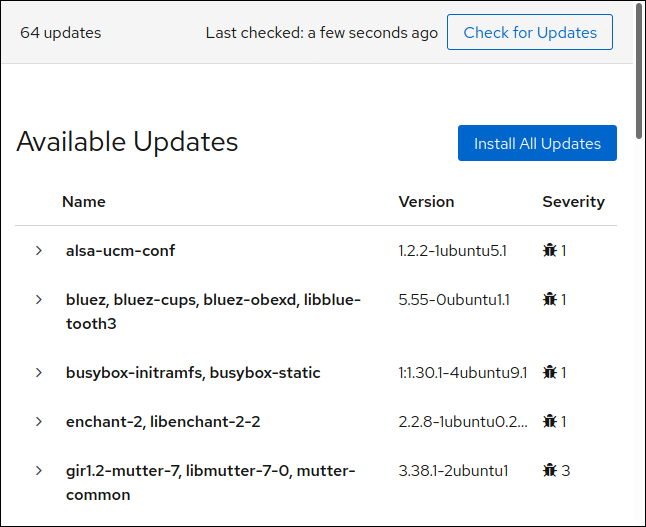
To install them, just click “just click the System icon and then click”.
Multiple computer monitoring
Before trying to monitor another computer, perform the following steps:
- Install Cockpit on the other computer and then log into Cockpit to verify that it is working. The browser interface does not need to be running on the remote machine when you are monitoring it remotely. Despite this, if it does, demonstrate that the Cockpit has been installed correctly and is fully operational.
- Use SSH to remotely connect to the other computer you're monitoring it from. Confirm that you can use SSH on the remote computer and then log in with your current ID and password or SSH keys.
Making sure these two steps work as expected makes monitoring a remote computer a breeze. Remember, if you are connecting to remote hosts with the same username and password as your monitoring computer, has to just click the System icon and then click “Reuse my password for remote connections”.
On the monitoring computer, click the drop-down arrow next to host.
Click on “just click the System icon and then click”.

Enter the details of the remote computer (either an IP address or a hostname). A colored highlight appears at the top of the browser to help you identify which computer you are looking at.
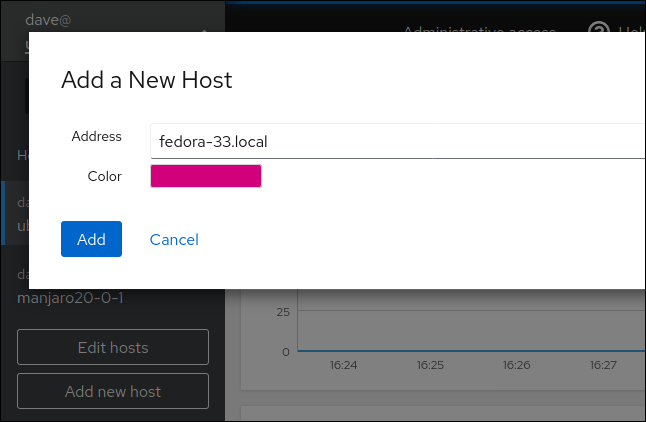
Click on “Add” when you are ready. You should now see the remote computer in the list of available hosts; click the drop down arrow next to it.
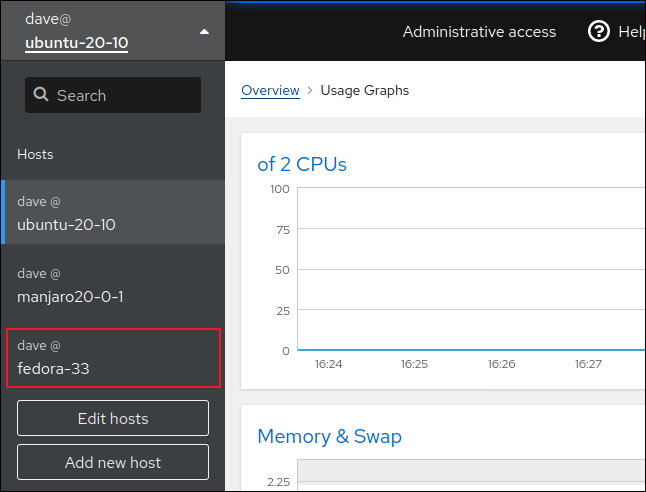
Click on the new remote computer to monitor it.
The name of the host you are monitoring will be displayed. The highlighted color at the top of the browser window will also be the one you selected when you added that host.
Many more features
There is much more you can with Cockpit, including the following:
- Get the overall health status of a computer.
- Monitor performance with CPU activity, the memory, disk and network.
- Change the hostname.
- Connect the host to a domain.
- open a window at the terminal.
- Manage software updates, user account, services and demons, partition tables, network links and bridges and IP addresses.
- Create a RAID device.
Plus more features are on the way. The developers have a working proof-of-concept version that shows a combined view of multiple hosts at the same time. Cockpit is not the most sophisticated management tool, but it has many functions, it is easy to use and will satisfy most needs.


