
Microsoft GraphAPI is a powerful tool. We can not only use it to create tools to automate our workloads, we can also have access to new functions before.
In this post, We will learn to explore and use Microsoft GraphAPI for Azure AD.
Prerequisites
You must meet some prerequisites before we can start. Before starting with the steps described in this post, make sure you meet or have the following:
- a Application registration in AzureAD with the following GraphAPI permissions:
- Directory.Read.all
- Directory.ReadWrite.All
- Id. Of application (id. From customer) and client secret for the above application registration
- Your tenant name
- A computer with PowerShell version 5.1 the superior
With that out of the way, let's learn to explore GraphAPI.
Read the documentation
Microsoft GraphAPI is well documented and the best place to start when discovering how to use a new function is to start at the reference documentation de la API de Microsoft Graph.
This specifies how to use a specific function and what permissions you need to use it. At this moment there are two versions of GraphAPI: v1.0 and the beta API. They may appear identical at first, but the beta API contains a lot of new features that have not been released yet. Also note that beta API functions are subject to change at any time.
Permissions
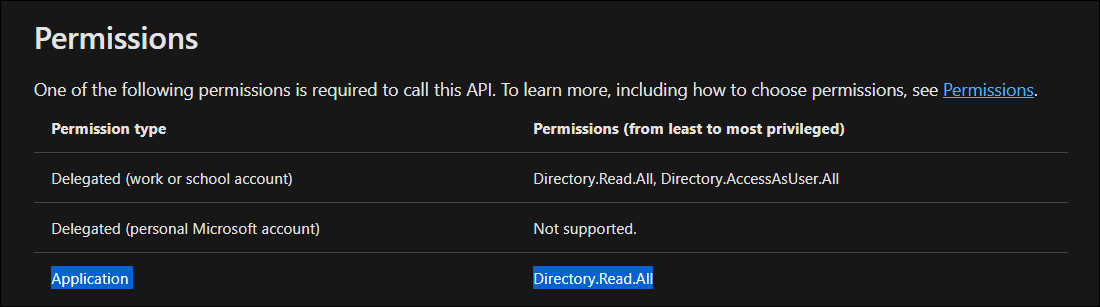
Permissions are an important part of exploring and using the Graph API permissions; Fortunately, All the permissions you need to perform a certain action are specified in the reference documentation of that function.
The next screenshot shows the permission required to use the getDirectoryObject function. And how you will access it as an application, need the Directory.ReadAll Excuse me.
Now that you have the basics, let's start by requesting an access token, a temporary secret that we will use to access the Microsoft Graph API.
Request an access token
The access token is a secret that you can request with our client identification and client secret. This is the token that you must in the requests towards GraphAPI.
To request an access token, must be authorized against the tenant's oauth2 endpoint by publishing its app id and app secret.
Edit the following script, replacing AppId, AppSecret y Tenant name, and run it in PowerShell to request an access token:
Add-Type -AssemblyName System.Web

$AppId = 'CHANGEME'
$AppSecret="CHANGEME"
$Scope = "https://graph.microsoft.com/.default"
$TenantName = "CHANGEME.onmicrosoft.com"

$Dirección url = "https://login.microsoftonline.com/$TenantName/oauth2/v2.0/token"

$Body = @{
  client_id = $AppId
	client_secret = $AppSecret
	scope = $Scope
	grant_type="client_credentials"
}

$PostSplat = @{
    ContentType="application/x-www-form-urlencoded"
    Method = 'POST'
    Body = $Body
    Uri = $Dirección url
}

# Request the token!
$Request = Invoke-RestMethod @PostSplat
Now, if you take a look at the $Request variable, you can see what our access token contains, as well as the type and expiration time.
PS51> $Request

token_type expires_in ext_expires_in access_token
---------- ---------- -------------- ------------
Bearer           3599           3599 eyJ...............
the expires in it's in seconds, which means you need to request a new token in an hour or it will stop working.
Let's save the access token in a variable for future use and then start making requests to GraphApi:
PS51> $AccessToken = $Request.access_token
Your first GraphAPI request
It's time for your first chart request!! The simplest requests to start with are requests that use HTTP GET. GET commands are for information only, so you don't have to worry about spoiling anything.
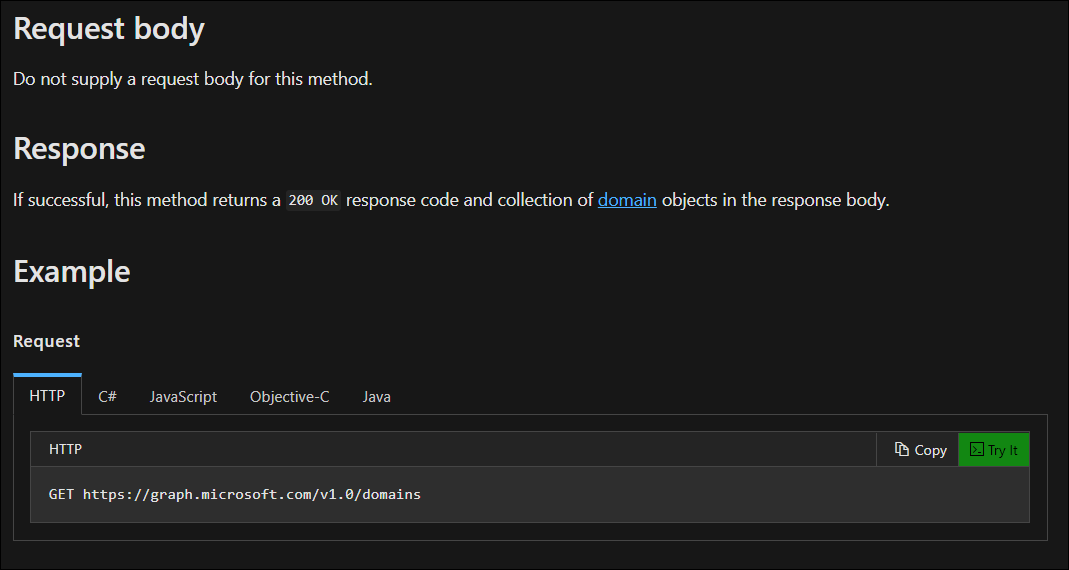
We'll start with a simple request that lists the domains linked to our tenant. And remember, read the documentation. All information about how to use graphAPI functions can be found in the documentation.
It is possible that you have noticed in the documentation of the List of domains command that you can call via HTTP GET, the default method when used Invoke-RestMethod:
With this information, you can start building the request. For that, we need to create a Authorization header that contains “Bearer
$Headers = @{
    Authorization = "Bearer $AccessToken"
}

$Uri = "https://graph.microsoft.com/v1.0/domains"

$Result = Invoke-RestMethod -Headers $Headers -Uri $Uri
You now have the list of domains in the $Result variable, but trying to generate the value of the $Result The variable will result in this:
PS51> $Result

@odata.context                                     value
--------------                                     -----
<https://graph.microsoft.com/v1.0/$metadata#domains> {@{authenticationType=Managed; availabilityStatus=; id=contoso.com; isAdminManaged=True; isD..
The result of the query is usually in the value result property. You can get the full result by simply generating that property instead.:
PS51> $Result.value

authenticationType               : Managed
availabilityStatus               :
id                               : contoso.com
isAdminManaged                   : True
isDefault                        : True
isInitial                        : False
isRoot                           : True
isVerified                       : True
supportedServices                : {Email, Intune}
state                            :
passwordValidityPeriodInDays     : 2147483647
passwordNotificationWindowInDays : 14

authenticationType               : Managed
availabilityStatus               :
id                               : contoso.onmicrosoft.com
isAdminManaged                   : True
isDefault                        : False
isInitial                        : True
isRoot                           : True
isVerified                       : True
supportedServices                : {Email, OfficeCommunicationsOnline}
state                            :
passwordValidityPeriodInDays     : 2147483647
passwordNotificationWindowInDays : 14
Now that you have learned the basics of getting information with GraphAPI, it's time to learn how to use filters.
Use filters
It's great to be able to recover all available data. And even when it can work, it's terribly ineffective. A good practice is to request only the data you need. To achieve this in GraphAPI, we can use filters.
A good candidate for testing filters is searching users. They have many attribute names common to local Active Directory and, in general, has at least some of them.
The URI to get all users is *https://graph.microsoft.com/v1.0/users*, but we want to filter this request. You can do it by adding the $ filter =
A filter (generally) consists of a property operator and a value like this:
property operator 'value'
If you now want to search for all users with the First name “John”, the following URI should be used:
https://graph.microsoft.com/v1.0/users?$filter=givenName eq 'John'
Then, if you want to use PowerShell to make this request, the code should look like this:
$Uri = "https://graph.microsoft.com/v1.0/users?`$filter=givenName eq 'John'"
$Result = Invoke-RestMethod -Headers $Headers -Uri $Uri
Notice the backtick earlier $filter—That's to escape the dollar sign - otherwise, PowerShell would have interpreted it as a variable.
Take a look at the value property and you will see all users with a given name of “John” in Azure Active Directory:
PS51> $Result.value

businessPhones    : {5554012}
displayName       : John Doe
givenName         : John
jobTitle          :
mail              : [email protected]
mobilePhone       :
officeLocation    :
preferredLanguage : en
surname           : Doe
userPrincipalName : [email protected]
id                : 7fd22087-ec0a-47a1-91fb-0a7d8e6f0c
‘EQ’ is not the only operator, does not have (born), coincide, contains, less / greater than (lt / gt), and much more. Although it is outside the scope of this post, more information about the operators is available in the documentation. In addition there is more extensive documentation available on the different properties of the filter in the property. documentation about each type of object.
Create a user
Now that you have the basics, let's perform a write operation and create a user. For that, you need to know how to build the data and where to PUBLISH it. You can see an example of how to do that by going to the Microsoft Graph API documentation and looking at “New account”:
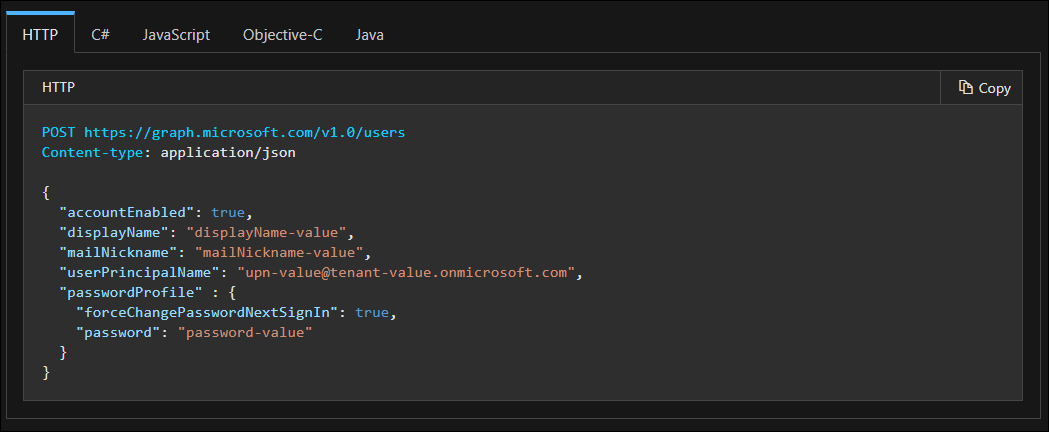
You can see that you need to send the data as a POST request and that the content type must be of app / json. You can also see a JSON representation of the data; the goal here is to create a PowerShell object that creates that JSON when ConvertTo-Json is used in it.
Let's try:
$Body = [PSCustomObject]@{
    accountEnabled = $True
    displayName = "Jane Doe"
    mailNickname = "janedoe"
    userPrincipalName = "[email protected]"
    passwordProfile = @{
        forceChangePasswordNextSignIn = $True
        password = "Hunter221!"
    }
}
In a hurry $Body | ConvertTo-Json will result in a JSON similar to the one shown in the documentation. What remains now is to convert it to JSON and POST it to GraphAPI URI with the correct content type:
$Body = [PSCustomObject]@{
    accountEnabled = $True
    displayName = "Jane Doe"
    mailNickname = "janedoe"
    userPrincipalName = "[email protected]"
    passwordProfile = @{
        forceChangePasswordNextSignIn = $True
        password = "Hunter221!"
    }
}

$BodyJson = $Body | ConvertTo-Json
$Uri = "https://graph.microsoft.com/v1.0/users"

Invoke-RestMethod -Uri $Uri -Headers $Headers -Method POST -ContentType application/json -Body $BodyJson
If you now go to our Azure Active Directory Console and take a look, will find the newly created user:

You have already created your first user using GraphAPI!
conclusion
Microsoft GraphAPI is a powerful tool and will allow you to further automate your environment. And not just when it comes to Azure Active Directory, but in addition to most of the SaaS services offered by Microsoft.
At the same time, considering the movement “serverless” that uses Azure Functions or AWS Lambda in an event, it is feasible to create minimalist and event driven functions to automate as much as is feasible in your environment. All without needing to include large libraries in your functions.


