
Most of us have: we deploy temporary virtual machines in Azure. Something that many of us have also done is forgetting to delete the resources attached to those virtual machines when deleting them. This can lead to unwanted costs running into the hundreds of dollars if you're not careful..
In this post, we will learn how to implement virtual machines in Azure and erase all traces of them when we finish using Terraform.
Prerequisites
You must meet some previous requirements to be able to follow this post:
- Have the Azure CLI installed.
- Be an Azure subscription administrator (or similar), allowing you to use it to create resources and resource groups.
With this out of the way, let's start by downloading and installing Terraform.
Terraform installation
Terraform can be installed in different ways. In Windows, the easiest way is to use choco:
choco install terraform
On the Macintosh, is enabled through Brew:
brew install terraform
More information about the installation of Terraform is enabled in the Terraform documentation.
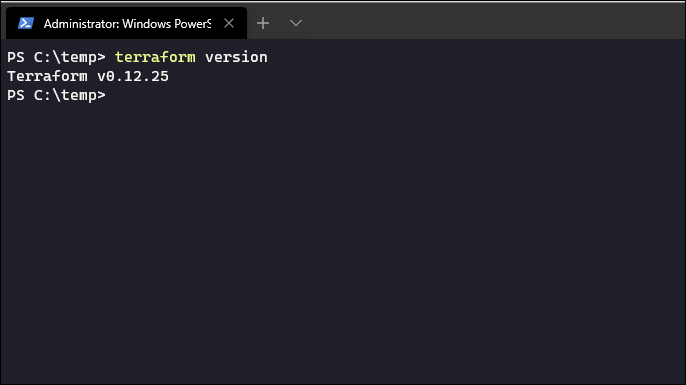
Assuming everything went well with the installation, you can confirm it works by running the command terraform version.
Now that you have confirmed that terraform works on your machine, time to authenticate to Azure subscription via Azure CLI.
By authenticating
To authenticate and determine the subscription in the Azure CLI, must log in. Open a terminal and type:
az login
And then, after authenticating, list all your subscriptions by entering:
az account list
If you have multiple subscriptions available, copy the subscription id of the correct one and enter:
az account set --subscription="COPIED_SUBSCRIPTION_ID"
You have now configured the Azure CLI to use your subscription. (This is the subscription that terraform will use later in addition). Now is the time to create the terraform template that we will use to implement our VM.
Create the Terraform template
The Terraform template is a simple text file with the end of the file .tf. It has a JSON-like syntax and can be easily read and generated. The template consists mainly of two parts: Providers (who handle communication with the service in which you want to implement) and the resources that the provider creates.
We start by creating a file called vm.tf in an empty directory. Terraform will need an empty directory to be able to write the configuration status later.
Now, open that file with your favorite text editor and add the provider:
provider "azurerm" {
  version   = "=2.11.0"
	features {}
}
This will tell Terraform that you want to use the AzureRM provider (to create azure resources) and what should be the version 2.11. It is essential to specify the version number as the functionality between different versions can vary greatly..
Once you have written that to the text file, it's time to add our Azure resource group. Terraform also sees this as a resource:
resource "azurerm_resource_group" "resourcegroup" {
        name = "test-vm"
        location = "westus"
        tags = {
            project = "some_test_project"
        }
}
The above code creates a resource group named “test-vm” found in the western region of the USA. UU. Also add a label with the name of the project.
To run a virtual machine successfully, we also need a network. And because Terraform is made for Infrastructure as code (IaC), it is also enabled as a resource:
resource "azurerm_virtual_network" "network" {
    name                = "${azurerm_resource_group.resourcegroup.name}-network"
    address_space       = ["10.0.0.0/16"]
    location            = azurerm_resource_group.resourcegroup.location
    resource_group_name = azurerm_resource_group.resourcegroup.name

    tags = azurerm_resource_group.resourcegroup.tags
}
This creates a virtual network. It also uses a variable in the Name parameter. If you look closely, you will see that it refers to the group of resources that we previously defined:
"${azurerm_resource_group.resourcegroup.name}-network"
That means the virtual network will be given the name test-vm-network. We also do the same with the location, the resource group name and tags.
Next, it is time to establish the subnet in which we will place the VM, using the same methods using variables as before:
resource "azurerm_subnet" "subnet" {
    name                 = "${azurerm_resource_group.resourcegroup.name}-subnet"
    resource_group_name  = azurerm_resource_group.resourcegroup.name
    virtual_network_name = azurerm_virtual_network.network.name
    address_prefix       = "10.0.2.0/24"
}
This creates a subnet called test-vm-subnet.
Now, let's define the NIC that the VM will also use:
resource "azurerm_network_interface" "vm1-nic" {
    name                        = "vm1-NIC"
    location                    = azurerm_resource_group.resourcegroup.location
    resource_group_name         = azurerm_resource_group.resourcegroup.name

    ip_configuration {
        name                          = "vm1-NicConfiguration"
        subnet_id                     = "${azurerm_subnet.subnet.id}"
        private_ip_address_allocation = "static"
        private_ip_address            = "10.0.2.4"
    }

    tags = azurerm_resource_group.resourcegroup.tags
}
For this case, we will use a static IP address, referring to the subnet using a variable.
AND, finally, but not less important, the definition of the virtual machine itself:
resource "azurerm_virtual_machine" "vm-1" {
  name                  = "vm1"
  location              = "${azurerm_resource_group.resourcegroup.location}"
  resource_group_name   = "${azurerm_resource_group.resourcegroup.name}"
  network_interface_ids = ["${azurerm_network_interface.vm1-nic.id}"]
  vm_size               = "Standard_B1ms"

  delete_os_disk_on_termination = true

  storage_image_reference {
    publisher = "MicrosoftWindowsServer"
    offer     = "WindowsServer"
    sku       = "2019-Datacenter"
    version   = "latest"
  }
  storage_os_disk {
    name              = "vm1-osdisk"
    caching           = "ReadWrite"
    create_option     = "FromImage"
    managed_disk_type = "Standard_LRS"
  }
  os_profile {
    computer_name  = "vm-1"
    admin_username = "demoadmin"
    admin_password = "$om3s3cretPassWord"
  }

  os_profile_windows_config {
      enable_automatic_upgrades = "true"
      provision_vm_agent = "true"
  }

  tags = azurerm_resource_group.resourcegroup.tags
}
The above code will provide an Azure virtual machine running Windows Server 2019, using the resources we previously defined. You will have an administrator with the username “demoadmin” who has the password “$ Om3s3cretPassWord”. The rest of the parameters are self explanatory, and you can find many more in the Terraform AzureRM documentation.
Now, all that's left is to save the .tf-file implementing this template in Azure using TerraForm!
Start and implement with TerraForm
Now that we have the template in order, open a terminal and go to the directory where you saved the .tf-file to:
cd c:tempterraform
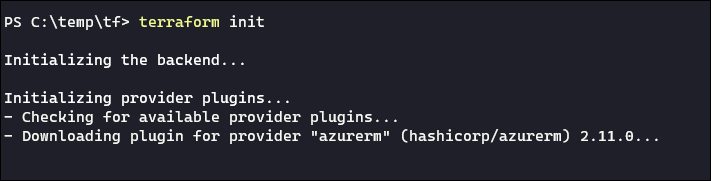
Now we must start TerraForm. This will download the resource module for AzureRM and look for errors in the .tf-proceedings:
After initialization is complete, you are ready to apply the template by running terraform apply.
terraform apply
TerraForm will now create a new resource group in Azure, networks, subnets and, In summary, the virtual machine itself. The state and all the resources you have created are stored in the .terraform folder from your current directory. Because, Don't delete that folder if you want to wipe the resources cleanly later!!
Once you are done with your test virtual machine and want to destroy it, just run:
terraform destroy
This will delete all the disks, nics, subnets, resource groups and others that you created when you ran terraform apply, and you don't have to worry about forgetting to delete the fragments that are left in terms of Azure resources.
conclusion
Using TerraForm for only minor tasks like this is incredibly neat. It shows that it is not necessary to have an Infrastructure as code (IaC) fully implemented for productive use. Also reduces cost by clearing unused resources in Azure. Hopefully, this has proven to be helpful to you, And he even started his journey to IaC!!


