Word makes it possible for you to hide text so that you can read or print your document as if the text was not there. This may seem pointless, Why not just remove the text if you don't want someone to read it? But hidden text has some interesting uses. Let's take a look at what hidden text is (and what is not), why you might want to hide the text and how to do it.
What is hidden text?
Word hides text through formatting marks, the same way you would format text as bold or italic. Instead of removing the text, word applies a formatting mark that means “do not display this text”.
Because hidden text is just standard text with formatting marks applied, anyone who can edit the document can search for hidden text and display it. Then it is no a security measure, and you should never rely on hidden text to prevent a certain person from reading something in your document. If you don't want someone to read something you've written, delete the text entirely or do not send the document to you.
Why would you want to hide the text?
Hiding text has its uses. If you want to print a document without text appearing, you can do it with hidden text (even if make sure you have not enabled the option to print hidden text). A great use for this is if you have a document that you want to print and deliver to an audience, but you want your copy of the document to contain notes just for you.
In addition, you may want different people to review different parts of a document., and the hidden text presents a simple way to show only those parts that you need a person to review (as long as you don't mind seeing hidden text if you find that).
It can also hide images and other embedded objects, which can reduce printing time and cost, as well as making your document more readable if you just want pure text.
Note: you can only do this in the Word client on your computer. The Word Online and Word apps for Android and iPhone do not allow you (still) hide text.
How do you hide the text?
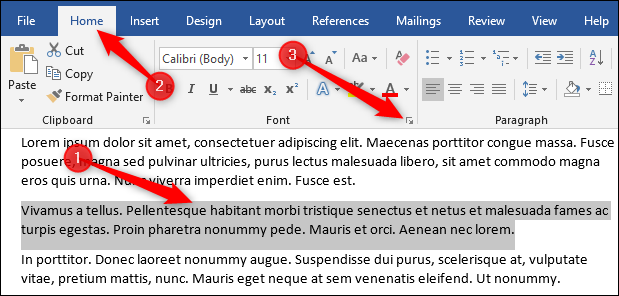
Hiding text is as simple as it sounds. Select the text you want to hide, switch to tab “Beginning” on the ribbon and then click the arrow at the bottom right of the group “Source”.
This opens the Source window. Activate the option “Hidden” and then click the button “To accept”.
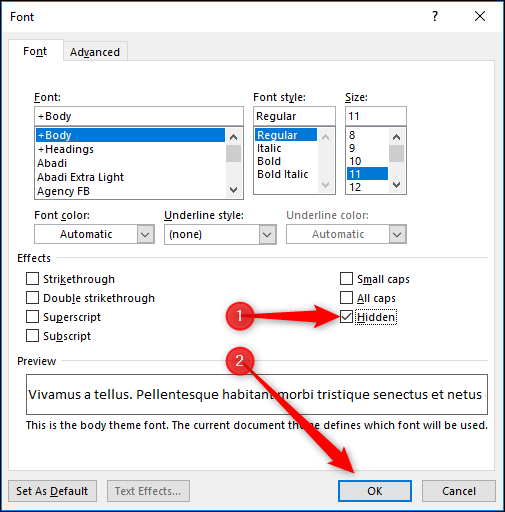
That's all about it. The text you selected is no longer visible as if you removed it from the document. If all that mouse click is too much for you, also there is a keyboard shortcut to hide the text: select your text and press Ctrl + Shift + H.
How do you hide objects like images?
Hide objects the same way you hide text: selecting them and marking the field “Hidden” in the Font panel (o using Ctrl + Shift + H). this method only works if your object uses the default text wrapping option of “In line with the text”, which is when Word treats an object as just another piece of text. If your object has a different text wrapping option, but you still want to hide it, you will have to hide the paragraph to which the object is anchored. This hides the anchored object at the same time. (Not sure what a “pinned object”? Do not worry, we covered it with our guide to placing objects in Word).
How is the text displayed?
To display the text, reverse the procedure. Select it and press Ctrl + Shift + H or uncheck the field “Hidden” in the Font panel.
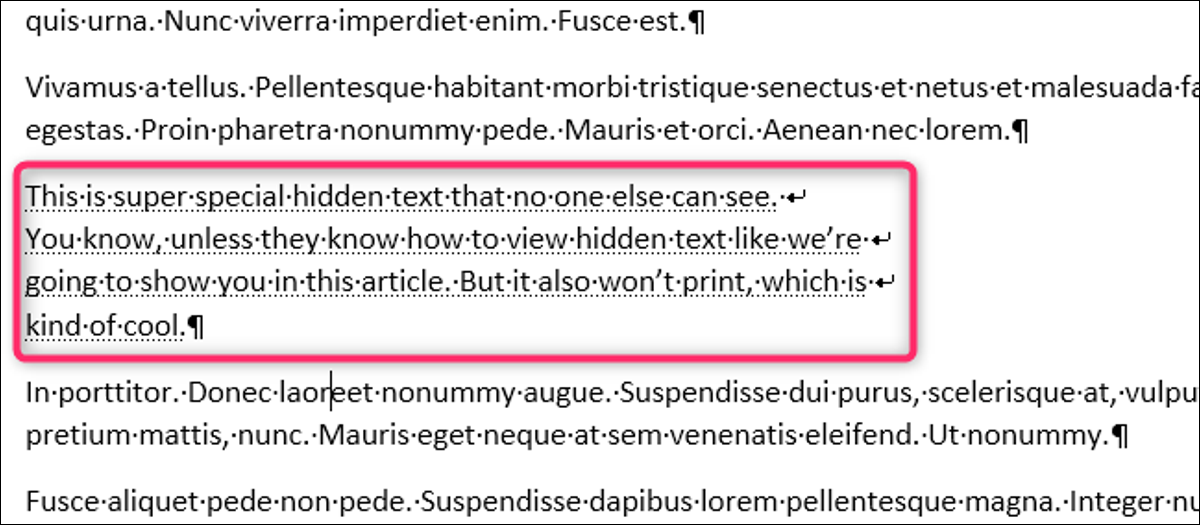
But, How do you select the hidden text in the first place if you can't see it? Because hidden text is just normal text with formatting marks applied, should show all formatting marks. This shows your hidden text.
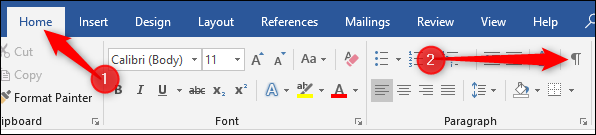
To show all formatting marks, click Start> Show / Hide.
You can also press Ctrl + Shift + 8 If you prefer. This shows all the non-printable characters in your document, as paragraph marks, spaces and tab characters.
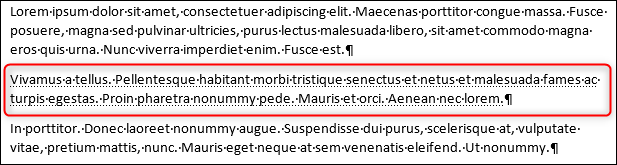
Hidden text has a dotted line underneath to distinguish it from regular text.
Select hidden text and use Ctrl + Shift + H or the Font> Hidden setting to show the text.
If you have a lot of hidden text to display, or you don't want to search for hidden text in the whole document, No problem. Select all the text in the document by pressing Ctrl + A and then use any of those same methods (Ctrl + Shift + H or Source> Hidden) to show all hidden text in the entire document (except for headers or footers, that you ‘ I will have to do it separately).
Click Start> Show / Hide the press Ctrl + Shift + 8 again to hide the formatting marks.
We mentioned at the top of this post that you can only hide / display text in Word client and not in Word Online. The same goes for formatting marks, what you can do in the Word desktop app.
Can you remove all hidden text at the same time?
Yes, and previously we showed you a way to do this using Find and Replace. You can use that method to select which hidden text to remove, but if you just want to ensure that any hidden text is removed, go to File> Find Problems> Inspect Document.
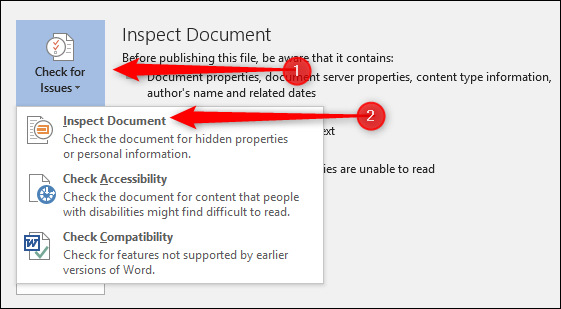
The option you are looking for is located at the bottom and is called “Hidden text”. Make sure the other options are disabled (unless you want to use them at the same time) and click the button “Inspect”.

If the Document Inspector finds hidden text, displays a button “on a dark blue shadow background”. Click here to remove all hidden text in the document.
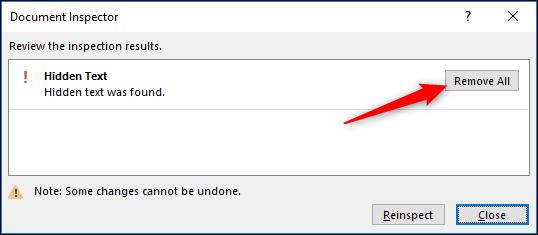
You cannot undo this action, so make sure you really want to remove all hidden text or have saved another copy of the document first.
Does this work with shared documents?
Si utiliza OneDrive o SharePoint, you can share your documents with other people. Hidden text is still hidden when people you have shared it with view the document in Word Online because Word Online does not allow you to hide / show text or show formatting marks. They can still download a copy and view it in the Word app. When they do, they can click Start> Show / Hide and view hidden text. One more time, do not share a document with hidden text unless you agree that those people can see what you have hidden.


