
Adding a page border to your document can be a subtle way to make your Microsoft Word documents stand out.. Can customize the style, the thickness and number of pages of a border to apply to your Word document.
Add a page border in Microsoft Word
Creating a page border in Microsoft Word will depend on your version of Microsoft Office. For Office 365 y Office 2019, open a Word document and click the tab “Design” on the tape.
If you have an older version of Office, click on the tab “Design” O “Page design” instead.
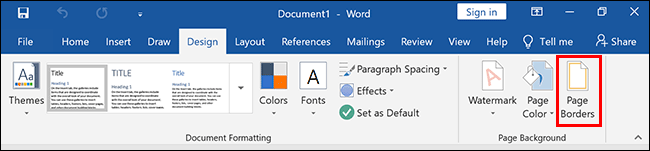
From here, Click the button “Page borders”, in the section “Background” of the tape.
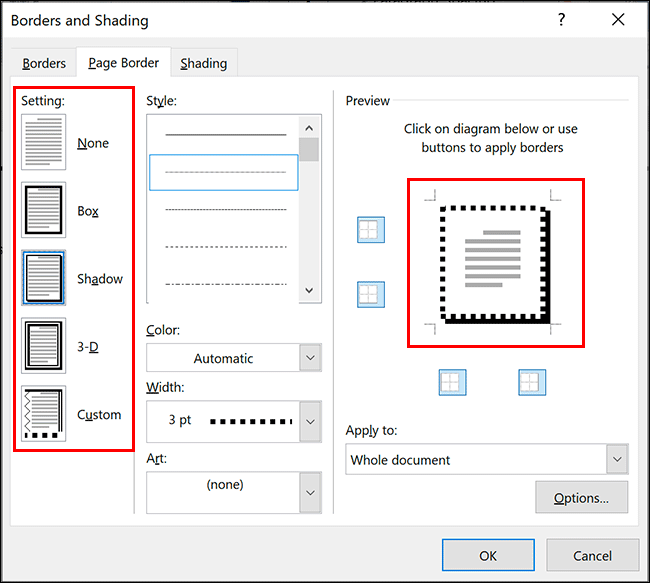
By default, picture “Edges and shading” that opens should default to the tab “Page Border”. If that is not the case, click on that tab to enter your border settings.
Click on “Chart” to add a typical box border to your document. You can use the style, the default border color and width, or change this setting in the various drop-down menus.
Click on “To accept” to apply the page border to your Word document.

By default, this border style applies ten to each page.
The edit view of your document will update to show the newly applied border.
Alternative page border styles and formatting
Box page format is the default style, but there are alternative border styles and formatting options available for you to use instead.
The border of the box is the most basic and adds a solid line with no shadow to your page. Even that can be customized with different types of lines, widths and colors.
Custom page border styles and settings
At the same time from the edge of the picture, you can also apply a border with a shadow, a style edge “3D” and a custom border with mix and match options for each side.
To do it, select one of the alternatives in the section “Setting” in the tab “Page Border” in the dialog box “Edges and shading”. The chosen style will appear for you to review in the section “Preview” before applying it to your document.
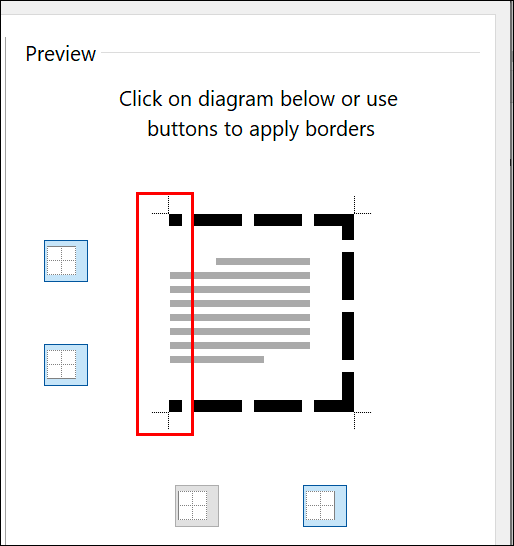
Apply or erase individual border lines
If you want to apply or erase individual border lines from your document (as an example, erase the edge of the bottom of a page), you can do it from the section “Preview”.
If a border is applied, click the border line to remove it. To reapply it, click on the line to make it reappear.
Apply custom border lines
By clicking on individual border lines in the section “Preview”, additionally you can apply different styles to different lines when border settings are selected “Personalized”.
To do this, Click the button “Personalize” in the column “Setting”, select a line style from the drop down menu “Style” and then click one of the border lines in the box “Preview”.

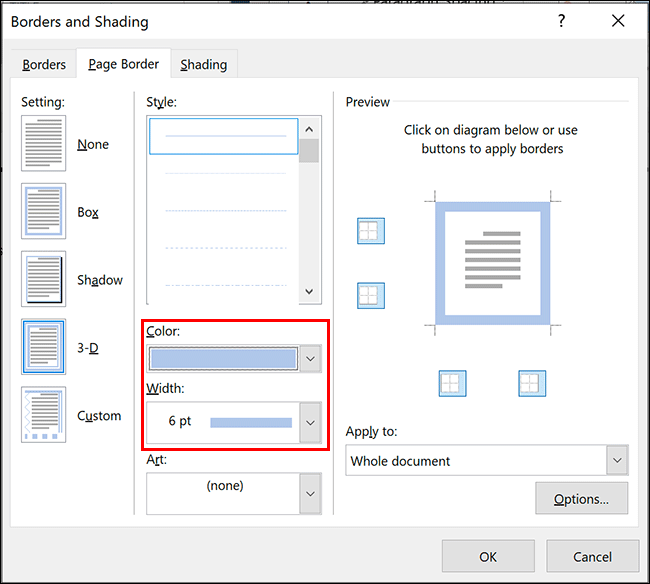
Change the width and color of the border
You can make your border stand out with different border colors and widths. A wider border will make your border stand out more in your document.
Edge widths start from 1/4 pts and go up 6 ptos. A preview of the chosen border width will appear in the section “Preview”. You can choose any color you choose, either from the predefined alternatives or using the RGB color table.
To change the width or color of the border, select the chosen alternatives from the dropdown menus “Color” and “Width”. If you have border settings applied “Personalized”, you will need to click on each border line in the section “Preview” to apply the selected settings to those lines.
Add a border to a single page
Microsoft Word will generally apply border styles to each page, but you can apply a page border to an individual page or exclude certain pages as its cover.
To do this, enter the setup menu “Page Border” (Design / Design / Page Layout> Page Borders) and click the drop down menu “Apply to”.
If you want to apply a border to an individual page, make sure you are active on that page in the Word document before entering the menu.
In the drop-down menu “Apply to”, select “This section” to apply it to the page you are on today. To apply your border to the first page only, select “This section – only the first page” O, to apply to all pages except the first page, select “This section – All except the first page” instead.
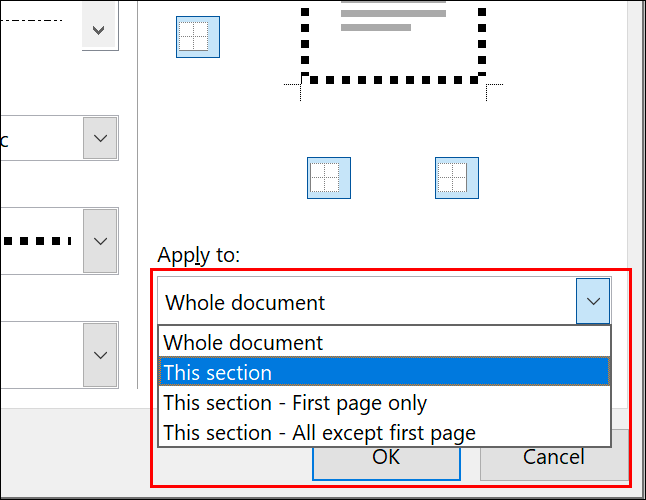
Click on “To accept” to save when ready. This will subsequently apply your page border to the pages you have specified, instead of the whole document.


