
Microsoft Word is known to be a great word processor, but you can also use it to create your own calendar. You can design one from scratch or select one from Word's calendar template library. That's how.
Create a calendar from scratch in Word
Creating a calendar from scratch in Microsoft Word takes a bit more time and energy than just using one of the templates, but if you want the full design credit for your calendar, will want to build it from scratch.
RELATED: How to insert a calendar into PowerPoint
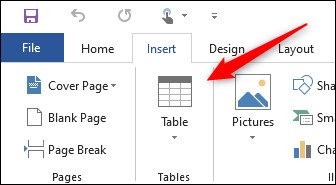
To do this, open a word document and insert a table by clicking the option “Table” in the group “Boards” of the tab “Insert”.
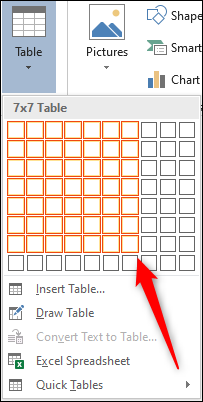
A drop-down menu will appear. Mouse over the grid to increase or decrease the number of rows and columns in the table. For the calendar, you will need a table of 7 × 7, therefore hover your mouse over the appropriate square on the grid and click on it to insert the table.
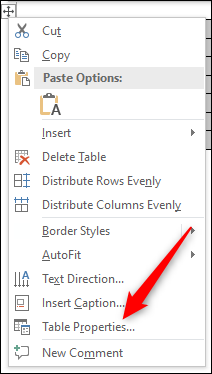
With the table 7 × 7 inserted, it's time to start formatting the calendar. First, we want to adjust the height of the table squares. Mouse over the table and an icon will appear in the upper left corner. Right click on that icon.
![]()
Next, select “Table Properties” on the menu.
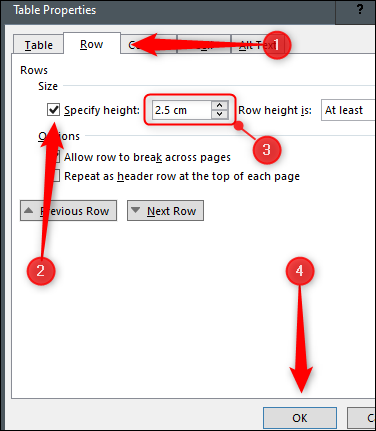
The window will appear “Table Properties”. Click on the tab “Line”, check the box next to “Specify height” and enter the desired height in the text box. 2,5 cm is a comfortable height, but you can adjust it according to your preferences.
Note: Depending on your region, Word can use inches instead of centimeters by default. Make sure to specify cm in the text box.
Press "OK" when done.
The height of the boxes inside your table is now set. Despite this, we also want to make some adjustments in the two upper rows. Select the top two rows by clicking and dragging over them.
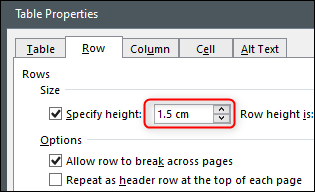
Next, adjust the height of these two rows (right click table icon> Table Properties> Row> Specify height) to make them a little smaller than the others. 1,5 cm is an ideal height, but you can adjust yours to suit your preferences.
You can also click and drag the row to adjust the height if you decide that one is too big for your liking..
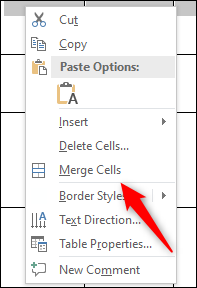
Now that the height of the cells in our table is set, it's time to enter the name of the month in the top row. To do this, we will need to combine the cells of the top row. Click and drag the mouse over each cell in the top row and right click on the selected area.
A drop-down menu will appear. Click on “Merge cells”.
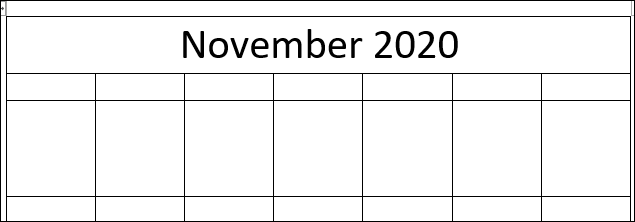
With cells in the top row merged, enter the name of the month. Use the alignment and font style that matches your design preference.
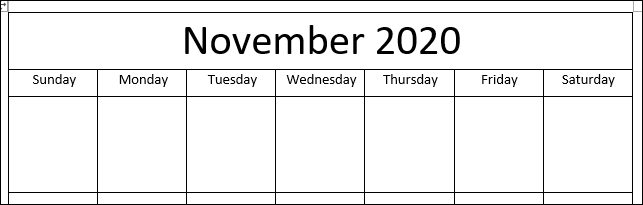
After, enter the days of the week in the second row. Again, format the text to match the style you have in mind.
To end, enter the days of the month in each respective box.
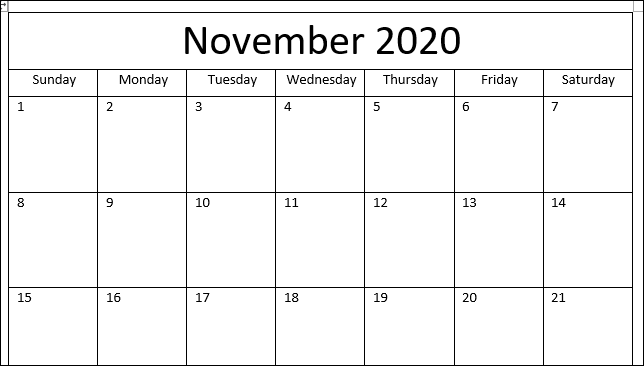
You can repeat the above steps for each month of the year to complete the calendar.
If you want an attractive calendar, but you don't have time to create everything from scratch, you can always select one of the many Word templates.
Use a calendar template in Word
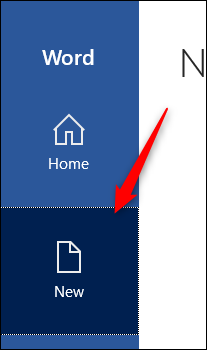
Word has a good variety of calendars available. To select one, open Microsoft Word and click on the tab “New” in the left panel.
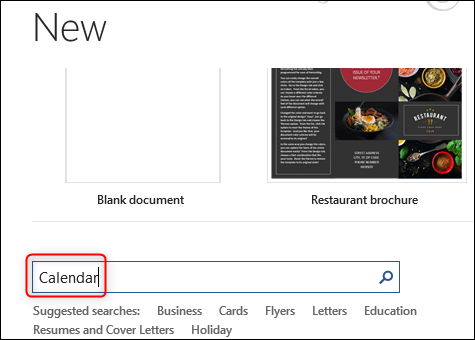
Next, scribe “Calendar” in the online templates search box.
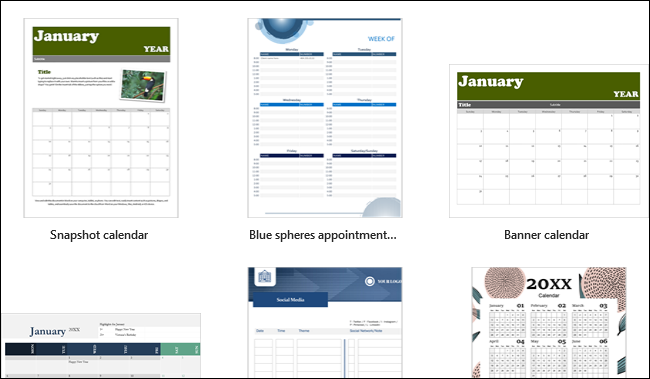
Scroll through the library and select a calendar template you like by clicking on it.
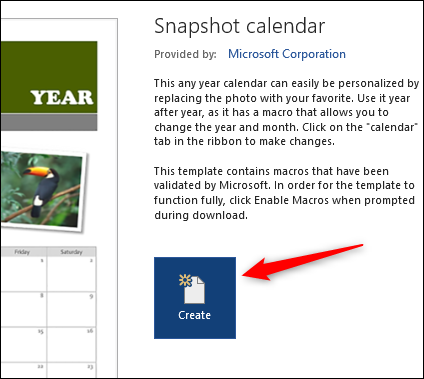
A pop-up window will appear showing a preview and description of the calendar. Click on “Create”.
Once selected, you can adjust the calendar with Word's style tools.
This is just one of the many things you can design with Microsoft Word. You can also create anything, from flow charts to brochures, using Microsoft's suite of design tools. If you need a simple design and don't have the time to invest in learning sophisticated design software like Photoshop, you can probably do it in Word.


