![]()
Confused when managing audio devices in Windows 10? To facilitate the accreditation of your audio devices, assign custom names to your devices. We will show you how to do this on your PC.
Why rename your audio devices
The main reason for renaming your audio input and output devices is to make your devices easily recognizable. As an example, if you use multiple speakers and microphones with your PC, and if each one has a unique name, you can quickly choose the device you want to use in your applications.
Renaming devices also helps to fix problems with them, since you can select the correct device while trying to fix the problem.
RELATED: How to record from multiple audio devices simultaneously
How to rename audio output devices in Windows 10
To use a custom name for your speakers in Windows 10, first open the Settings app. Do this using the Windows keyboard shortcut + i.
In the window “Setting”, click on “System”.
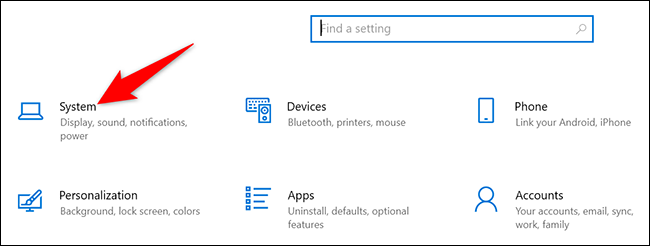
In the page “System”, in the sidebar on the left, select “Sound”.

In the right panel, you will see a section of “Departure”. Here, click drop down menu “Choose your output device” and select your speaker from the list. Subsequently, below this drop down menu, click on “Device properties”.

You are now on the page “Device properties”. At the top of this page, click in the text field and type a new name for your speakers. Subsequently, next to this name field, click on “Rename”.
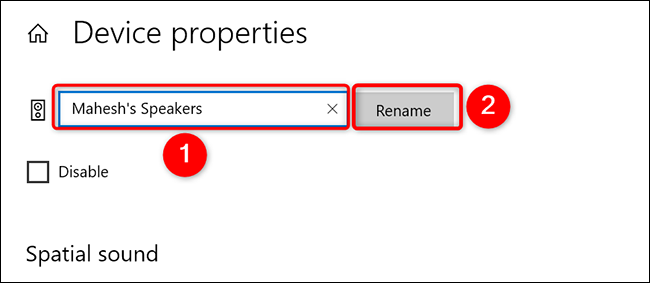
And that is. Windows 10 will not show any kind of confirmation message, but rest assured that your device is renamed. You will now see the new name of your device in your apps, como Audacity.
How to rename audio input devices in Windows 10
The procedure for renaming the microphones is practically the same as for renaming the speakers..
Start by opening the Settings app on your Windows PC 10. Do this by pressing the Windows keys + i simultaneously.
In Settings, click on “System”.
In the page “System”, in the left sidebar, click on “Sound”.
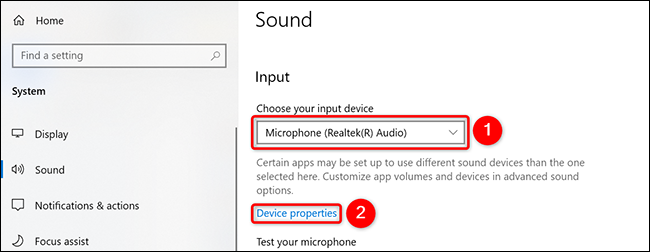
In the right panel, you will see a section of “Entry”. Here, click drop down menu “Choose your input device” and select your microphone in the list. Subsequently, below this drop down menu, click on “Device properties”.
You will see a page of “Device properties”. In this page, at the top, click in the text field and enter a new name for your microphone. Subsequently, next to this text field, click on “Rename”.
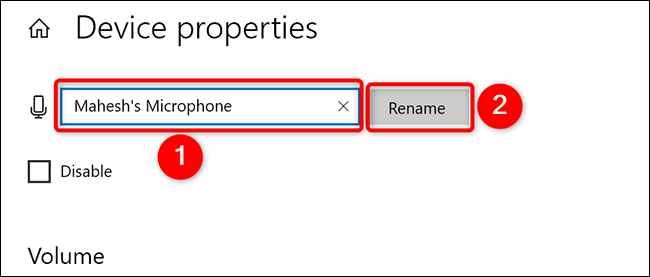
And without any confirmation, Windows 10 will change the name of your microphone to the one specified. Are you ready.
It is a good idea to use unique names for your speakers and microphones., especially if you use multiple of these devices with your computer.
Did you know that you can also change the name of your Windows PC 10?
RELATED: How to change the name of any computer, smartphone or tablet
setTimeout(function(){
!function(f,b,e,v,n,t,s)
{if(f.fbq)return;n=f.fbq=function(){n.callMethod?
n.callMethod.apply(n,arguments):n.queue.push(arguments)};
if(!f._fbq)f._fbq = n;n.push=n;n.loaded=!0;n.version=’2.0′;
n.queue=[];t=b.createElement(e);t.async=!0;
t.src=v;s=b.getElementsByTagName(e)[0];
s.parentNode.insertBefore(t,s) } (window, document,’script’,
‘https://connect.facebook.net/en_US/fbevents.js’);
fbq(‘init’, ‘335401813750447’);
fbq(‘track’, ‘PageView’);
},3000);


