![]()
Creating a mapped network drive enables you to quickly access files and folders on a shared network as if they were on your local machine. Fortunately, Windows 10 enables you to map network drives in just a few easy steps.
Enable network discovery
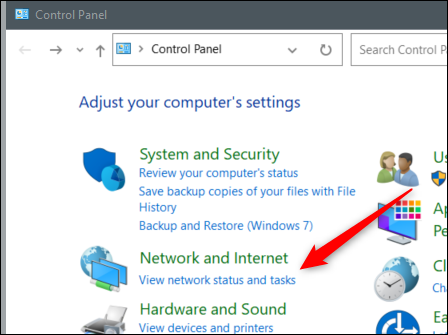
If you want to map a network drive on your Windows PC 10, you will need to enable network discovery first. To do it, open Control Panel, and then click “View network status and tasks” in the Network and Internet group.
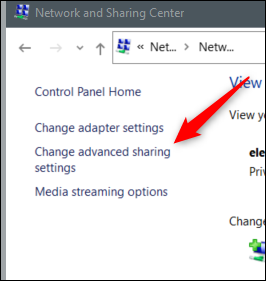
Next, click on “Change advanced sharing settings” in the left panel.
On the next screen, click the bubble next to “Enable network discovery” to select it.
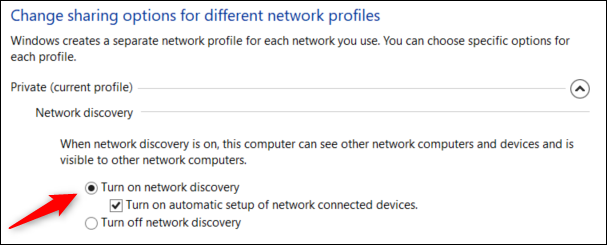
Click on “Save Changes” and then network discovery will be enabled.
Allocate a network drive
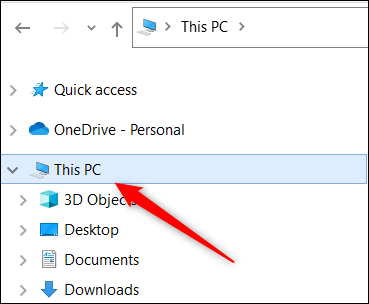
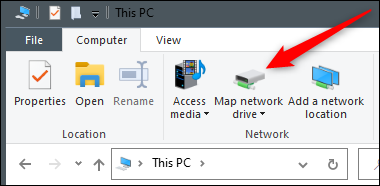
With network detection enabled, you can now allocate a network drive. First, open File Explorer, and then click “This PC” in the left panel.
Next, click on “Award network unit” in the Network group on the Computer tab.
The Map Network Drive window will appear. In the text box next to “Unit”, select the drive letter you would like to use. You can use any letter that is not currently used on your device. Type the folder or path of the computer in the text box “File”, or click “Examine” and choose the device in the popup that appears. You can also choose “Reconnect at login” if you want to connect every time you log in to your device.
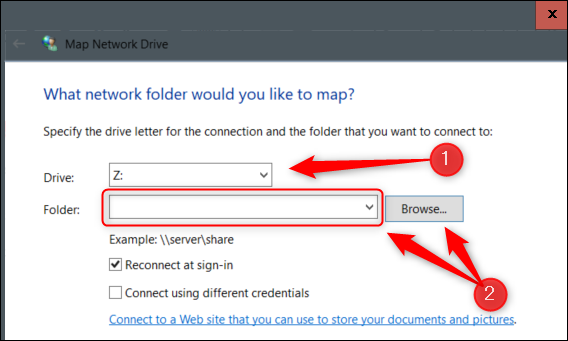
Once you have it set up, click on “Finalize” and the network drive will be mapped to your device.
That's all about it. Use a mapped network drive and learn how to share with (and see and enter what is shared in) a network will save you a lot of time and energy.
RELATED: The basics of shared network


