
Microsoft Defender antivirus included in Windows 10, also known as Windows Defender, has a command line interface. Instead of using the graphical Windows security application, can run Windows built-in antivirus 10 from command prompt, PowerShell o la terminal de Windows.
Run a quick virus scan
You can run a quick scan to check for viruses, malware and other threats in some common places, such as the Windows Registry and startup folders. In general, this scan only takes a few minutes to complete.
To use this analysis, open the menu “Beginning”, I searched “Symbol of the system”, right-click the utility and select “Execute as an administrator”.
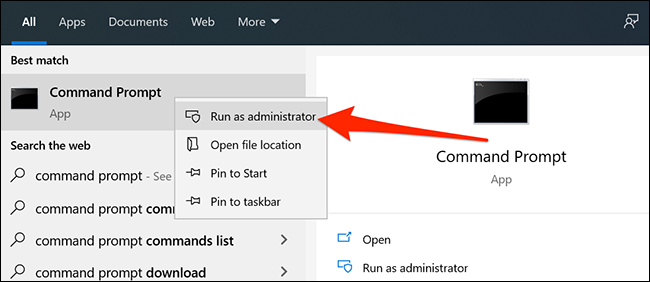
Click on “Yes” in the User Account Control message.
In the command prompt window, type the following to make the Microsoft Defender Antivirus directory your current working directory:
cd C:ProgramDataMicrosoftWindows DefenderPlatform4.18 *
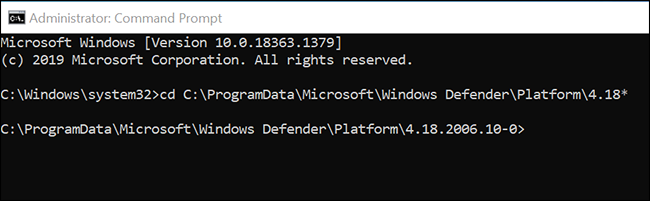
Note: If you convert another directory to your current working directory or close and reopen the command prompt, be sure to run the above command before using any other Microsoft Defender Antivirus command.
After, enter the following command and press “Enter” to start a quick virus scan:
MpCmdRun -Scan -ScanType 1
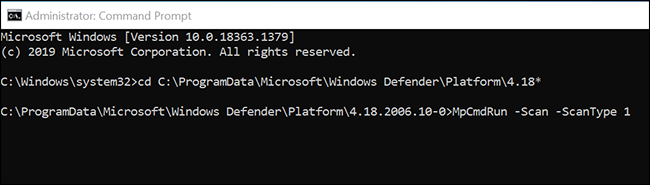
You will see the progress of the scan live on your screen.
Run a full virus scan
A full scan thoroughly checks all files on your computer for viruses, malware and other security threats. Since this is a full scan, tends to take longer than the other scans.
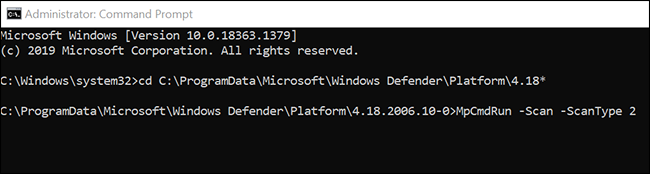
You can run a full scan with the following command at the command prompt:
MpCmdRun -Scan -ScanType 2
Note: If you need to stop a scan for any reason, presione Ctrl + C on your keyboard.
Perform a custom virus scan
You will want to use a custom scan when you have particular files or folders that you want to scan for viruses, malware and other threats. Additionally you can use this to scan files on your external storage, like your USB flash drives.
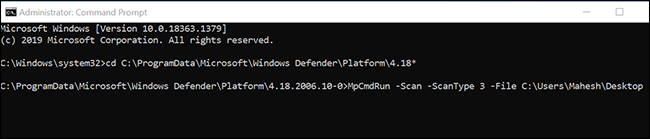
To use this, type the following command in the command prompt window and press “Enter”.
Be sure to replace “PATH” with the path to the folder or file you want to scan. If there are spaces in your path, add double quotes before and after the path, So: “C: Users Mahesh Desktop My Files”
MpCmdRun -Scan -ScanType 3 -File PATH
As an example, if you wanted to scan your desktop for threats, I would run the following command, replacing “MYNAME” with your username.
MpCmdRun -Scan -ScanType 3 -File C:UsersMYNAMEDesktop
Scan your PC's boot sector files
Your PC's boot sector is where all the essential information about your computer's startup is stored. This sector contains the code that starts your operating system.
Sometimes, certain viruses and other threats attack this boot sector. When this happens, you experience problems starting your computer. You could also face other problems.
RELATED: What to do when Windows won't start
If you think your PC is infected with a virus or malware, It is important to highlight running a boot sector scan to find and delete any suspicious content from this sector.
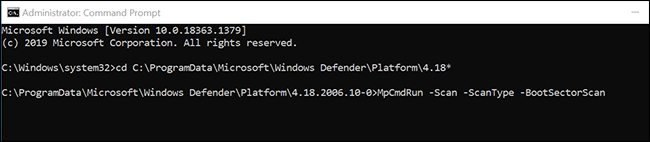
You can use the following Microsoft Defender Antivirus command to run a boot sector scan:
MpCmdRun -Scan -ScanType -BootSectorScan
Restore quarantined files
When Microsoft Defender Antivirus finds a suspicious file, moves it to Quarantine. This is a special location to save suspicious files and your files cannot be started when they are quarantined here.
If you think antivirus has mistakenly moved a file to quarantine, you can use a command to restore that file to its original location.
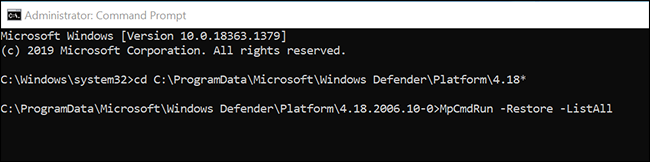
To do this, first, run the following command to view a list of all your quarantined files:
MpCmdRun -Restore -ListAll
In the listing, note the name of the file you want to restore. After, type the following command, replace “MyApp.exe” with the name of the file you want to restore and press “Enter”.
MpCmdRun -Restore -Name MyApp.exe
If you want to restore your file to another folder, use the following command instead. Be sure to replace “PATH” with the path to your folder before running the command.
In any case, replace “MyApp.exe” with the name of the file you want to restore.
MpCmdRun -Restore -Name MyApp.exe -FilePath PATH
Update Microsoft Defender antivirus
microsoft defender antivirus updates itself regularly to ensure it can find newer viruses and threats. Despite this, can force you to check for and download latest updates at any time.
you can do this by running the following command in the command prompt window:
MpCmdRun -SignatureUpdate

Will update virus definitions without any warning.
See all available Microsoft Defender antivirus alternatives
At the same time as the above, There are many other command combinations that you can use to get the most out of this antivirus on your Windows PC. 10.
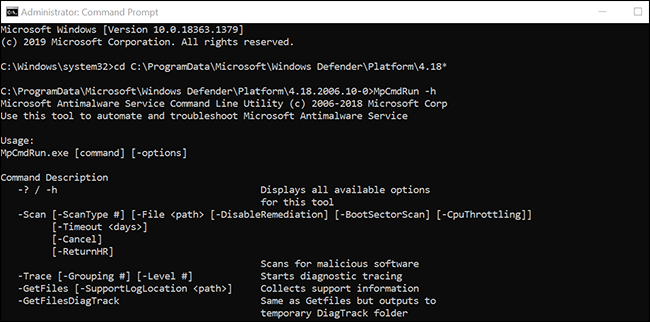
To find all available commands and parameters, run this command at command prompt:
MpCmdRun -h
You are now a pro when it comes to using Microsoft Defender Antivirus from the command prompt.
If you prefer the graphical interface, see our guide on how to use Microsoft Defender Antivirus, which explains all the graphic features of this program.
RELATED: How to use Windows Defender's built-in antivirus in Windows 10


