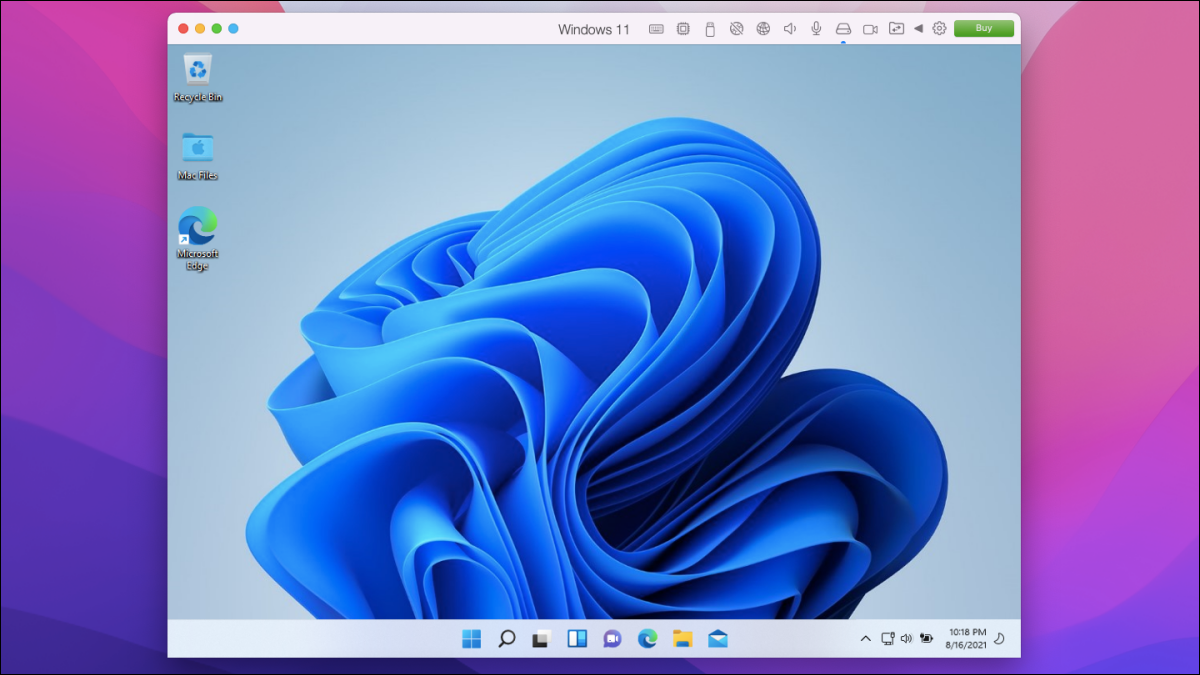
The stable version of Windows 11 will arrive at the end of 2021, but the preview version is already enabled. You can use Parallels 17 to run Windows 11 on Intel and M1 Macs today. That's how.
What do you need to run Windows 11 on a mac?
Parallels 17, a virtual machine application, is compatible with pre-versions of Windows 11 on macOS Monterey. The domestic version of the application costs $ 80, but if you already have a previous version, get the update by $ 50. Navigate the Parallels website to buy the respective version.
On Mac Intel, you can use windows 11 after installing windows build 10 Insider Preview. To do this, you will need a Microsoft account registered with the Windows Insider program.
Although the Mac M1 can run Windows software, can't run the standard version of Windows 11. Because, you must first install windows 10 in ARM and then switch to Windows 11.
RELATED: Can you run Windows software on a Mac M1?
Why use Parallels?
Actually, there are several alternatives to running Windows on a Mac. You can do it with Boot Camp, but it means that you will have to boot it with macOS, sacrifice some storage space and use only one of the operating systems at a time. On the other hand, with a virtual machine application like Parallels, you won't have to dual boot or restart your Mac every time you use Windows 11.
How to install Windows 11 in Parallels on Mac
First, you will need to download and install Parallels 17 or higher on your Mac.
Make sure to allow Parallels Desktop to access the Desktop folders, Documents and Downloads from your Mac to get it working properly.
Open the Parallels application and run your virtual machine assistant. Subsequently, click on “Get Windows 10 from Microsoft” and select the button “Continue”.
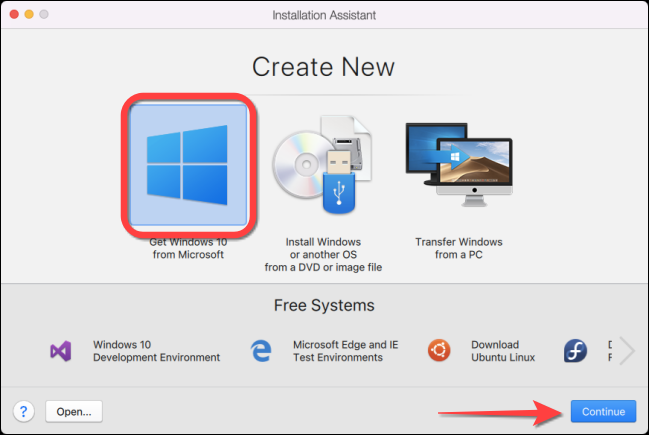
Note: Mac M1 users should download a copy of Windows 10 en ARM Insider Build and install the VHDX file using Parallels installation wizard.
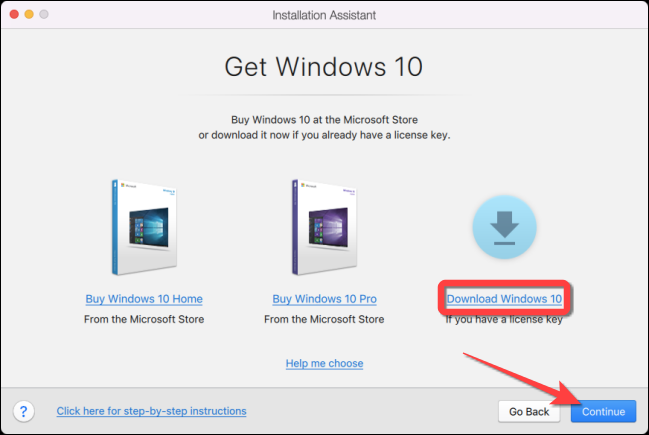
Please select “Descargar Windows 10” and click the button “Continue”.
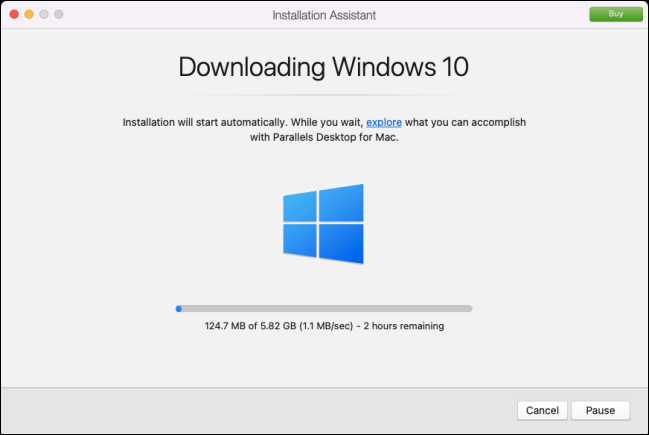
The wizard will download the latest version of Windows 10 and install it. This may take a few minutes.
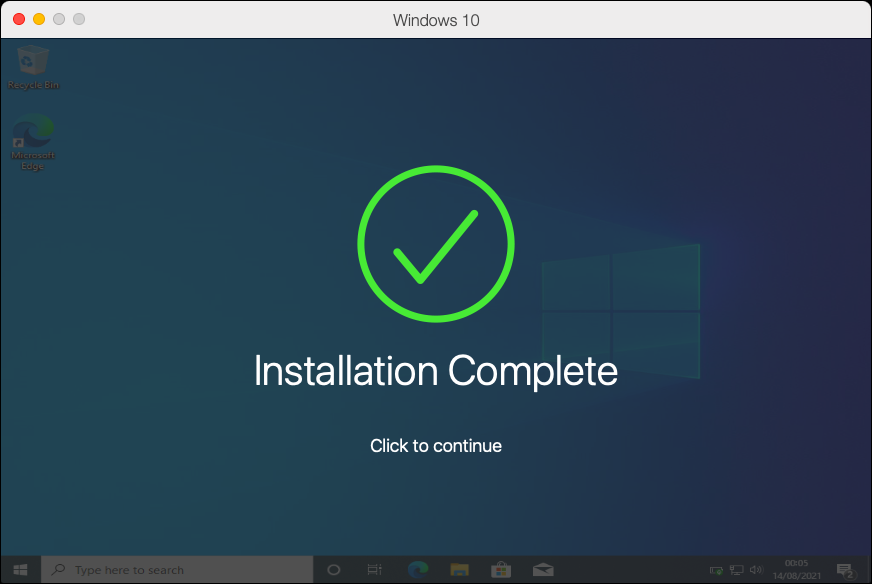
After the Parallels Wizard finishes installing, select “Haga clic para continuar”.
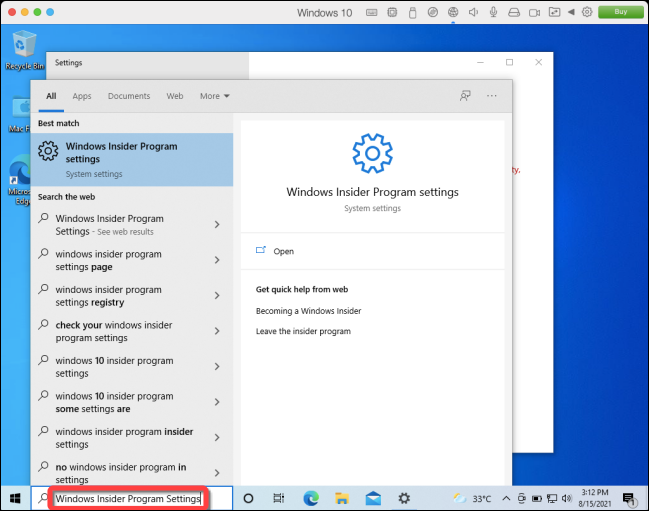
In the Windows virtual machine 10, scribe “Configuración del programa Windows Insider” en el cuadro de búsqueda y presione Entrar.
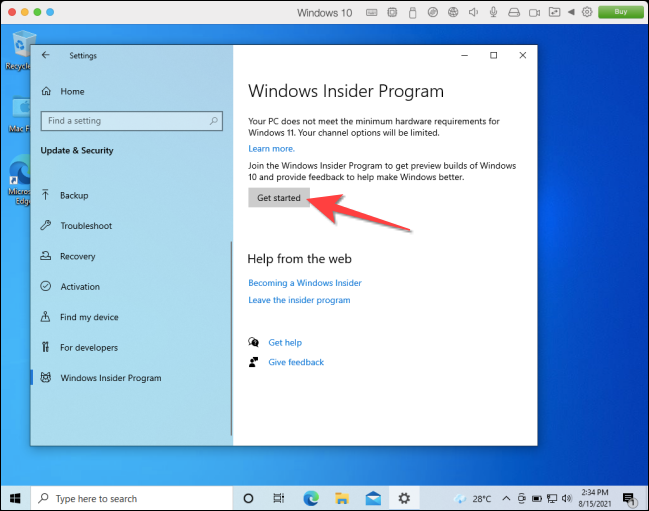
In the left column, select the button “Start” en la sección del Programa Windows Insider de la aplicación Configuración.
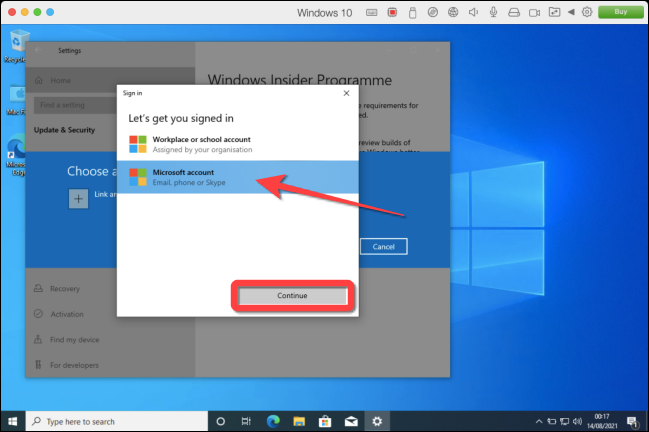
Subsequently, link your Microsoft account that is registered in the Windows Insider program.
After that, you will see the preview channel of the version available for the Windows Insider program account 10. Next, you will need to edit specific registry keys and switch from version preview channel to developer preview channel.
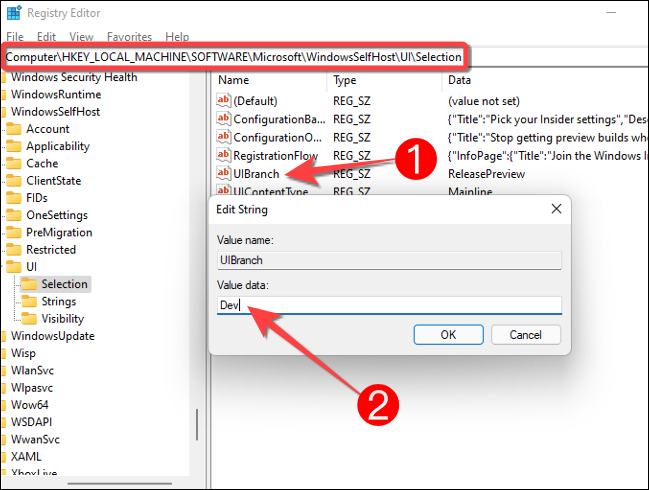
Open Registry Editor in Windows 10 with administrative privileges. After allowing you to make changes, you can navigate to the next key or copy and paste into the Registry Editor address bar:
HKEY_LOCAL_MACHINESOFTWAREMicrosoftWindowsSelfHostUISelection
On the right side panel, haga doble clic en la tecla “UIBranch” and write “Dev” in the frame “Value information”.
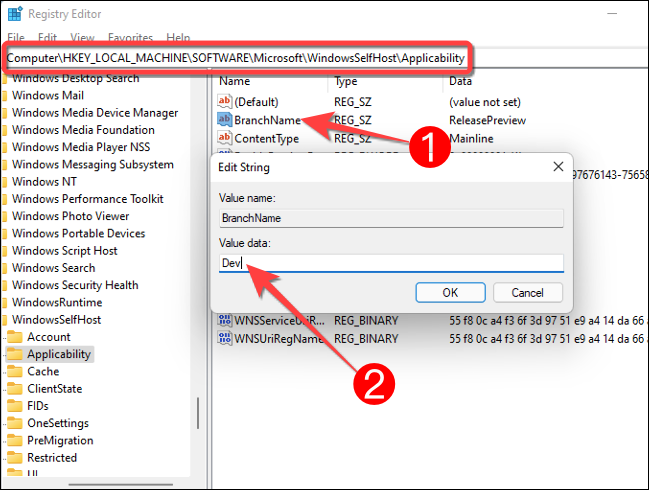
Next, browse or copy and paste the next key into the Registry Editor's address bar:
HKEY_LOCAL_MACHINESOFTWAREMicrosoftWindowsSelfHostApplicability
From the right side panel, haga doble clic en la tecla “BranchName” and write “Dev” in the frame “Value information”.
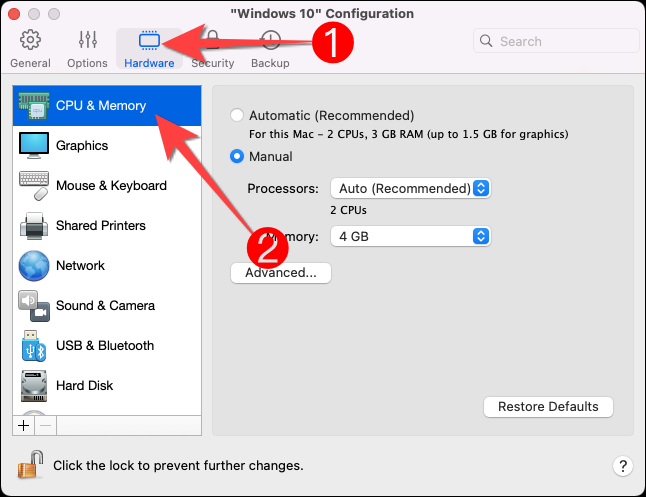
before continuing, apague Windows 10 and check if Parallels has at least 4 GB of allocated memory. To check, Click on the icon “Setting” con forma de engranaje en la esquina superior derecha de la ventana de Parallels.
![]()
Select the tab “Hardware” and choose “CPU and memory” para ver la memoria asignada. Change the value to at least 4 GB if less than that value is automatically assigned.
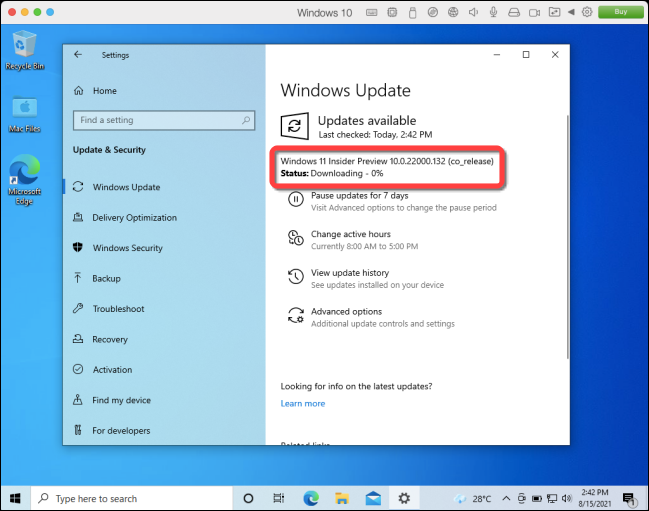
Next, restart the Windows virtual machine 10 and head to Windows Update for new updates. The Windows build download should begin 11 Insider Preview.
Once the Windows installation is complete 11, restart Windows to apply the changes.
That is all! You can enjoy Windows 11 on your Mac using Parallels Desktop 17 or higher version. Once Windows 11 is available to the public, Try other alternatives to run Windows software on a Mac.
RELATED: 5 Alternatives to Running Windows Software on a Mac


